 nsite-clay / guide
EN
ES
SK
CS
nsite-clay / guide
EN
ES
SK
CS
From nothing to a published site
This is the whole path from an empty browser tab to a page that is online, with the screenshots taken along the way. You will make a key, publish a page, put a picture and a Nostr feed in it, and save it. There is no terminal and nothing to sign up for.
The example is a page for a Nostr meetup. It takes about ten minutes to build, and it still needs a picture, a timetable and somebody else's posts, which is enough to reach most of what the editor can do.
1Getting a key
A site here belongs to a key rather than to an account. There is nothing to register and nobody to ask. The key that publishes a page is the only key that can ever change it, so losing it leaves the page frozen exactly as it stands.
Open the publisher. It offers four ways in.
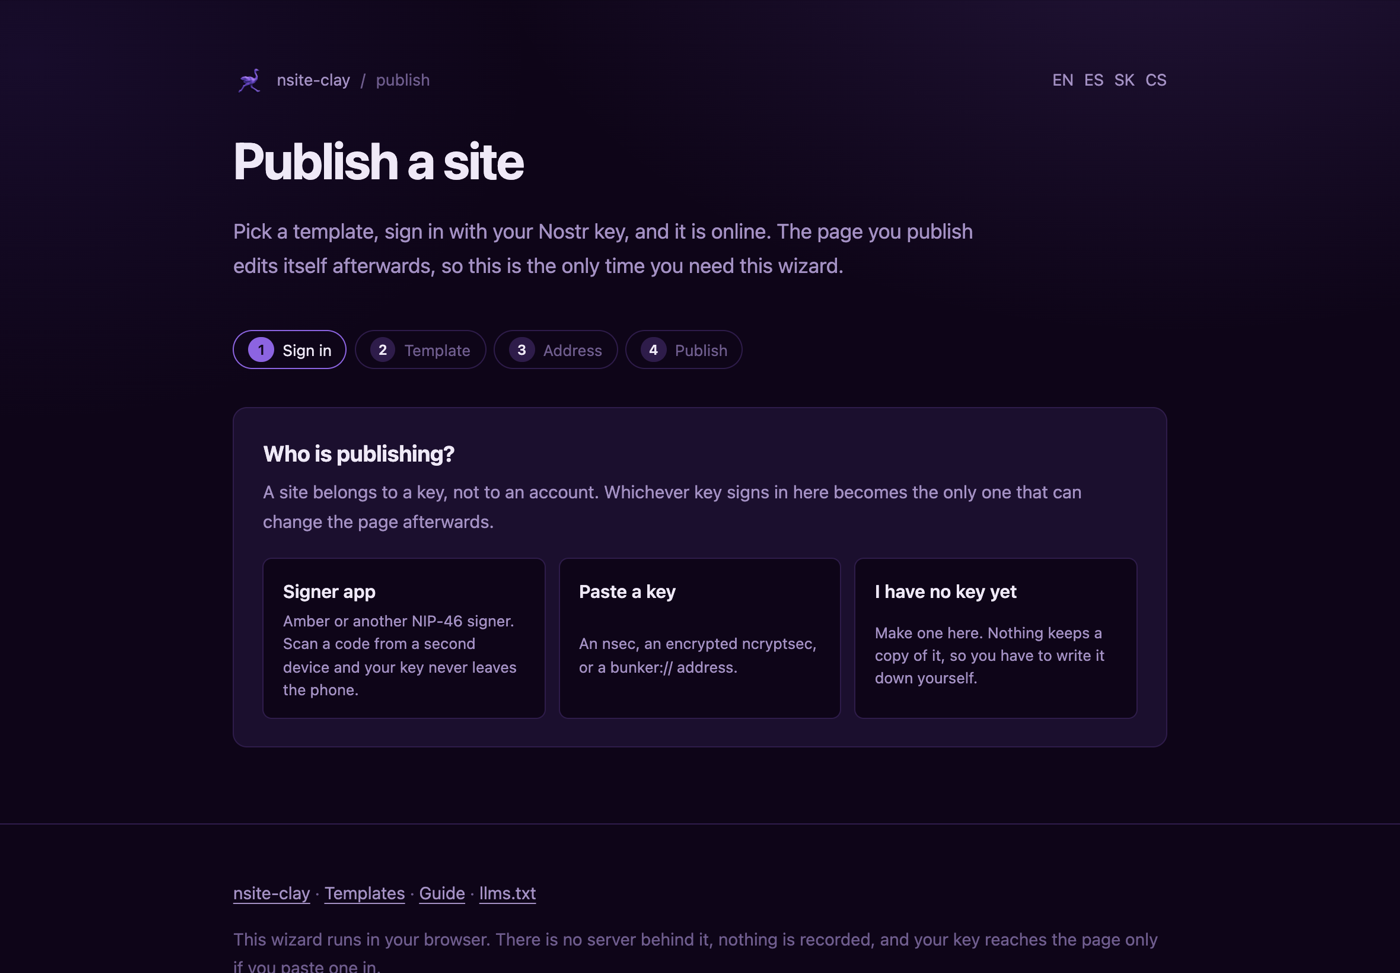
- Browser extension. Alby, nos2x and the rest. It appears only when one is installed. Nothing to type and the key stays in the extension.
- Signer app. Amber and other NIP-46 signers. The page shows a code, you scan it, and your key never reaches the browser at all. Scan it from a second device: tapping the link on the same phone puts this page in the background, and a backgrounded tab can miss the answer.
- Paste a key. An
nsec, an encryptedncryptsec, or abunker://address. The key stays in that one tab for an hour, so the other pages of your site open signed in, and goes when the tab closes, but a pasted key is a key that has touched a web page, which is why it is third on the list. - No key yet. Make one here.
Making one
Press I have no key yet and a key is generated in your browser. You see it once. It goes nowhere else and nothing keeps a copy, so if you close the tab without writing it down it is gone.
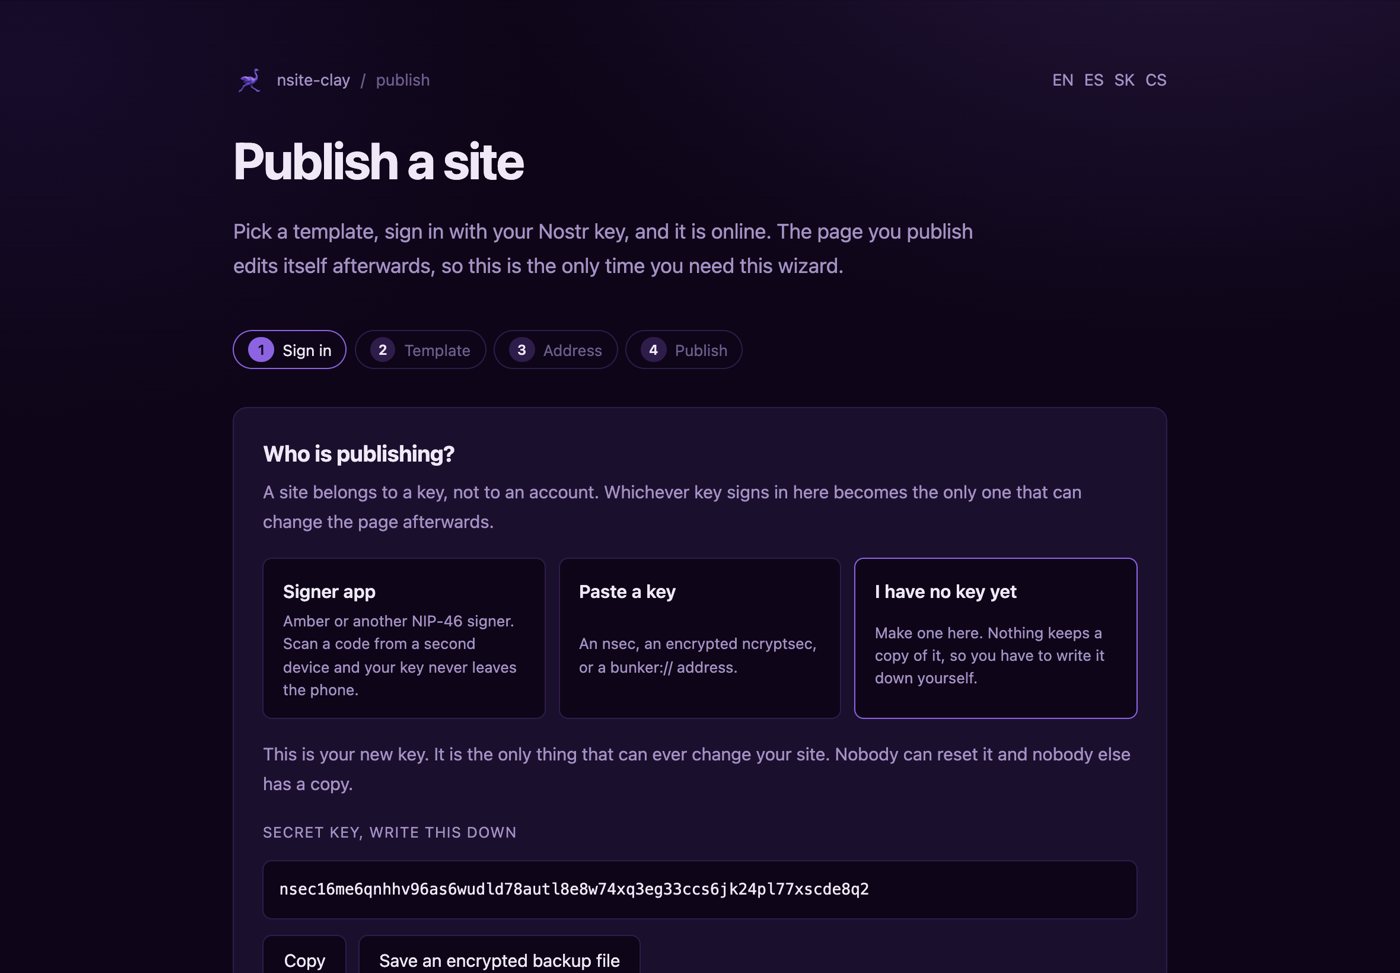
The backup file is worth taking. It writes your key encrypted with a password you choose, using NIP-49, so the file on your disk is not the key itself. Losing that password loses the key just as thoroughly as losing the key, so put the password somewhere too.
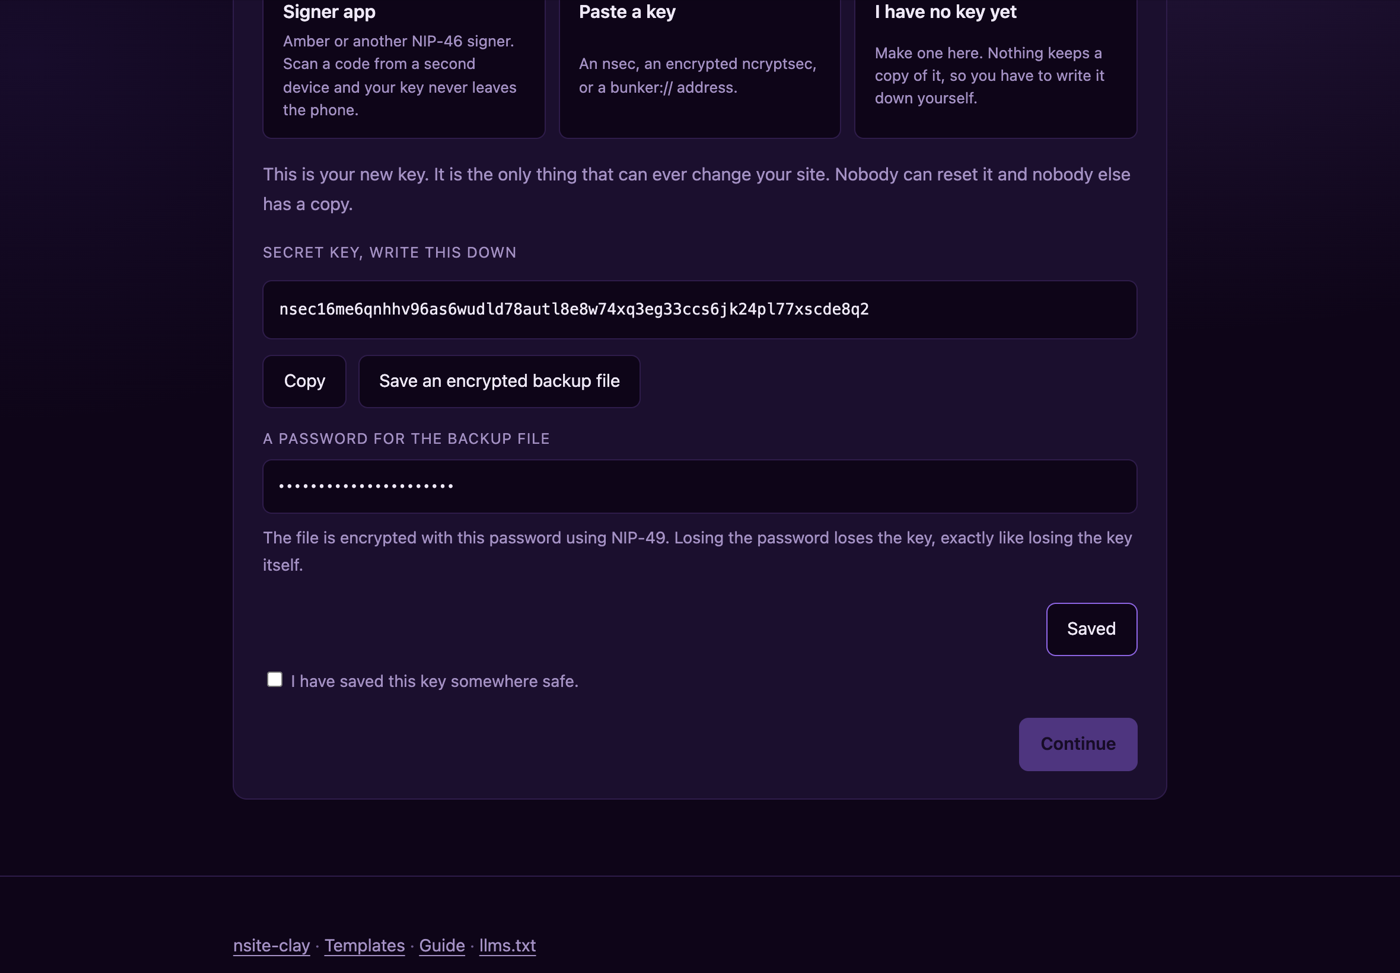
There is no reset. Nobody holds a copy to send you, because nobody holds a copy at all. That is what owning it costs. Write the key down before you tick the box.
2Picking a template
Every template is a finished page you type over rather than an empty frame. They are fetched from this site, so nothing is downloaded from anywhere else.
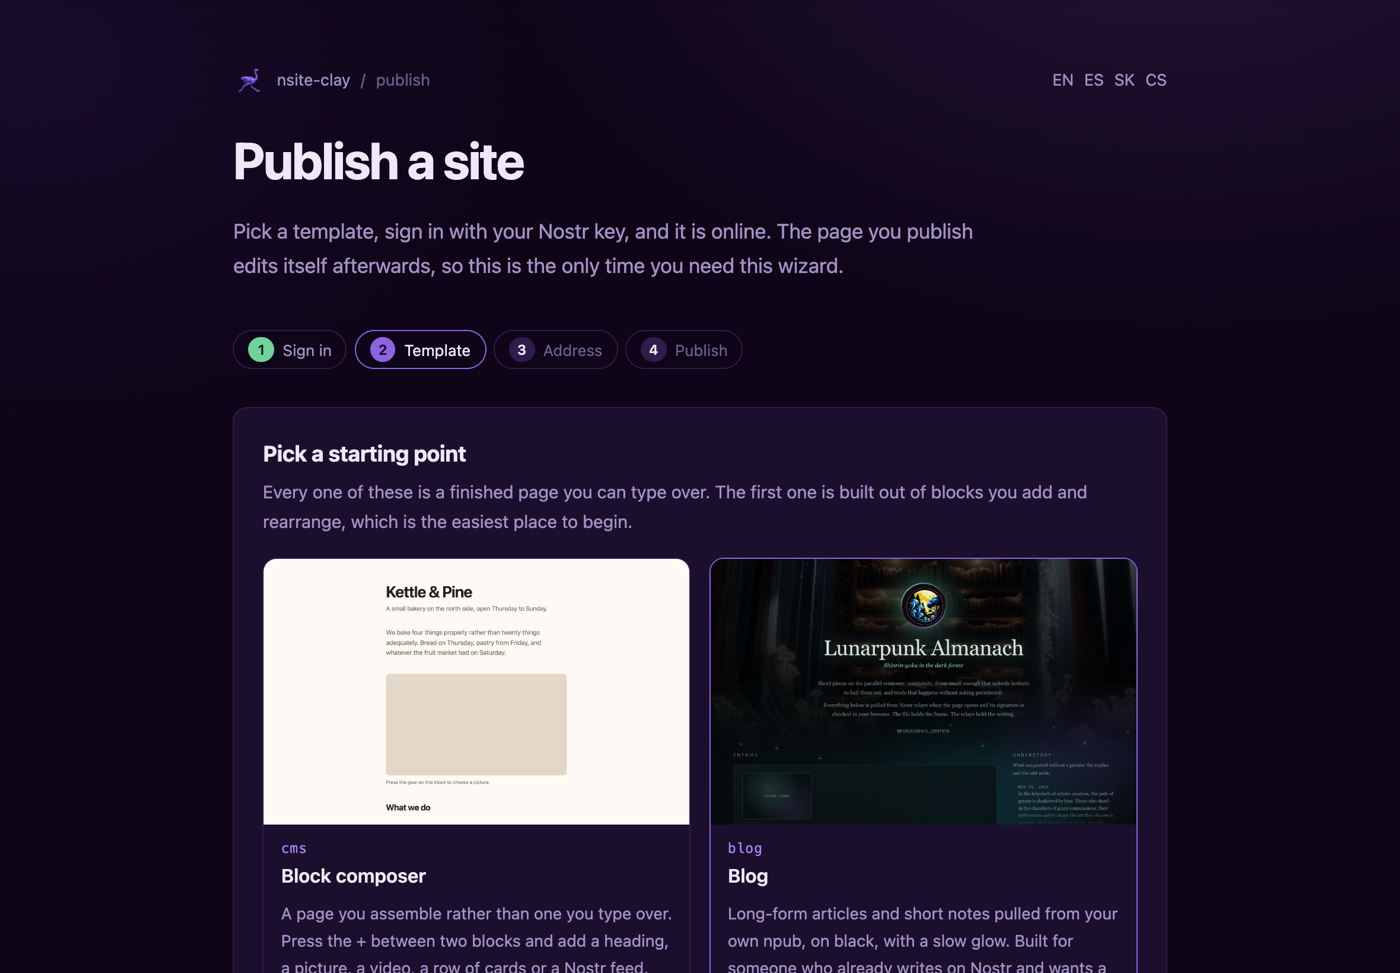
The one called cms is the one this guide uses. It is built out of blocks you add
and rearrange: a heading, a paragraph, a picture, a video, a row of cards, a Nostr feed. Most of
the others take blocks too, each in its own shapes, so a block added to the zine comes out in
monospace and one added to the terminal comes out as another command. Two do not: the gallery
redraws itself from a live feed every time it loads, and the chat log is append-only by
design.
Clicking a template takes you straight to the next step. If you want a different one after all, the numbered steps along the top are the way back: any step you have already been through can be clicked to return to it.
Whichever you pick, the template's own demo content points at the person who wrote it: the feed pulls their notes, the footer links their profile. The publisher replaces every one of those with your key on the way out, so the page that lands is yours from the first byte.
3Choosing an address
Your site lives at your npub on any nsite gateway. What you choose here is the path inside it. A single slash is the front page.
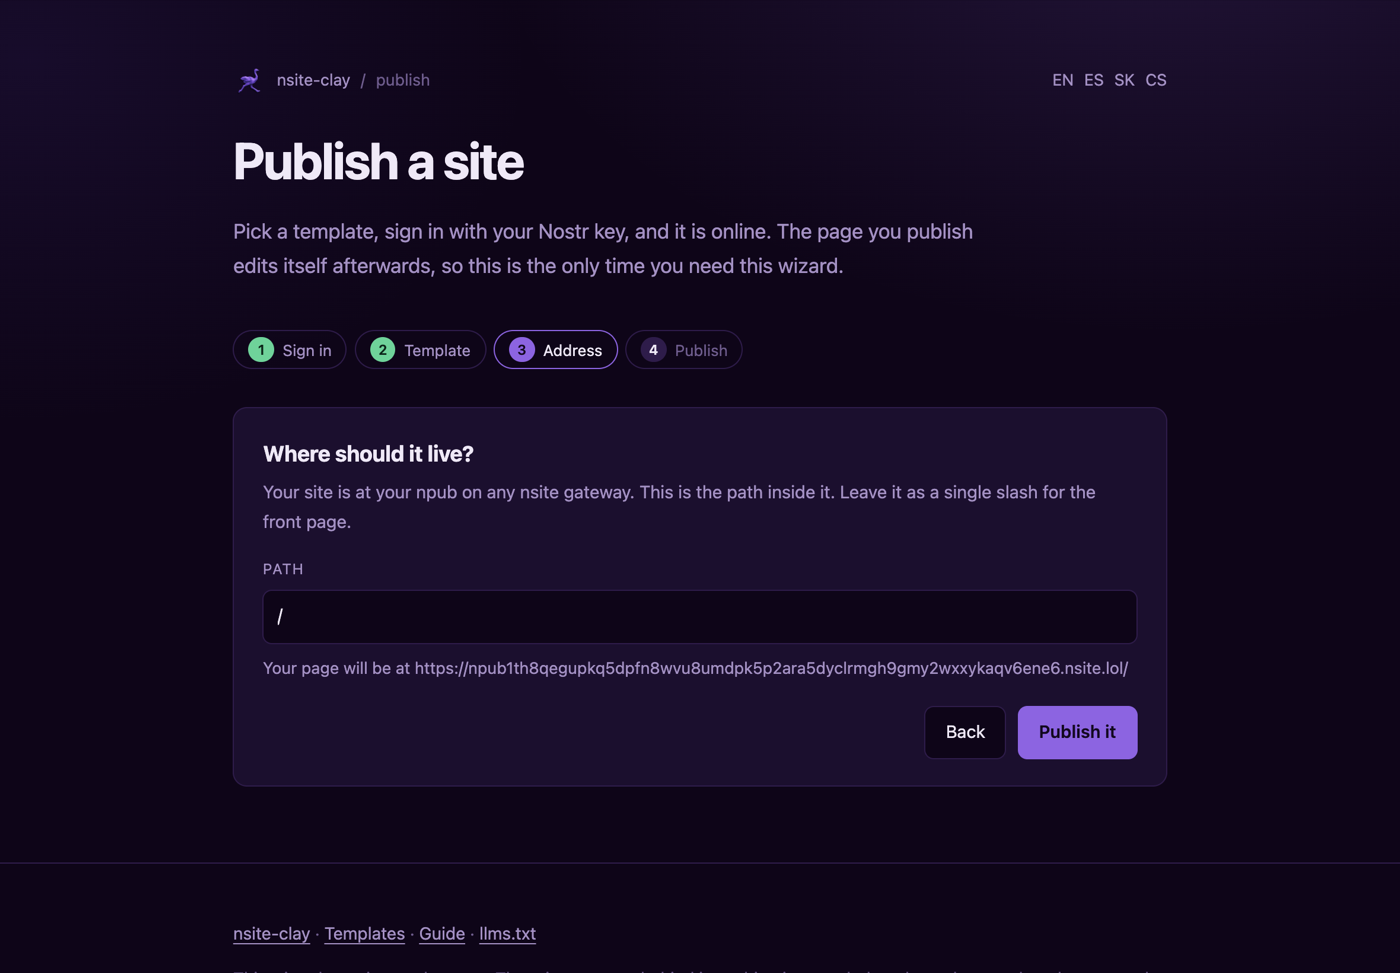
Type /meetup and the page ends up at
your-npub.nsite.lol/meetup. Paths that do not end in .html are treated
as folders, which is how gateways resolve them.
One npub can hold as many pages as you like, and they do not interfere with each other. The publisher checks what the key has already published and says so before you go on.
4Publishing
Press the button. Every file is uploaded to a Blossom server, which stores blobs by their own hash. A signed manifest then says which hash each path points at, and a second event files that set of hashes as a version you can come back to.
If you are signing with an app rather than a pasted key, it will ask you to approve each signature.
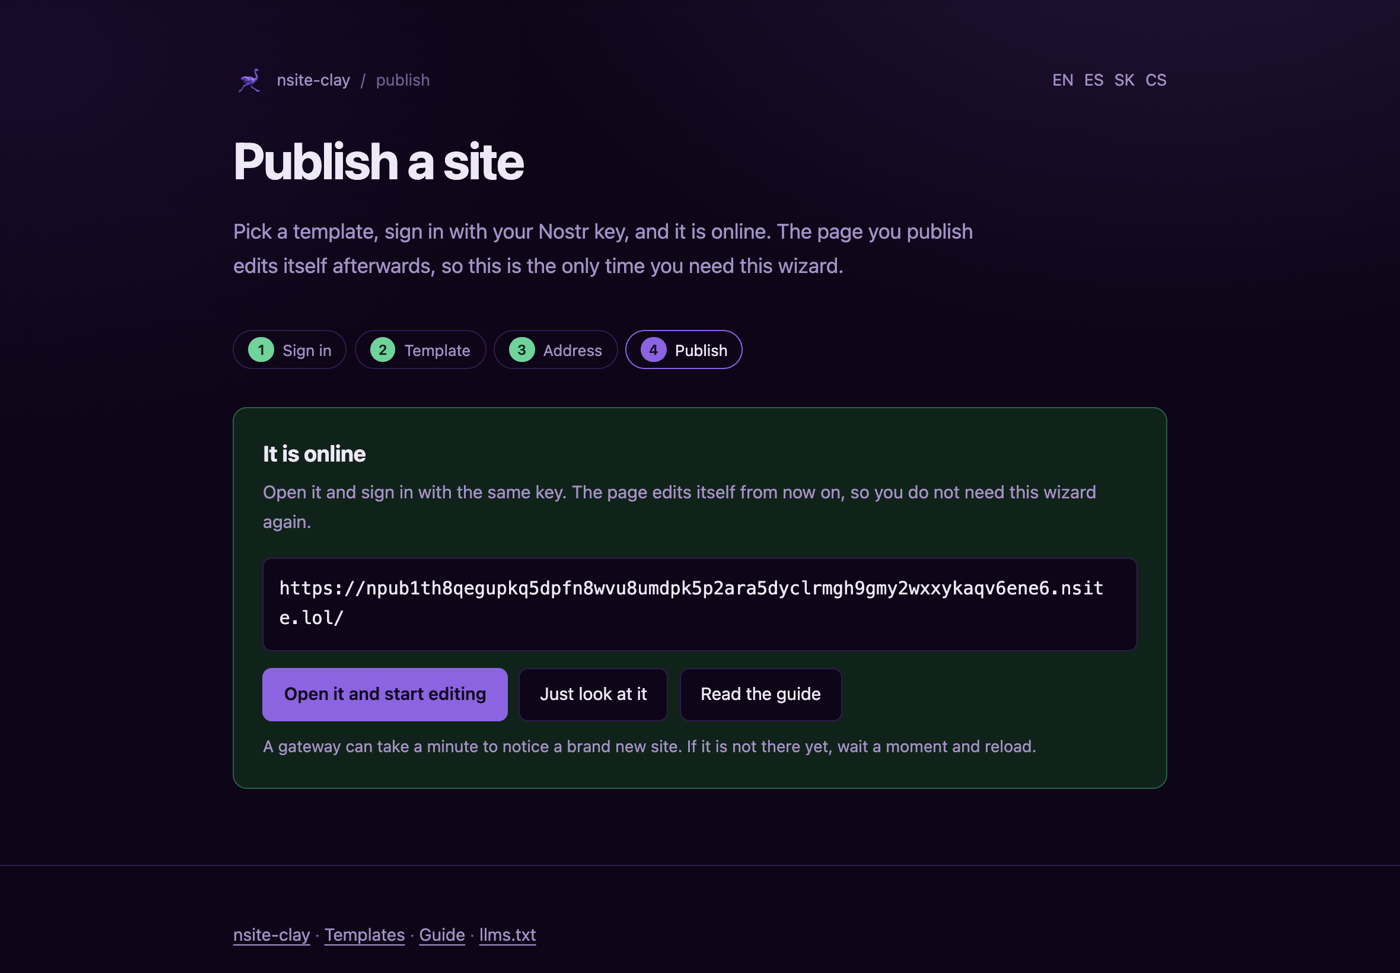
That is the site online. A gateway can take a minute to notice a brand new one, so if it is not there immediately, wait and reload.
This is the last time you need the publisher. From here the page edits and republishes itself.
Publishing from a terminal instead
The CLI does the same job for anyone who would rather have a directory on disk. It is not the shorter path and you do not need it, but it is there if you want the files under version control or a page built by a script.
npx nsite-clay init mysite --template=cms --npub=npub1…
npx nsite-clay deploy mysite --sec=nsec1…
Prefer a remote signer over a raw key, and pass it in the environment rather than as an argument, because an argument is visible to every process on the machine:
NOSTR_BUNKER_URI="bunker://…" npx nsite-clay deploy mysiteAfter the first deploy the page saves itself, so you come back to the terminal only for changes you make outside the browser.
5Editing the page
Open the address with #edit on the end and sign in with the same key. Without
#edit a reader gets the page and nothing to click, which is what everyone else
should see.
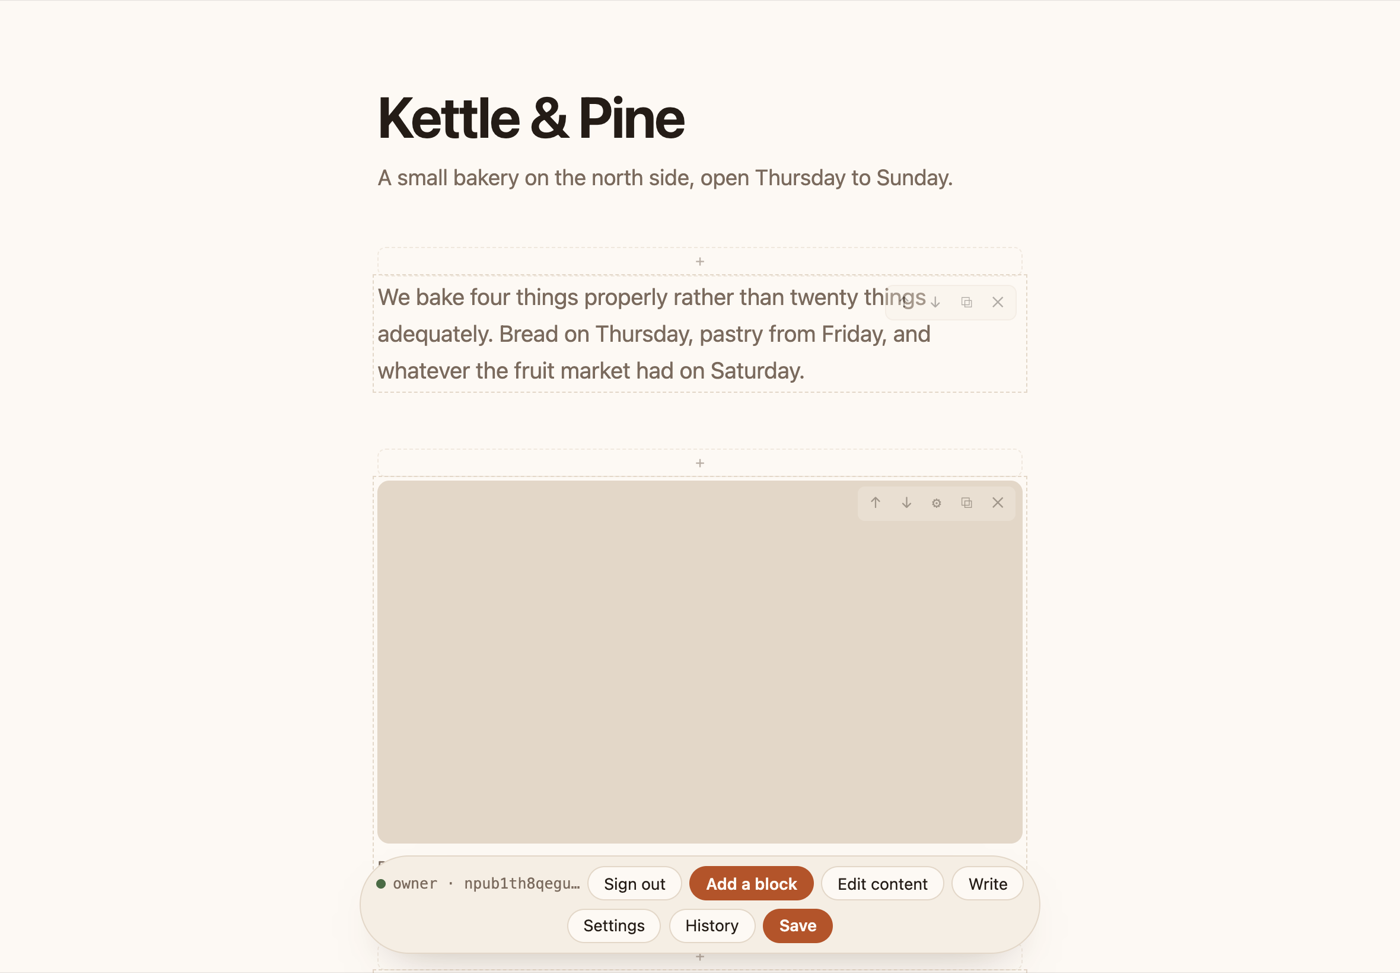
Click into any text and type. Headings, paragraphs, captions and card titles are all just text on the page; there are no fields and no form behind it. Selecting a few words brings up a small toolbar for bold, links and lists.
Each block has a rail in its corner: move it up, move it down, duplicate it, delete it, and
where the block holds a picture or a feed, a gear that reopens the picker. Between the blocks
is a + that opens the palette.
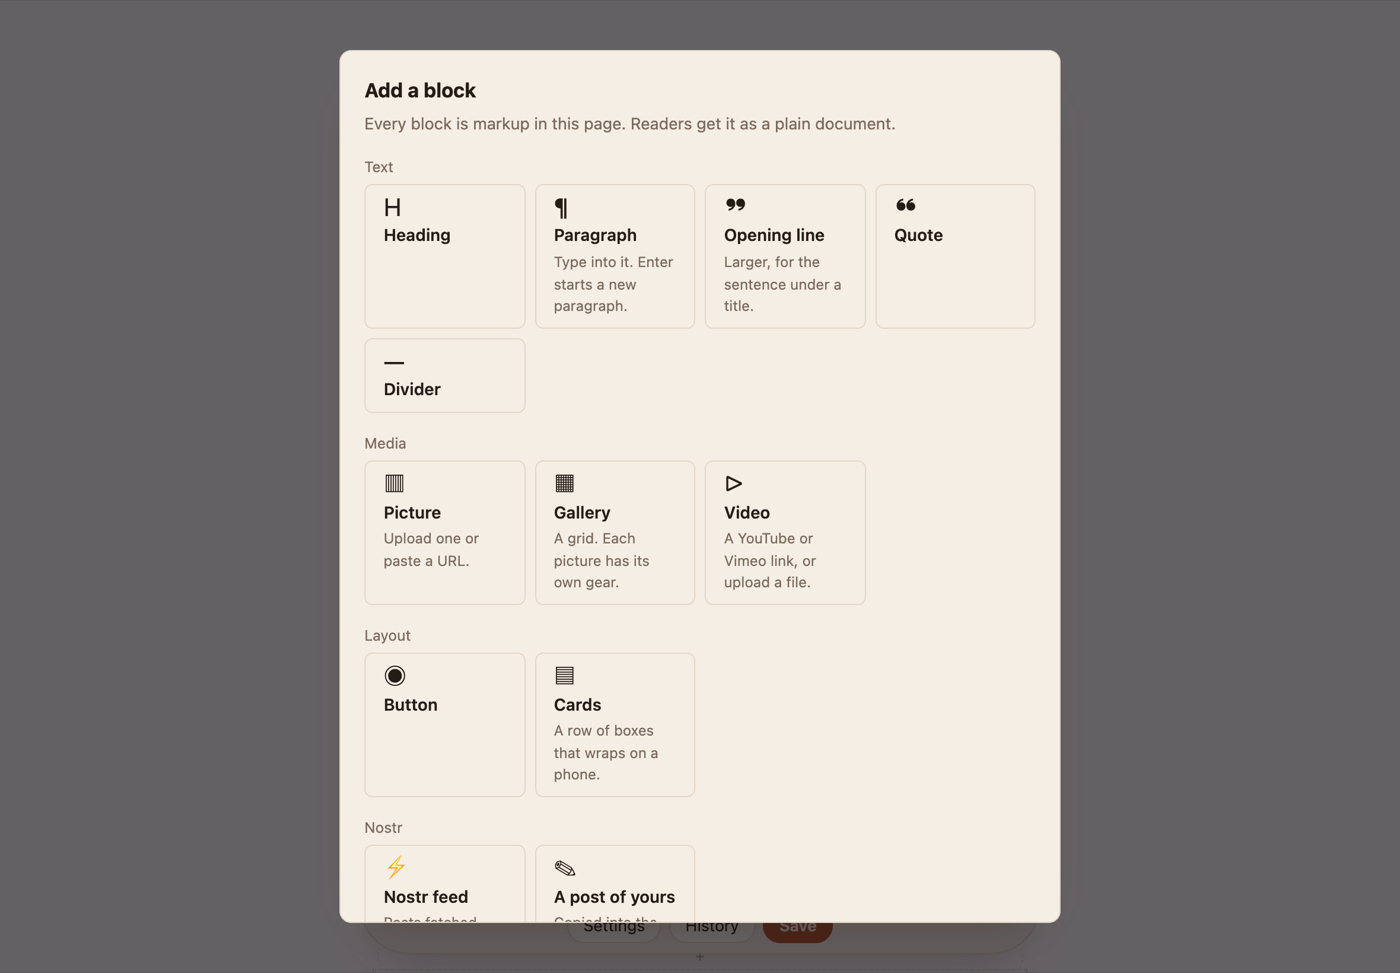
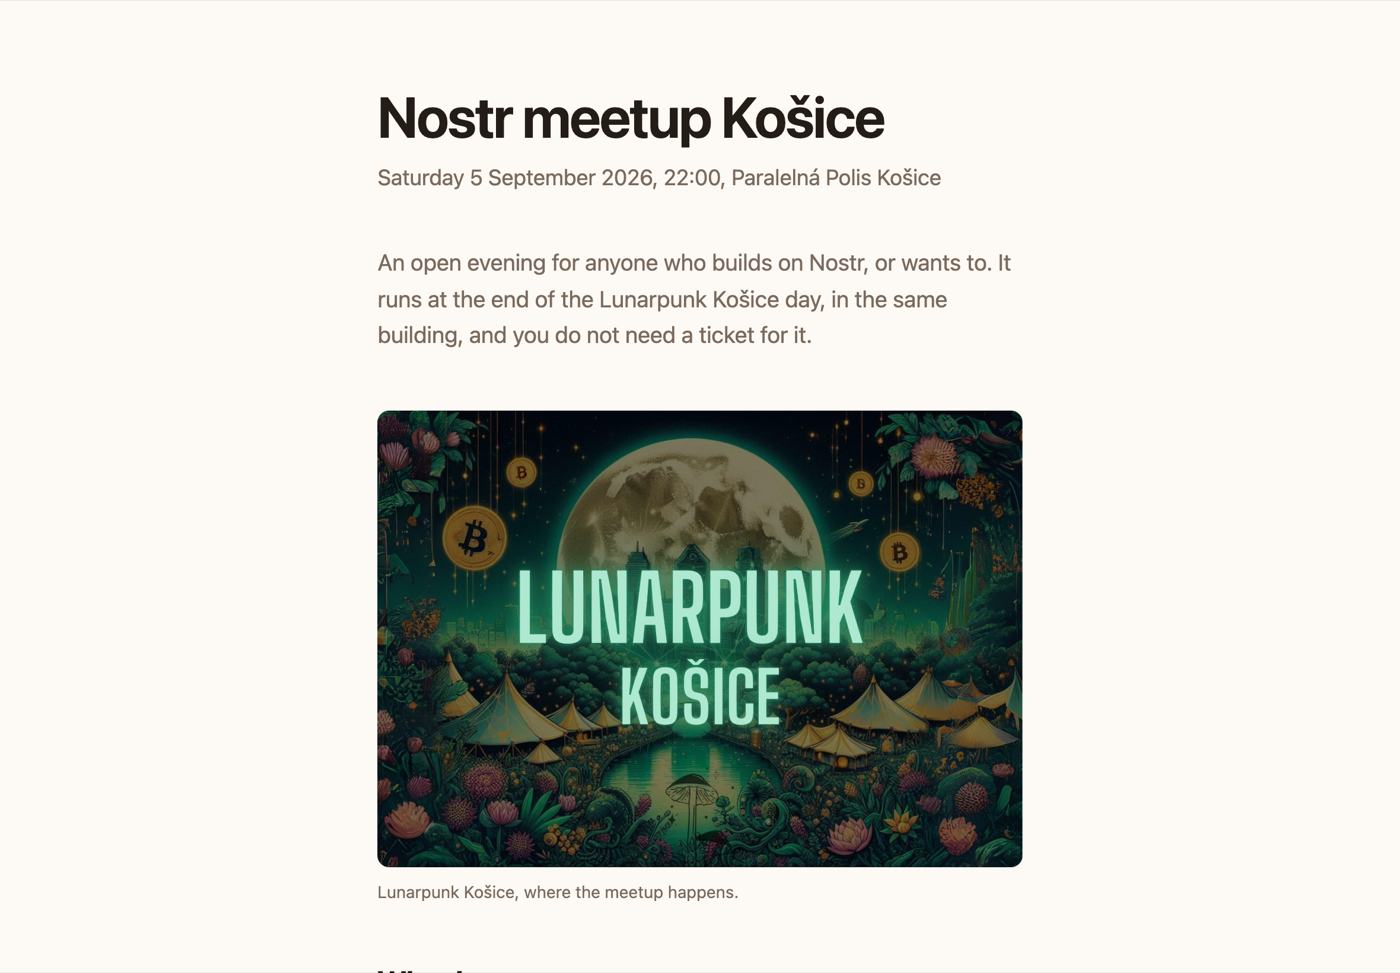
For the meetup page: the title, the date under it, an opening line, a heading, a paragraph about what happens, and a row of three cards for the timetable.
The link button opens a list of the pages of your site and the headings on them. Pick one, or type a web address, an email address or a phone number. While you edit, a link that leads nowhere has a dashed outline, so a mistyped address shows up before a reader finds it.
On a site with more than one page, Pages on the toolbar lists all of them and opens the one you pick, ready to edit. You stay signed in for an hour as you go from page to page, and the hour starts again whenever you do something.
If you would rather have a coding agent such as Claude Code make the changes, open Settings and press Copy instructions for your own agent, then paste the text into the agent. It says how to download the site, change it and publish it again, and tells the agent to ask you for a link from your signer app, never for your key.
6Adding a picture
The picture block's gear opens the picker. Drop a file on it, choose one you have uploaded before, or paste a URL.
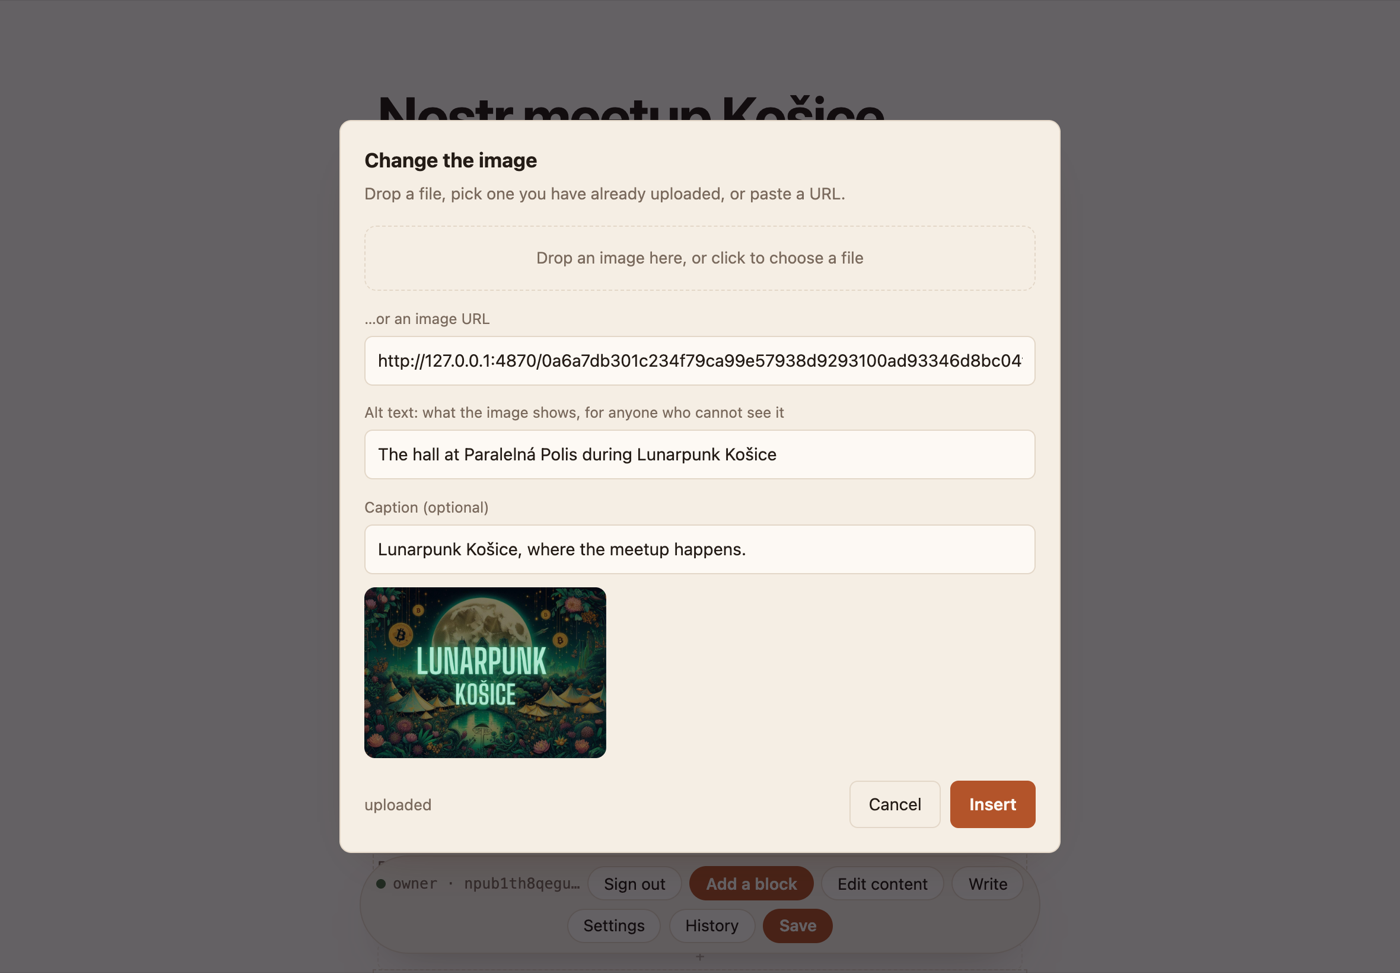
A dropped file is uploaded to the same Blossom servers that hold the page, under your key. The grid shows everything that key has uploaded before, so the second time you want a picture it is two clicks.
Fill in the alt text. It is what somebody using a screen reader gets instead of the picture, and it costs one sentence.
7Adding a video
A video block takes a YouTube or Vimeo link, or a file to upload.
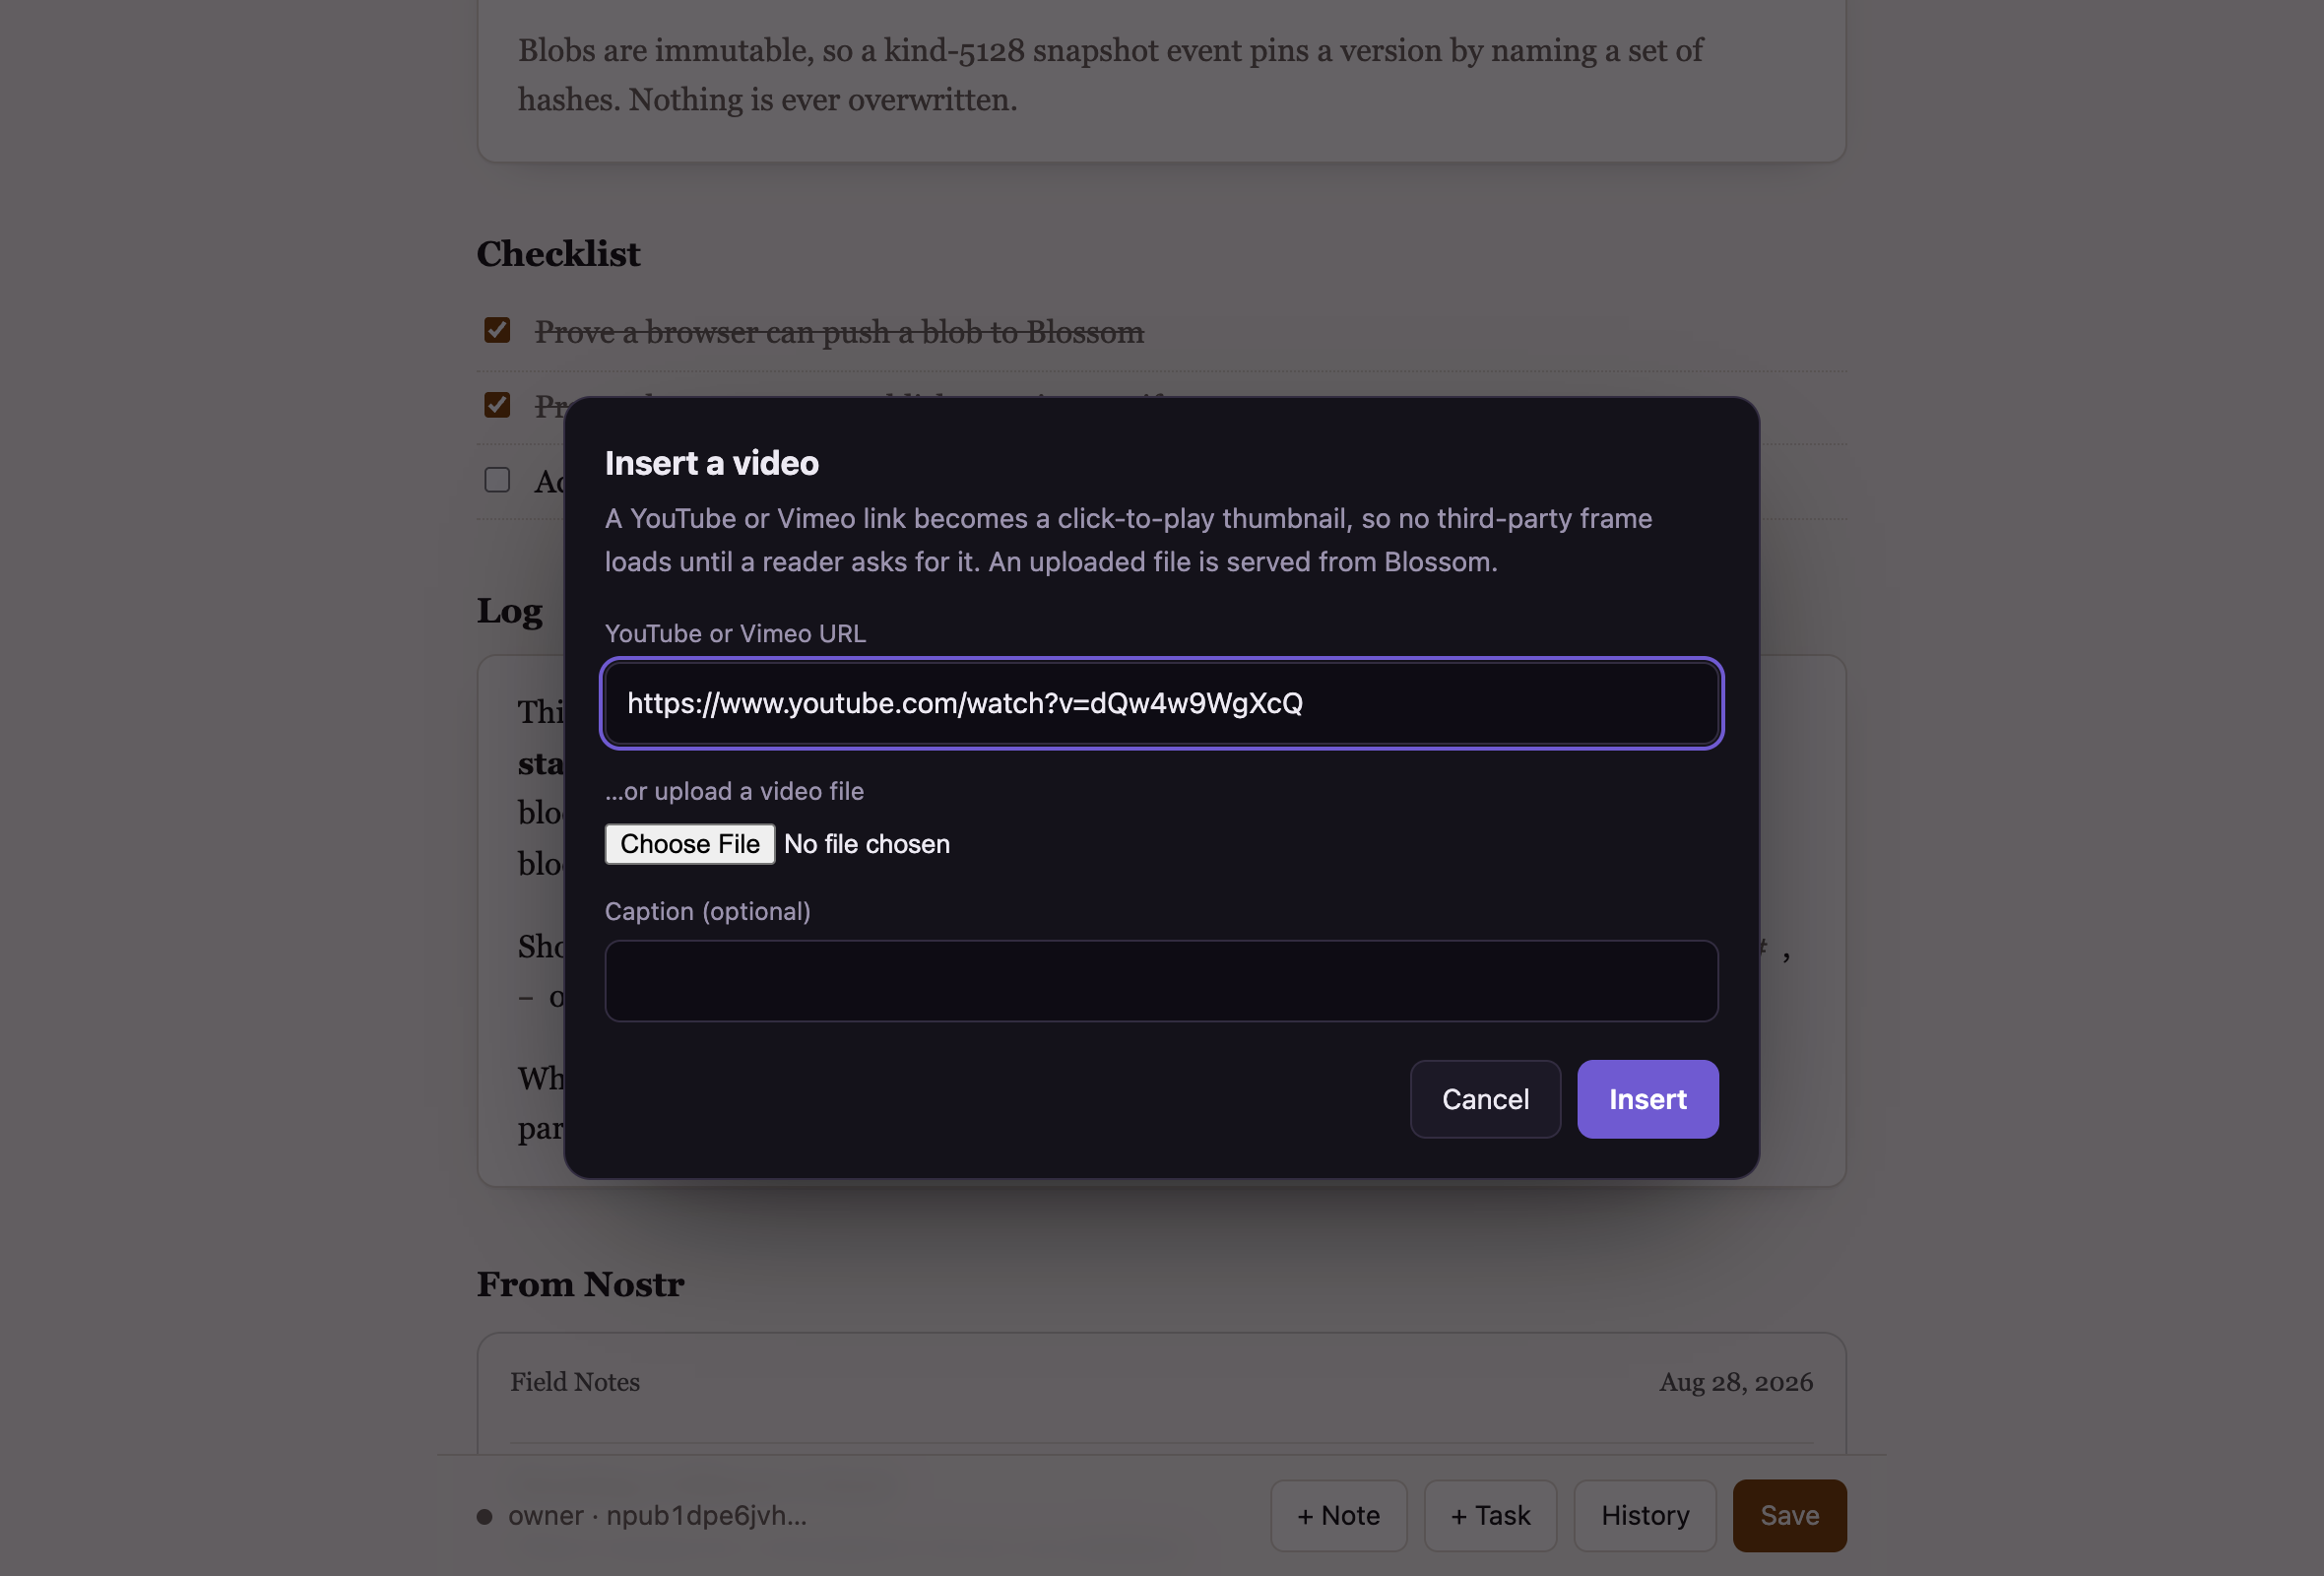
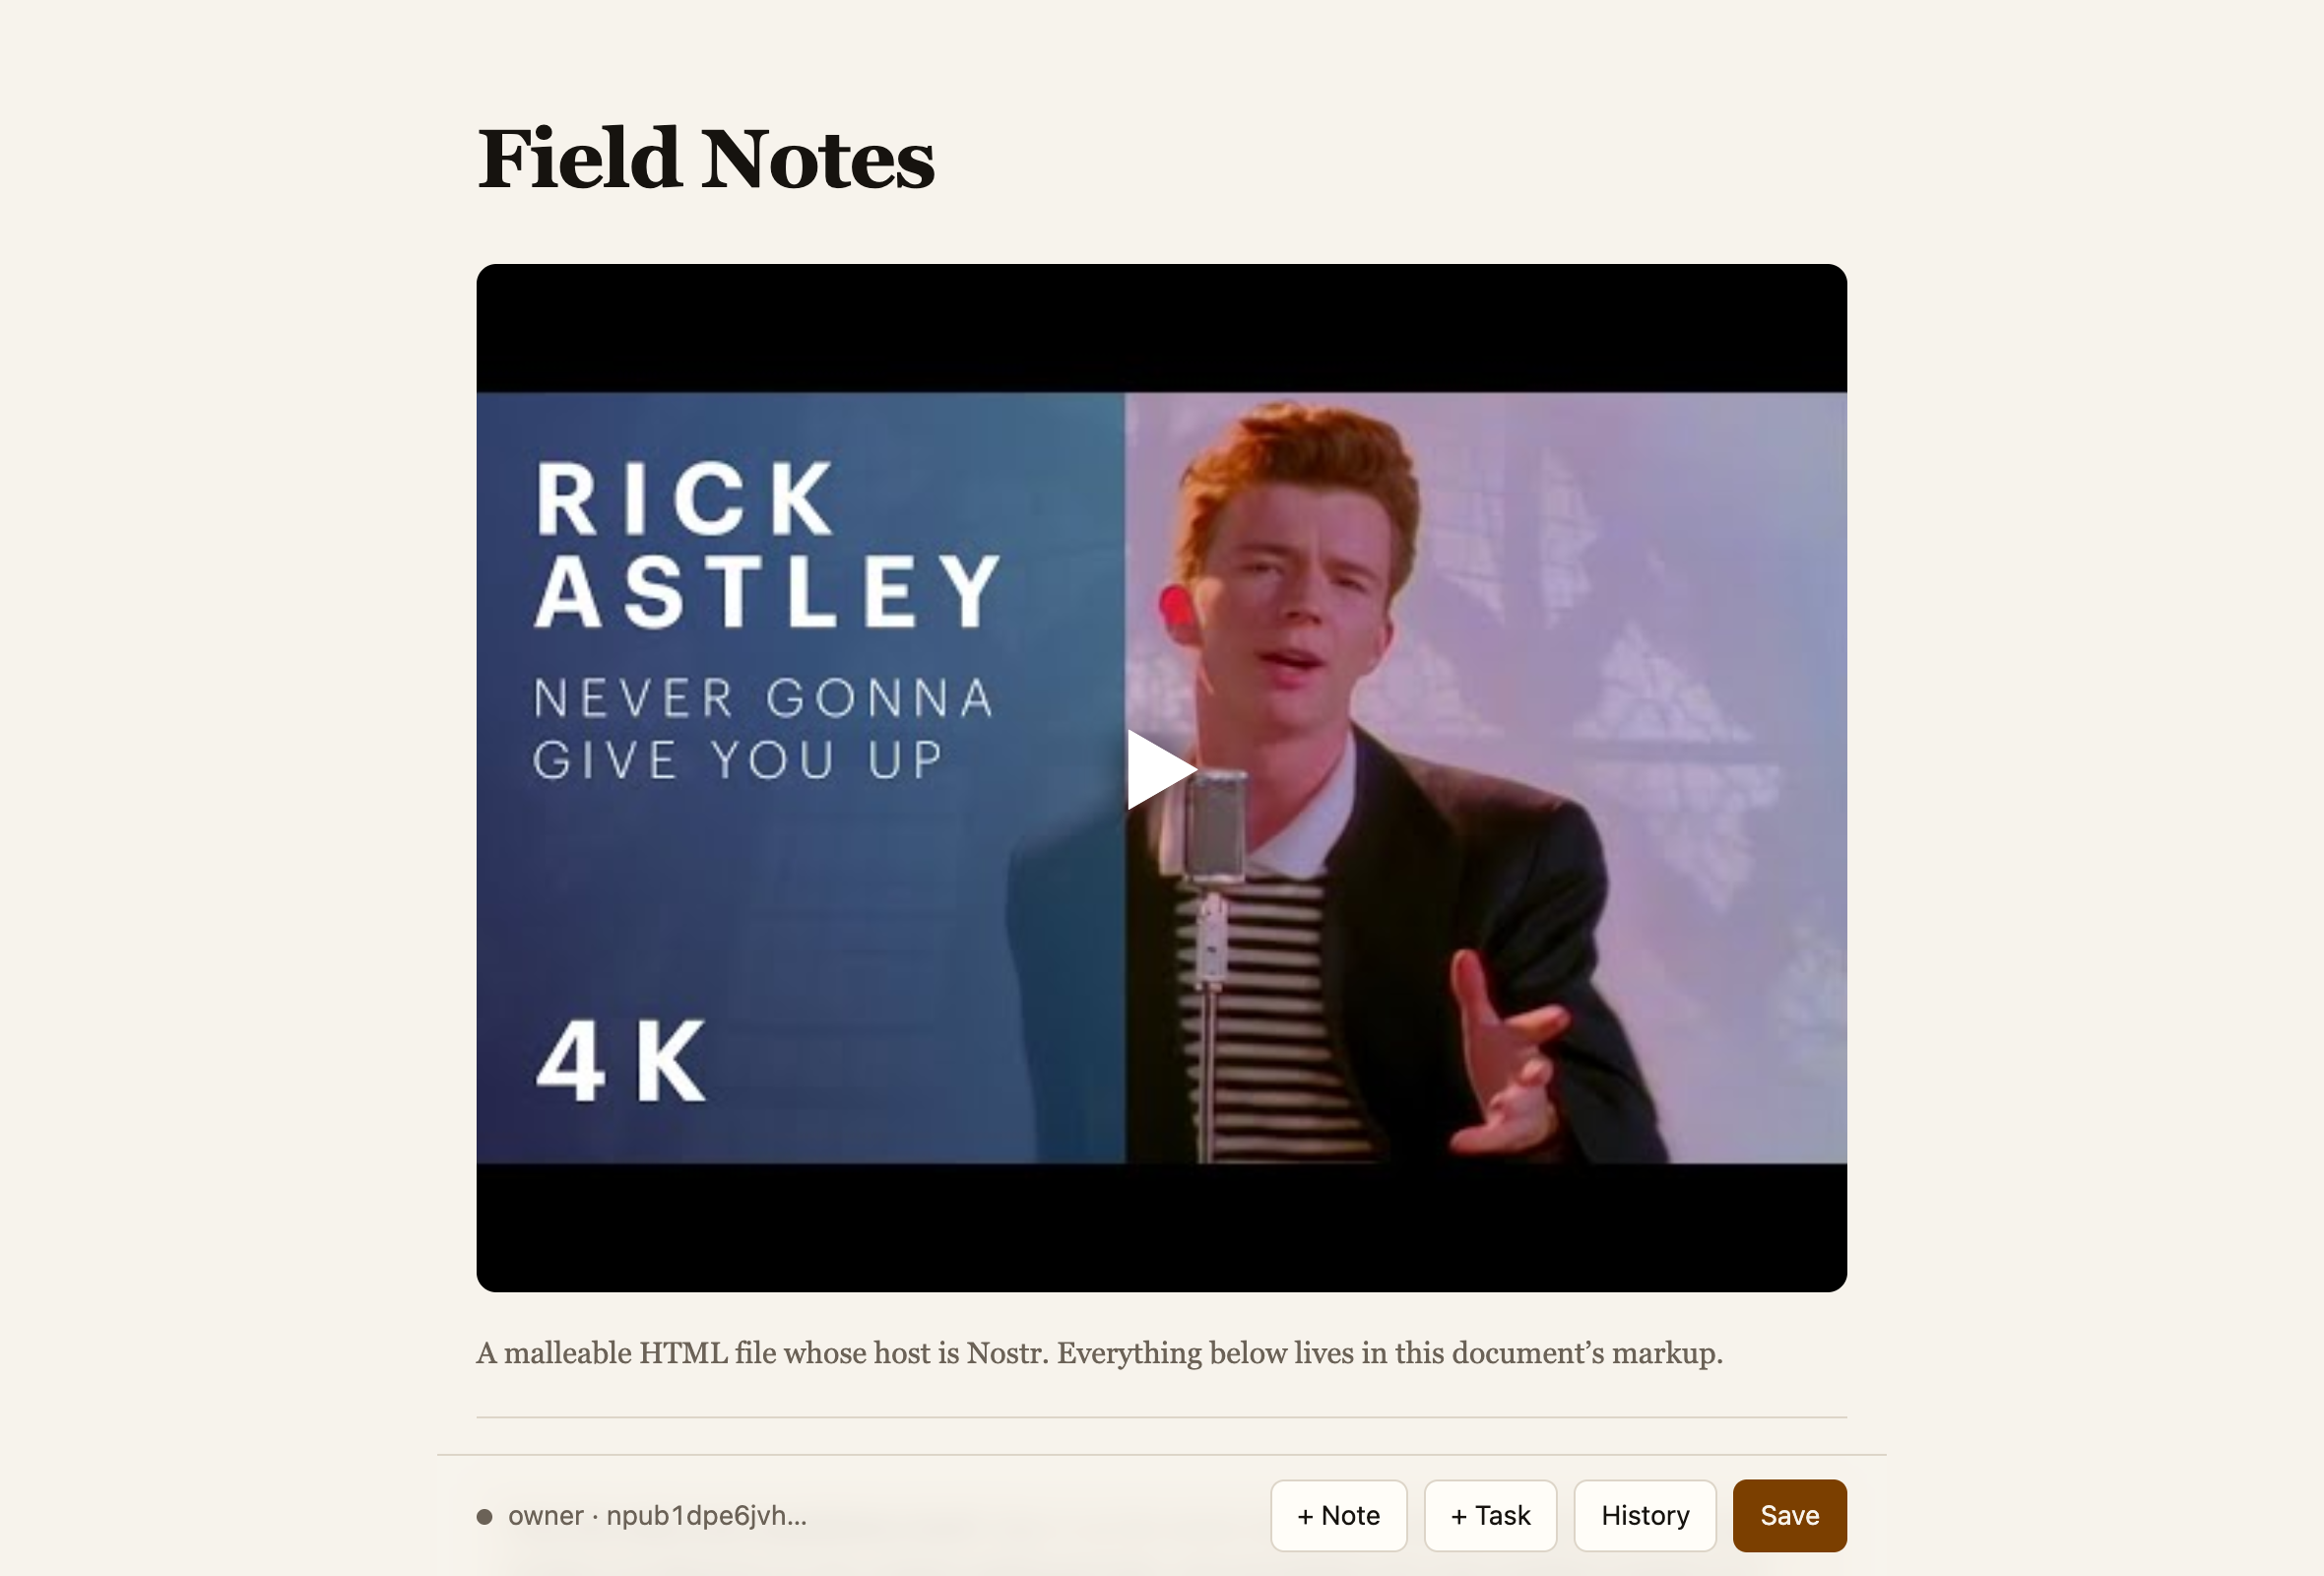
The player loads only when somebody presses play. Until then YouTube is not watching your readers, and the thumbnail still works as a link for anyone browsing with JavaScript off.
8Showing Nostr posts
A Nostr feed block shows posts by whoever you name. It is a good way to keep a page current without touching it: the posts are fetched when a reader opens the page, so the page stays as fresh as the account behind it.
The meetup page shows the Lunarpunk Košice account, since that is the event it happens inside. Paste one or more npubs, and the posts appear so you can see what you are about to show.
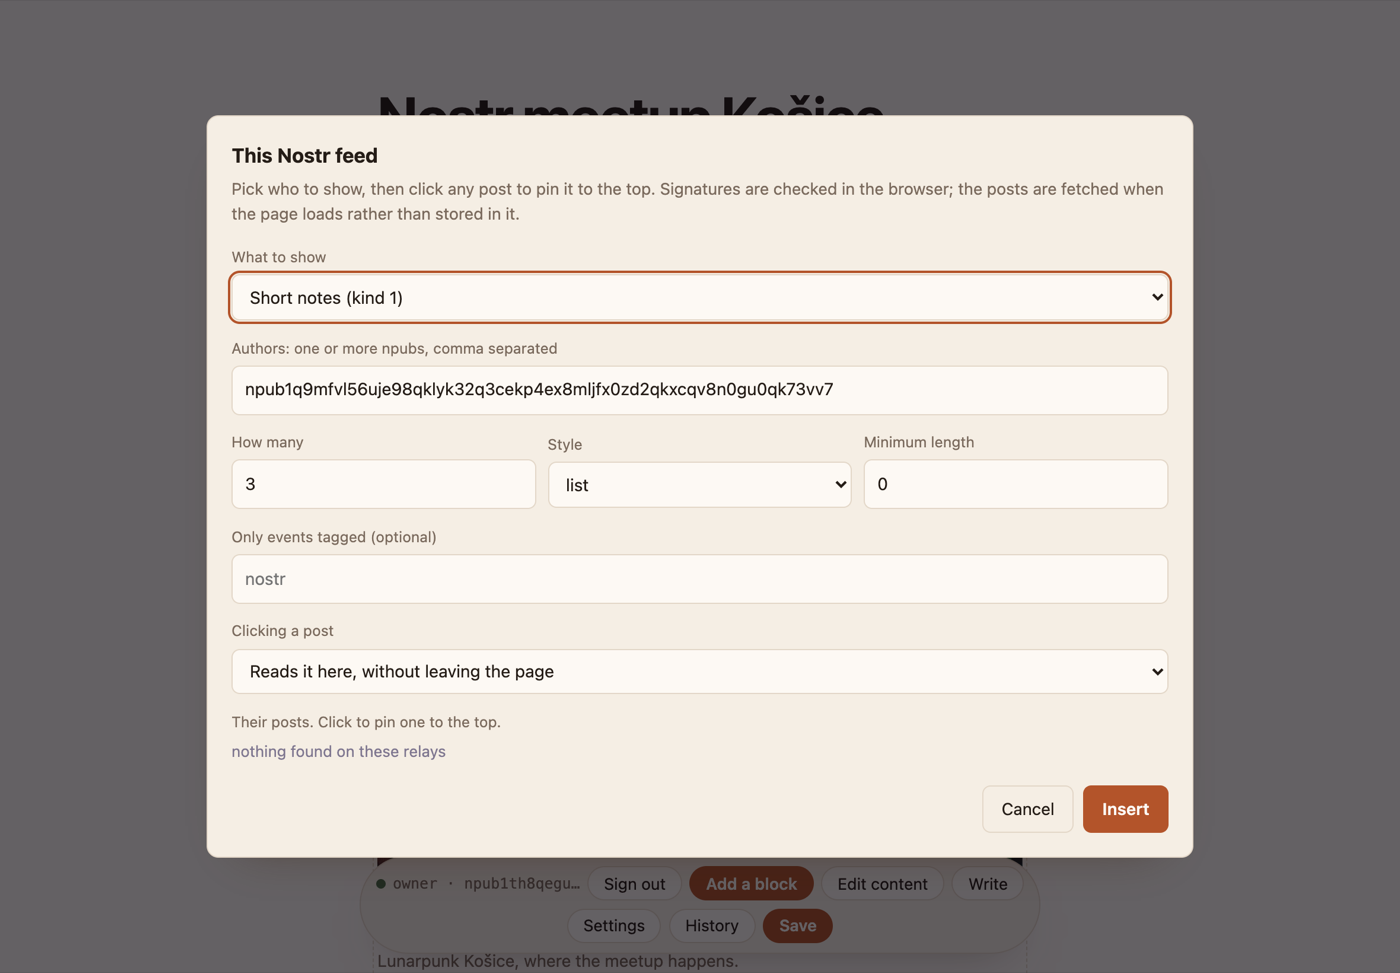
You can pick short notes, long-form articles or picture posts, choose how many to show, and pin particular ones to the top. Every signature is checked in the reader's browser, so a relay that hands over something the author did not write is caught rather than displayed.
Clicking a post reads it on your page by default. The feed already fetched it to draw
the card, so it opens with no waiting, and closing it puts the page back exactly as it was
rather than reloading anything. If you would rather send people to a Nostr client, the same
field offers Yakihonne, Primal and njump, or a URL of your own with {id} in it.
There is also a block for a post of yours. That one copies the post into the page rather than fetching it, so it reads with no relay and no JavaScript, while still remembering which Nostr event it came from. Edit the post in any Nostr client and the copy can be brought back in line.
9Writing a post
A page that can show your posts can write them too. Write in the toolbar lists everything you have published and opens any article for editing.
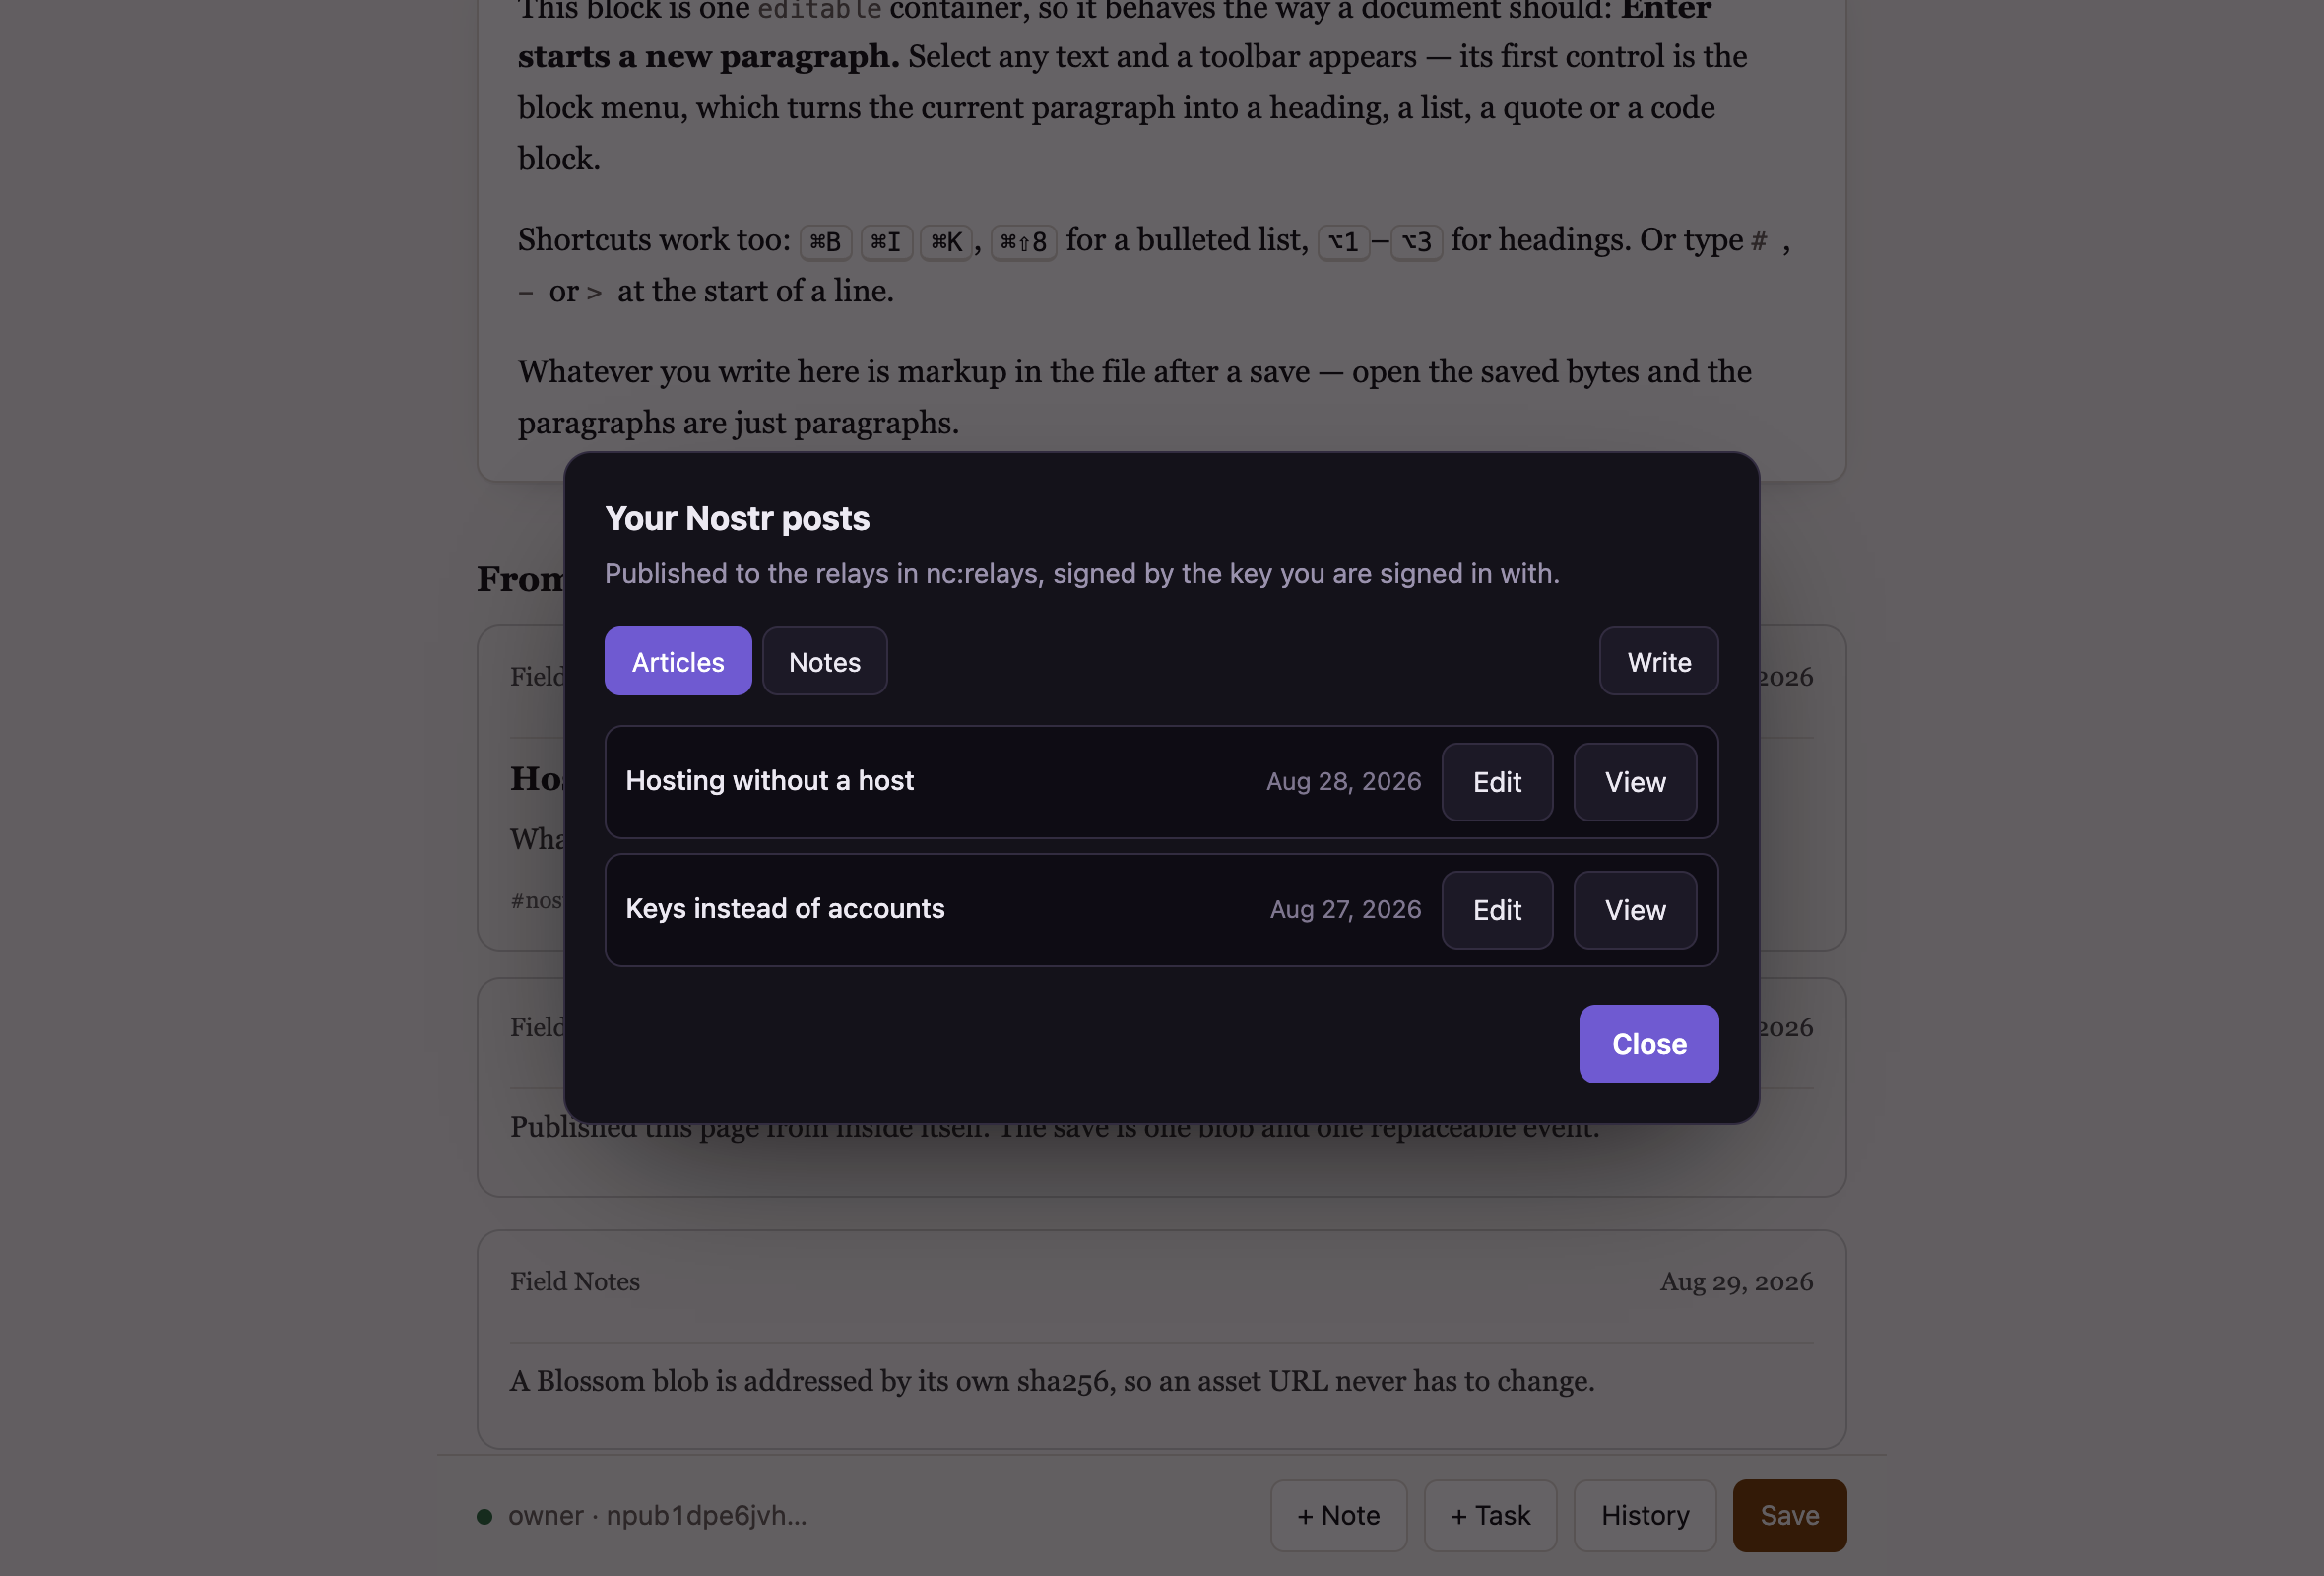
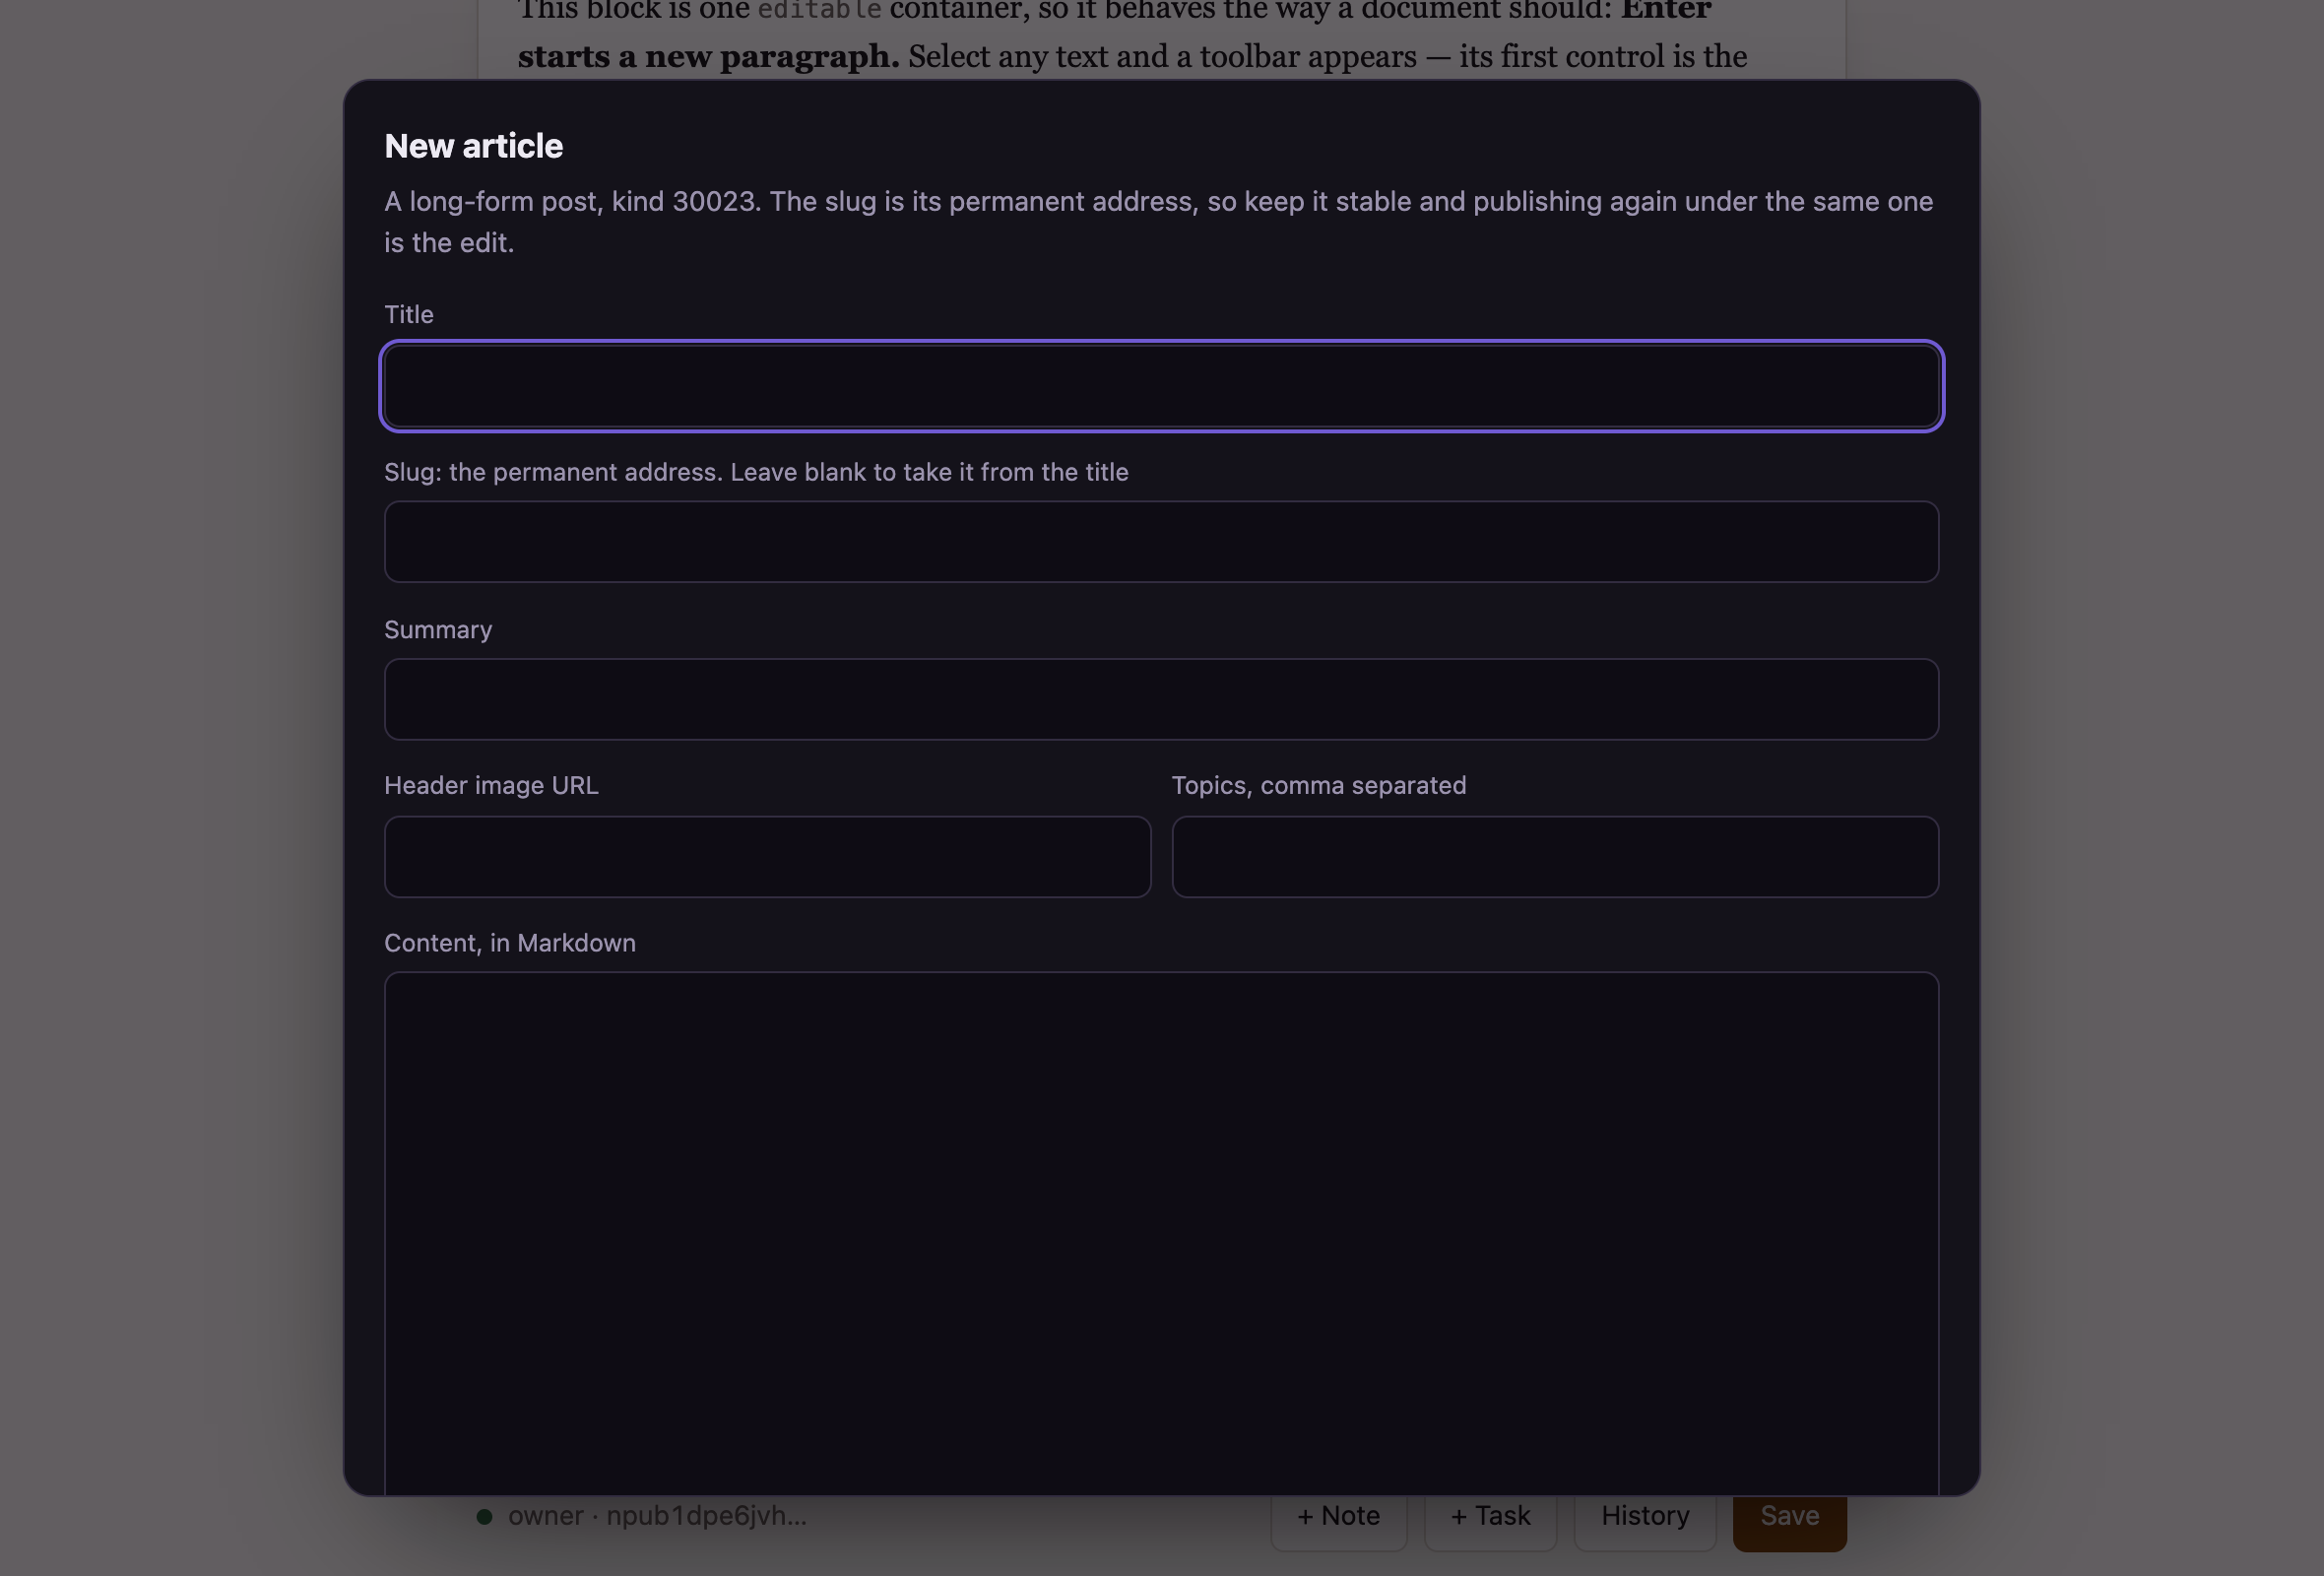
The address is the field to get right. It is how your article is linked, and publishing again under the same address is how you edit it: fix a typo, publish, and every Nostr app shows the corrected version at the same link, with the original date still on it.
Short notes work the same way except that they cannot be edited once they are out. The panel says so before you publish one.
Posts and pages stay separate. Writing a note does not change your page, and saving your page does not touch your posts.
10Saving
Press Save. The page serialises itself, uploads the result as one blob, and republishes the manifest pointing at it. Anyone loading the page from now on gets your version, as a plain static document with the changes already in it.
Saving takes about a second. If nothing has changed since the last one it says so and does nothing, so pressing it twice is harmless. Anyone still reading the old version is told a newer one exists and their page updates itself, so nobody has to know what a hard refresh is.
When a save fails it says why. The usual cause is a signer app that has gone to sleep: wake it, approve, and press Save again.
11Going back to an earlier version
Every save is kept. History lists them all.
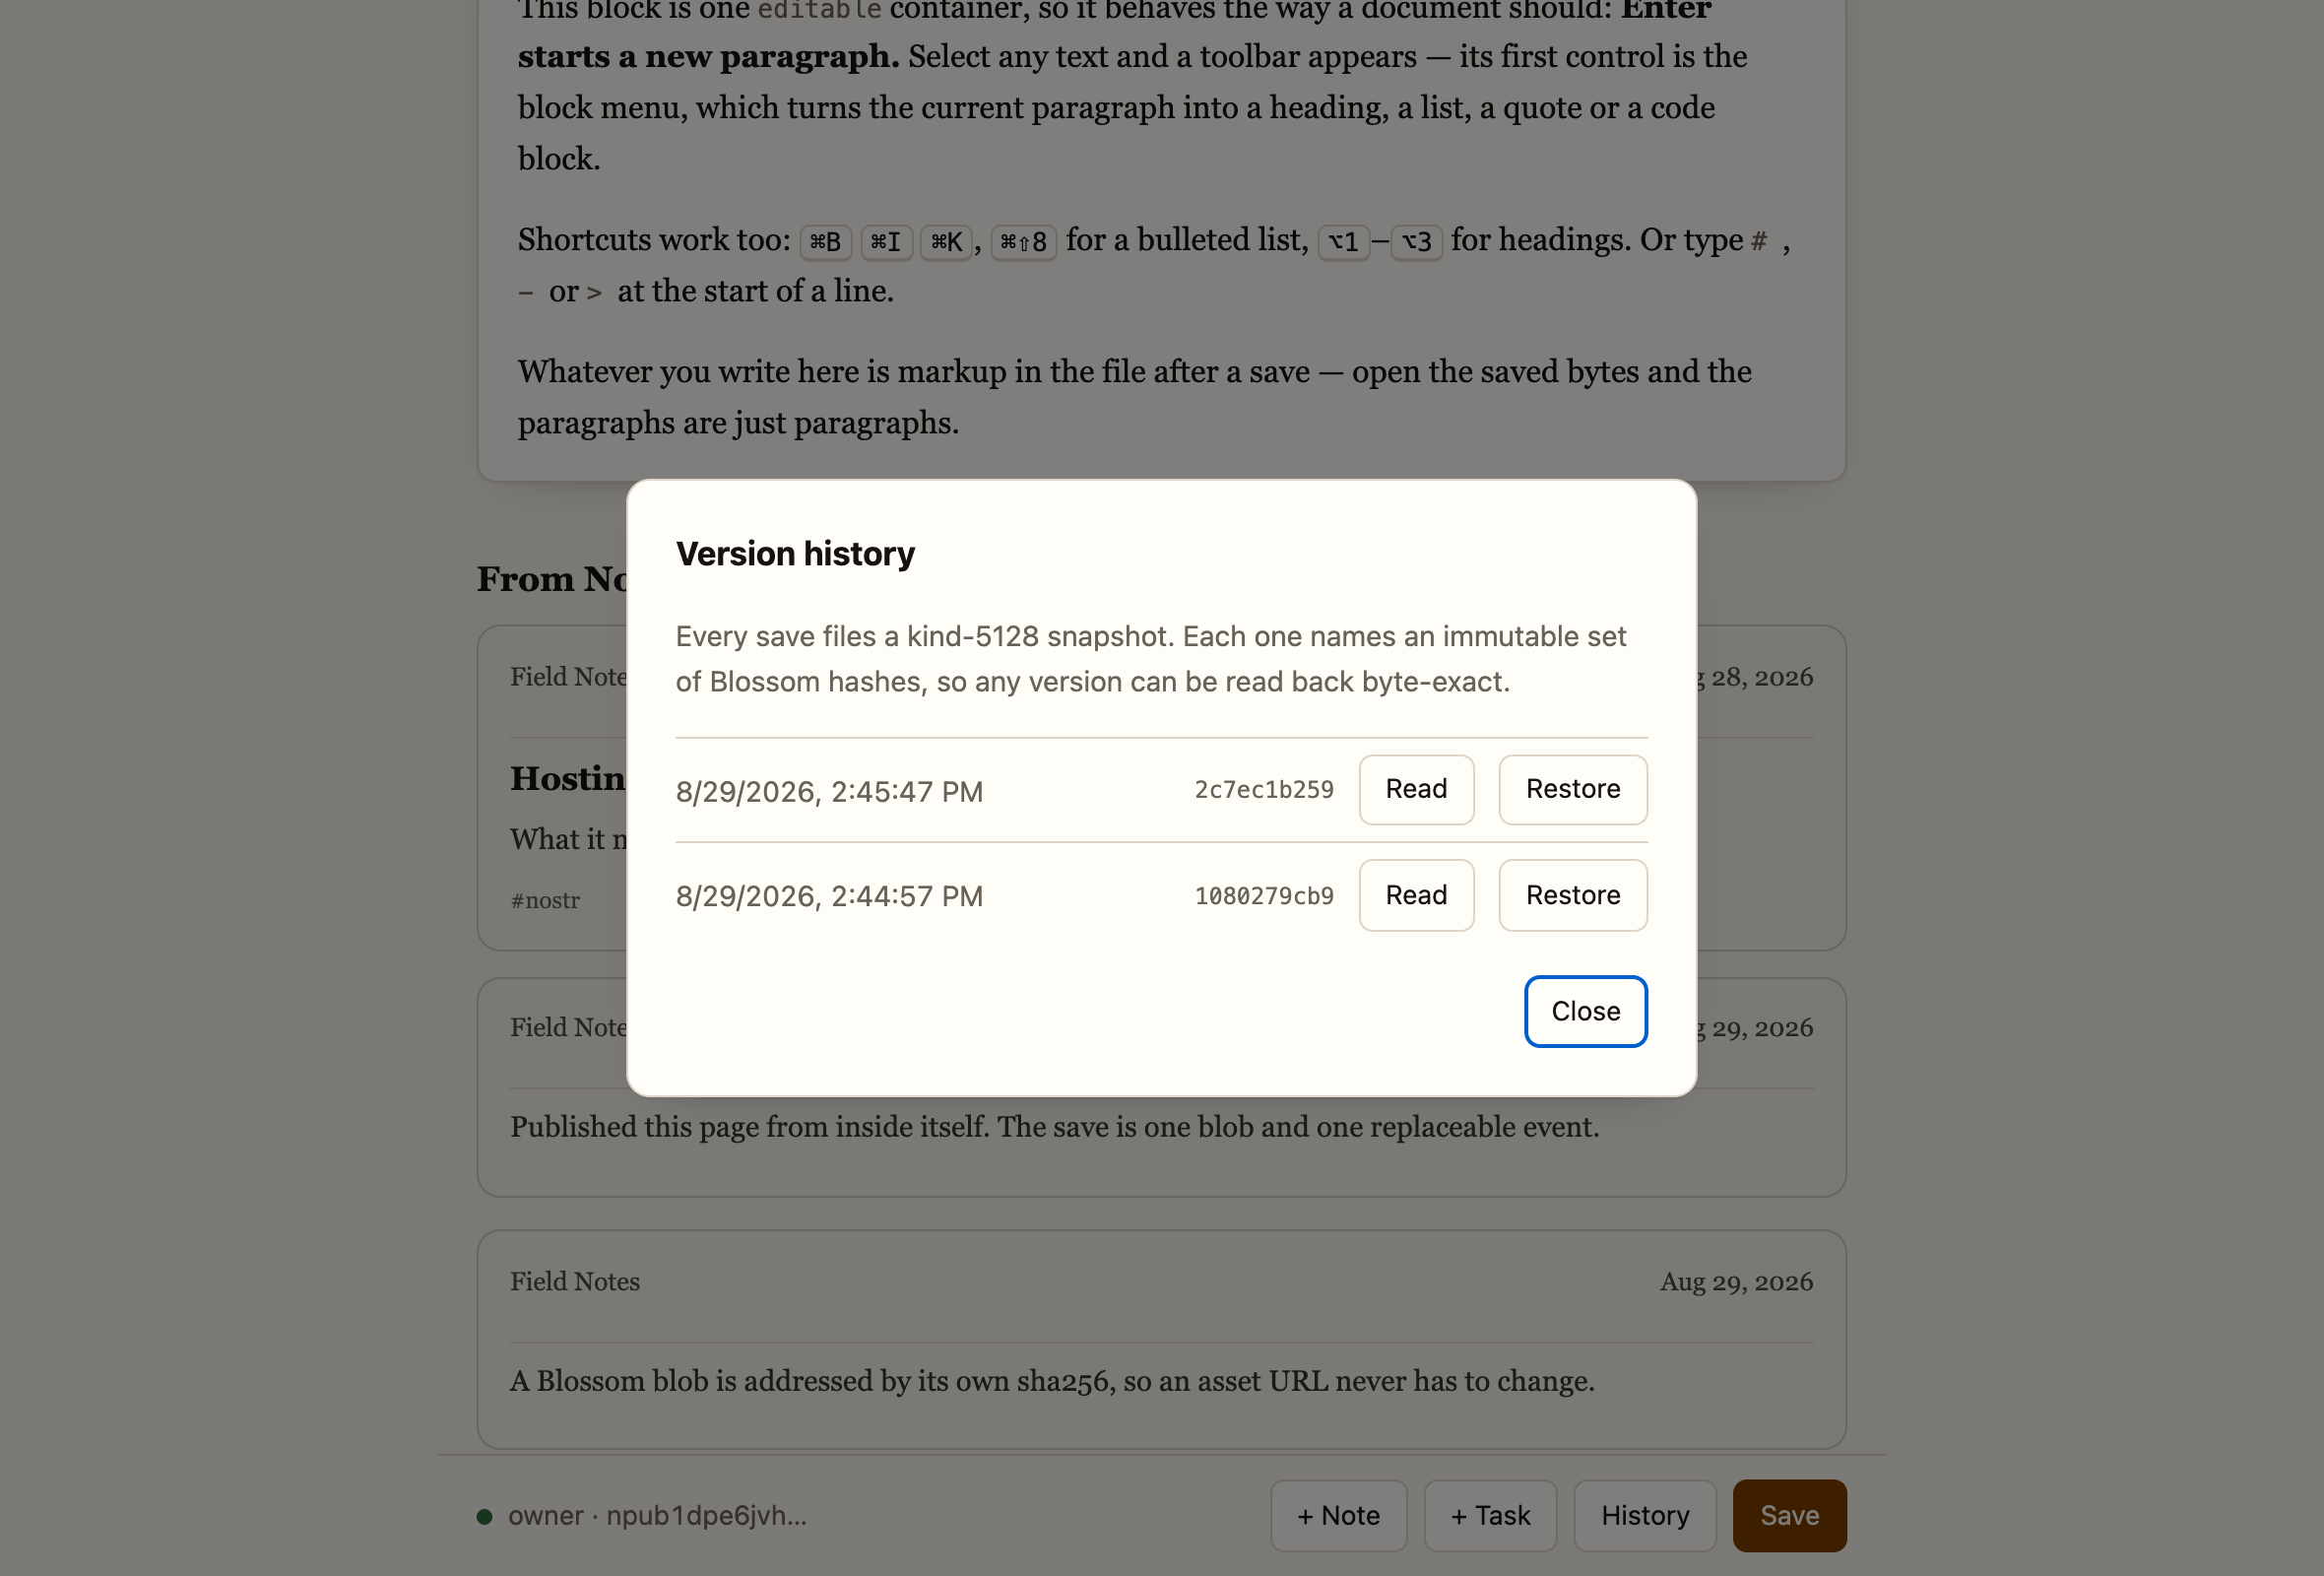
Restoring an old version does not throw the current one away. It becomes another entry in the list, so you can change your mind again.
12A second page under the same key
The quickest way starts from a page you already have. Open Pages on the toolbar and choose New page. It gets the same design, header, footer and blocks as the page you are on, and a link in that page's menu if you want one. New page with AI does the same and writes the content from a short description. Both pages are published together.
The publisher adds pages too, and it is the way to start one from a different template.
Go back to the publisher, sign in with the same key, and pick another path. It tells you what is already there.
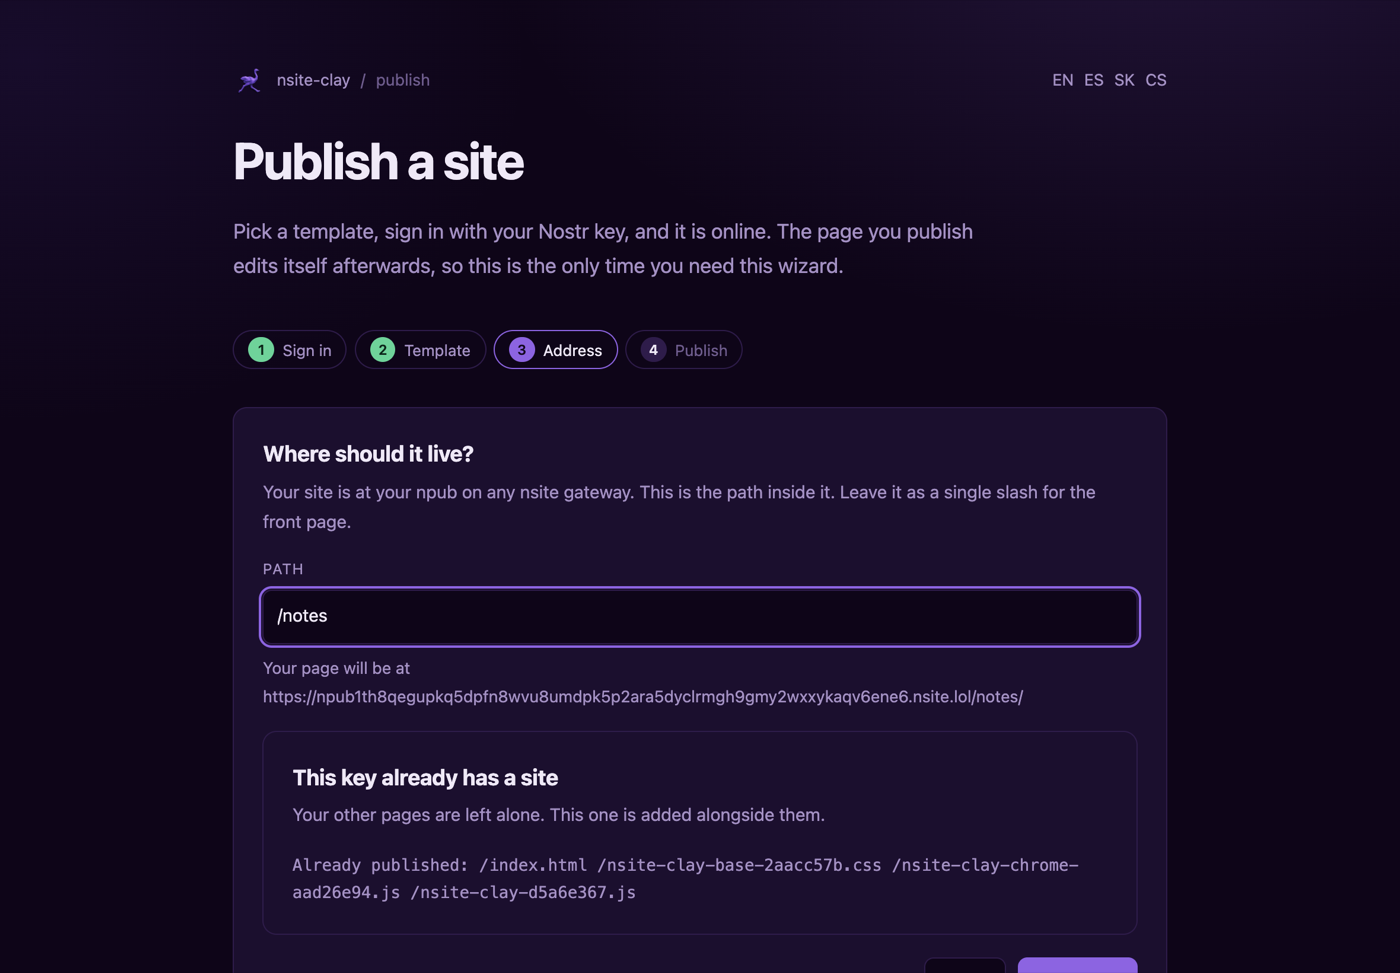
Choosing a path that is already taken is a different matter, and the publisher will not do it quietly.
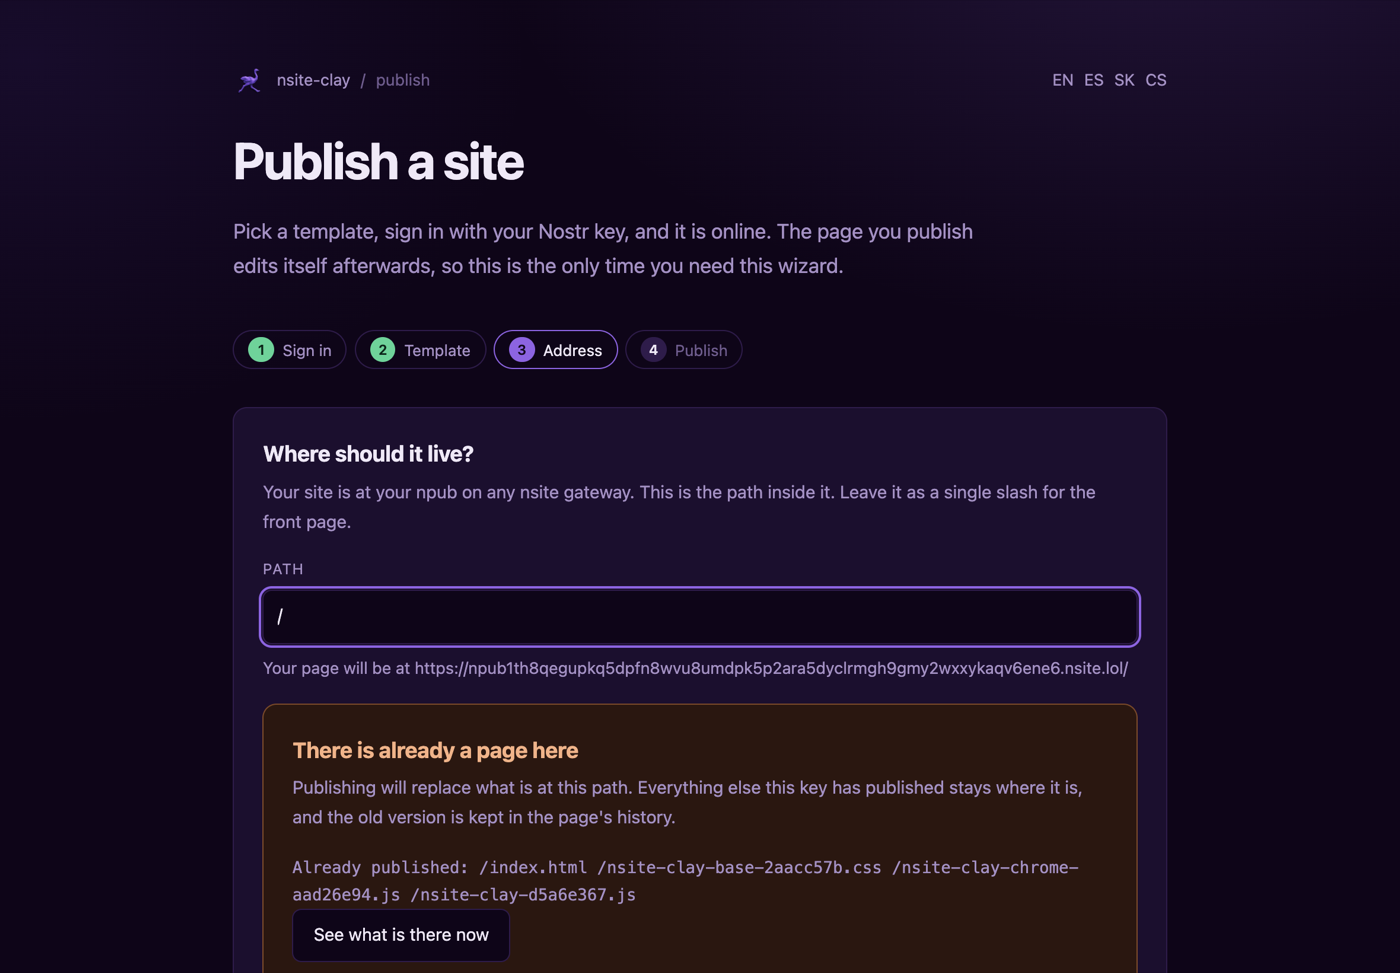
Even then the old page is not gone: replacing one is a new version, and the version history still holds what was there before.
13Where your page lives
Your page is at your npub:
https://<your npub>.nsite.lol/That address is yours because the key is yours. Nobody assigned it and nobody can take it away. Several gateways serve the same page from the same events, so if one is down you change the hostname and nothing else moves: nsite.lol, nosto.re, nwb.tf, nsite.run, nsite.cloud and shakespeare.to. nsite.run has the clearest explanation of what an nsite is if you want the background.
A domain of your own
Point a CNAME at your npub subdomain, not at the gateway itself:
blog.example.com. CNAME npub1….nsite.lol.The npub is the part a gateway reads, so a CNAME at nsite.lol on its own tells it
nothing about whose site to serve. When the hostname it was asked for is not an nsite label, it
follows the CNAME and takes the npub from where the name points.
That is the routing, and routing is only half of it. nsite.lol holds one certificate, for
*.nsite.lol, and answers any other name with a TLS unrecognized name
alert and no certificate at all, so a browser asking for https://blog.example.com
never gets as far as the page. For HTTPS on a name of your own, run a gateway yourself: the
reference one leaves TLS to Caddy, which issues certificates on demand. Or ask whoever runs the
gateway you like to add your name to theirs.
What to remember
Back the key up properly, because it is the site and there is no way to reissue it.
Your readers need nothing from you. The published page is static HTML and reads with scripting turned off, apart from the Nostr feeds, which are the one thing fetched when the page opens.
Nothing you do is destructive. Every save files a version, and blobs are addressed by their own hash, so no edit overwrites the bytes of an older one.
And you can leave whenever you like. The page is one HTML file: save it from your browser, put it anywhere else, and it is the same page.