A walkthrough
This page has been replaced. Everything here, and the publishing steps that used to come before it, is now in the guide. That is the one to read. This copy stays so old links keep working.
Two commands to get a page online. After that everything happens in the browser: writing, pictures, video, your Nostr posts. Every screenshot below is the real thing, taken on a page like the one you are about to make. The controls it describes live on your page, not on this one.
01
Get your page online
This is the only part that happens in a terminal, and it is two commands. You need Node.js installed.
npx nsite-clay init mysite
npx nsite-clay deploy mysite --sec=nsec1…
The first command makes a folder with your page in it and prints a key. That key is the only thing that can ever change the page, and it is not stored anywhere, so copy it somewhere safe before you close the terminal. The second command puts the page online and prints its address.
Already have a Nostr key? Pass your npub to the first command instead, and the page belongs to you from the start:
npx nsite-clay init mysite --npub=npub1…
That is the last command you need. From here on, the page changes itself. You only come back to the terminal if you want to edit the file by hand.
02
Open it and sign in
Open the address the deploy printed. This is what anyone visiting sees: your page, and nothing to click.
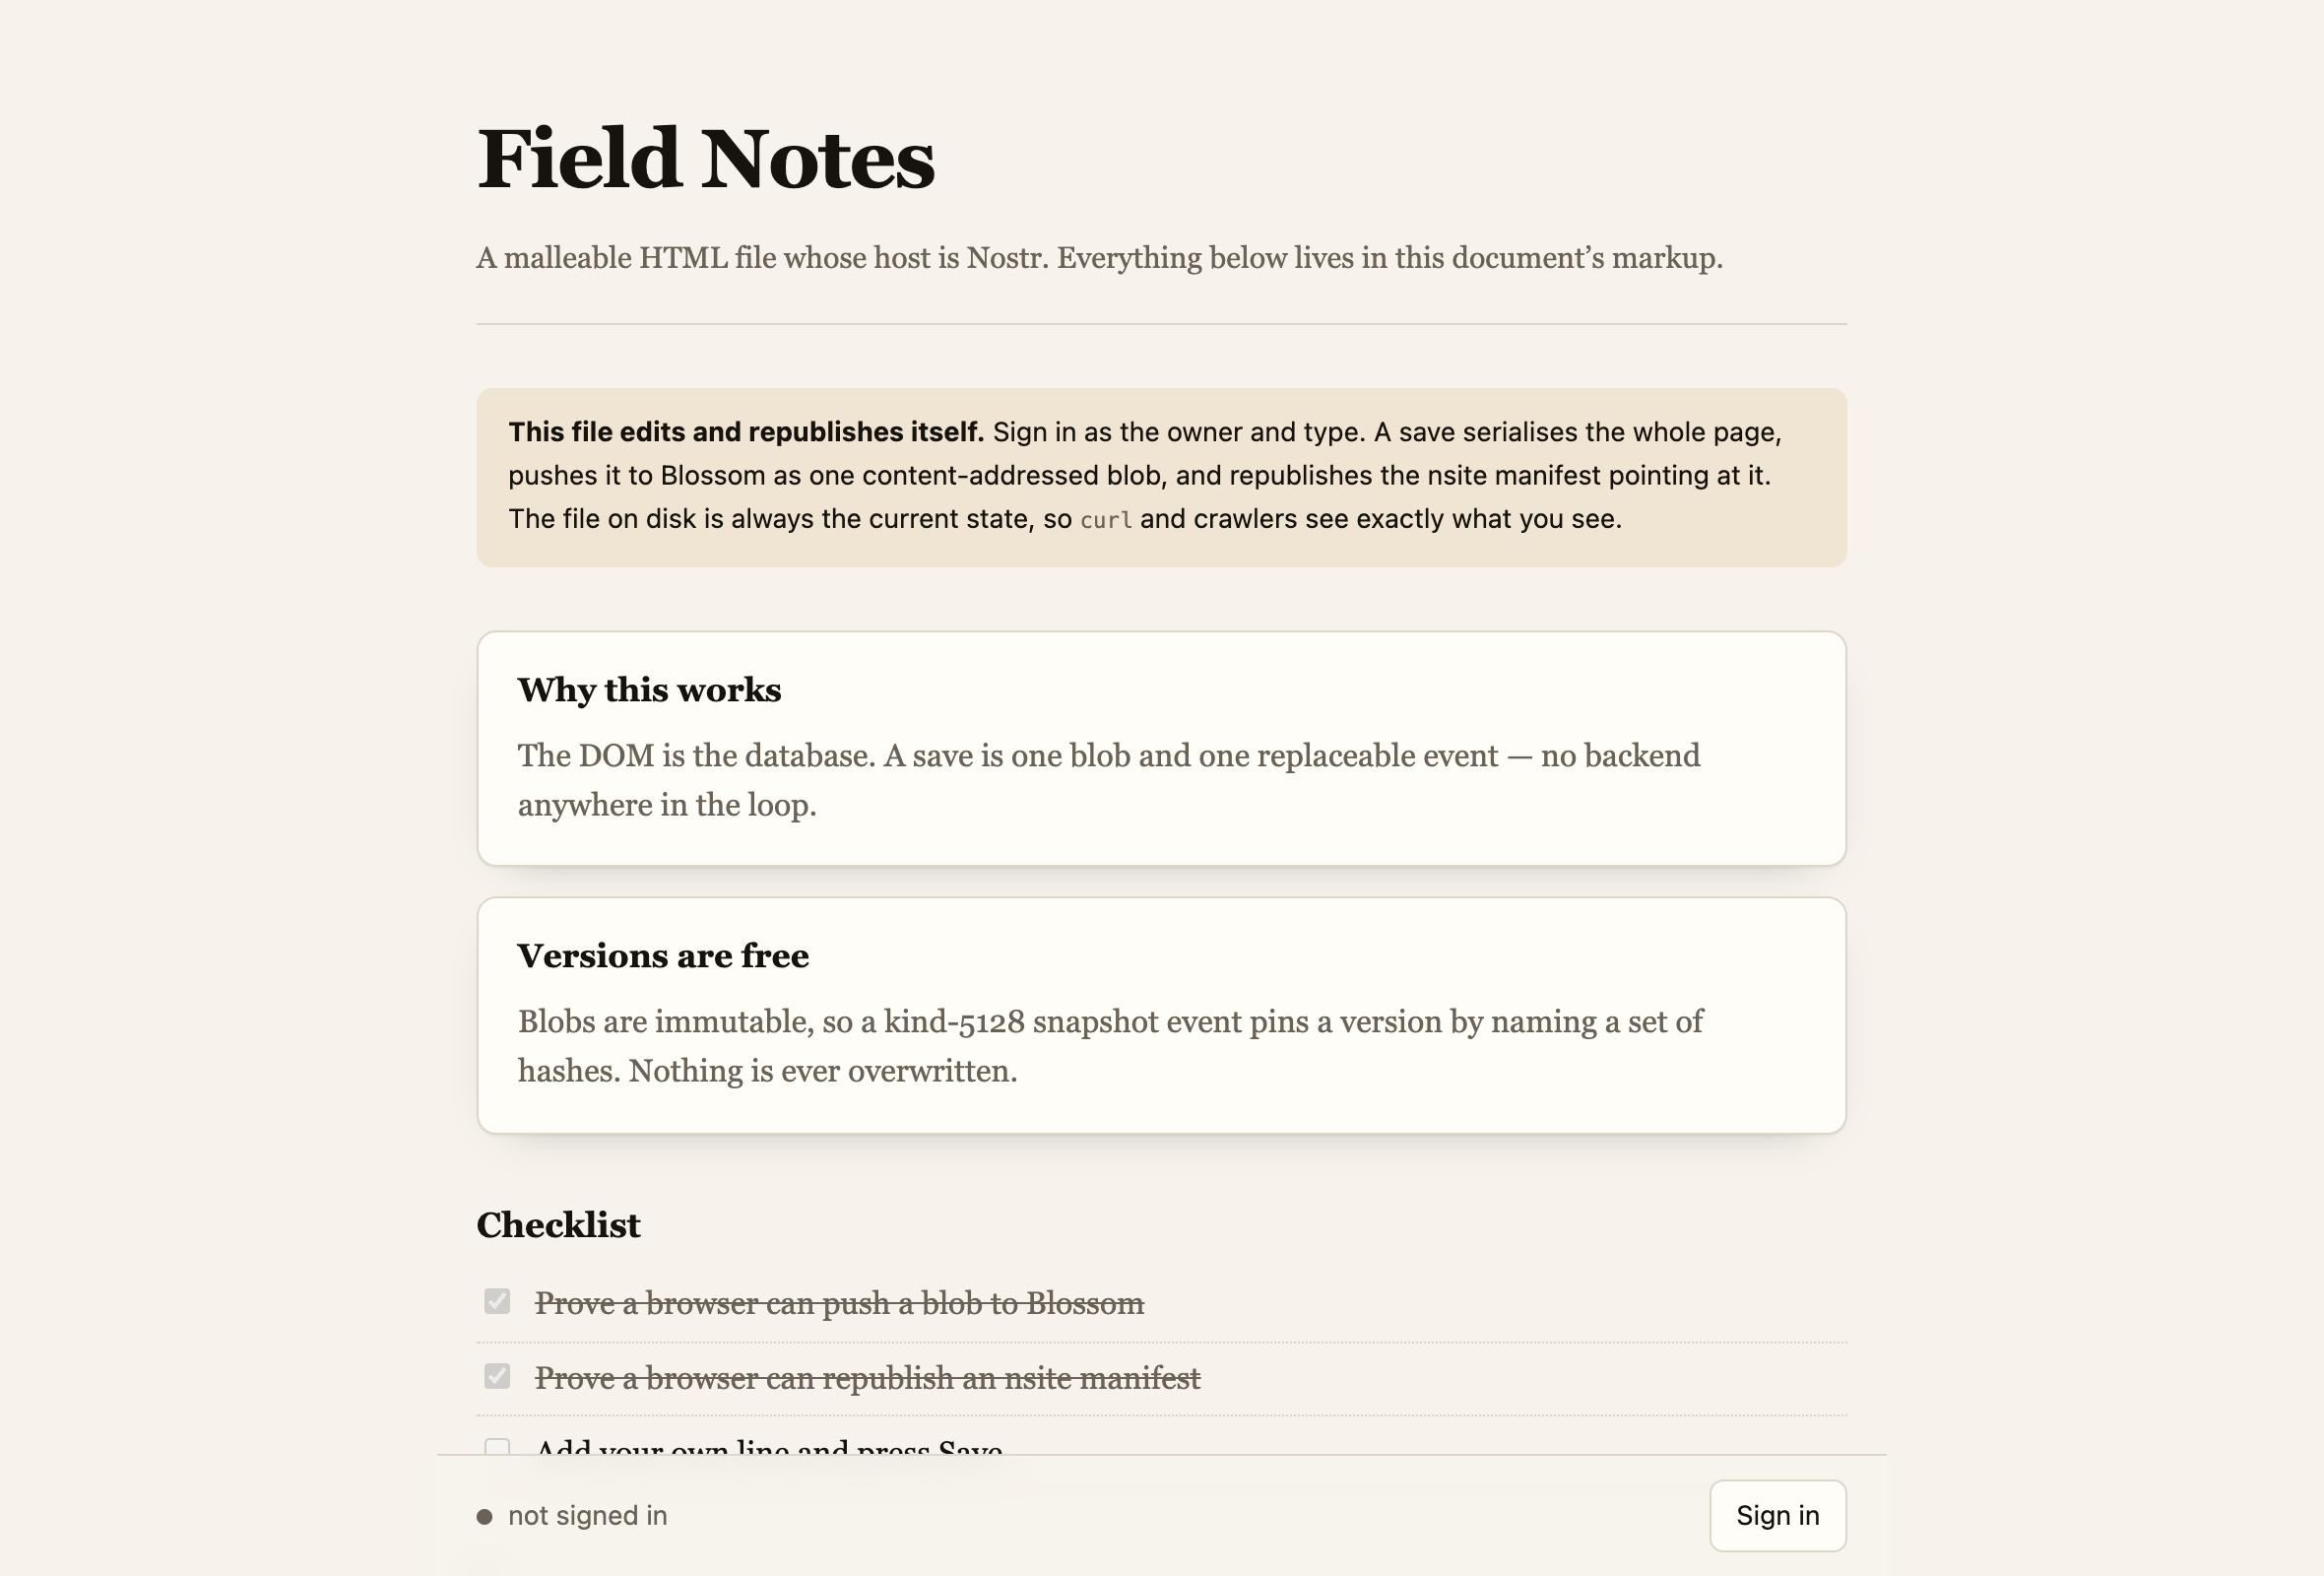
Press Sign in in the corner. There are three ways in. Use the first one that applies to you.
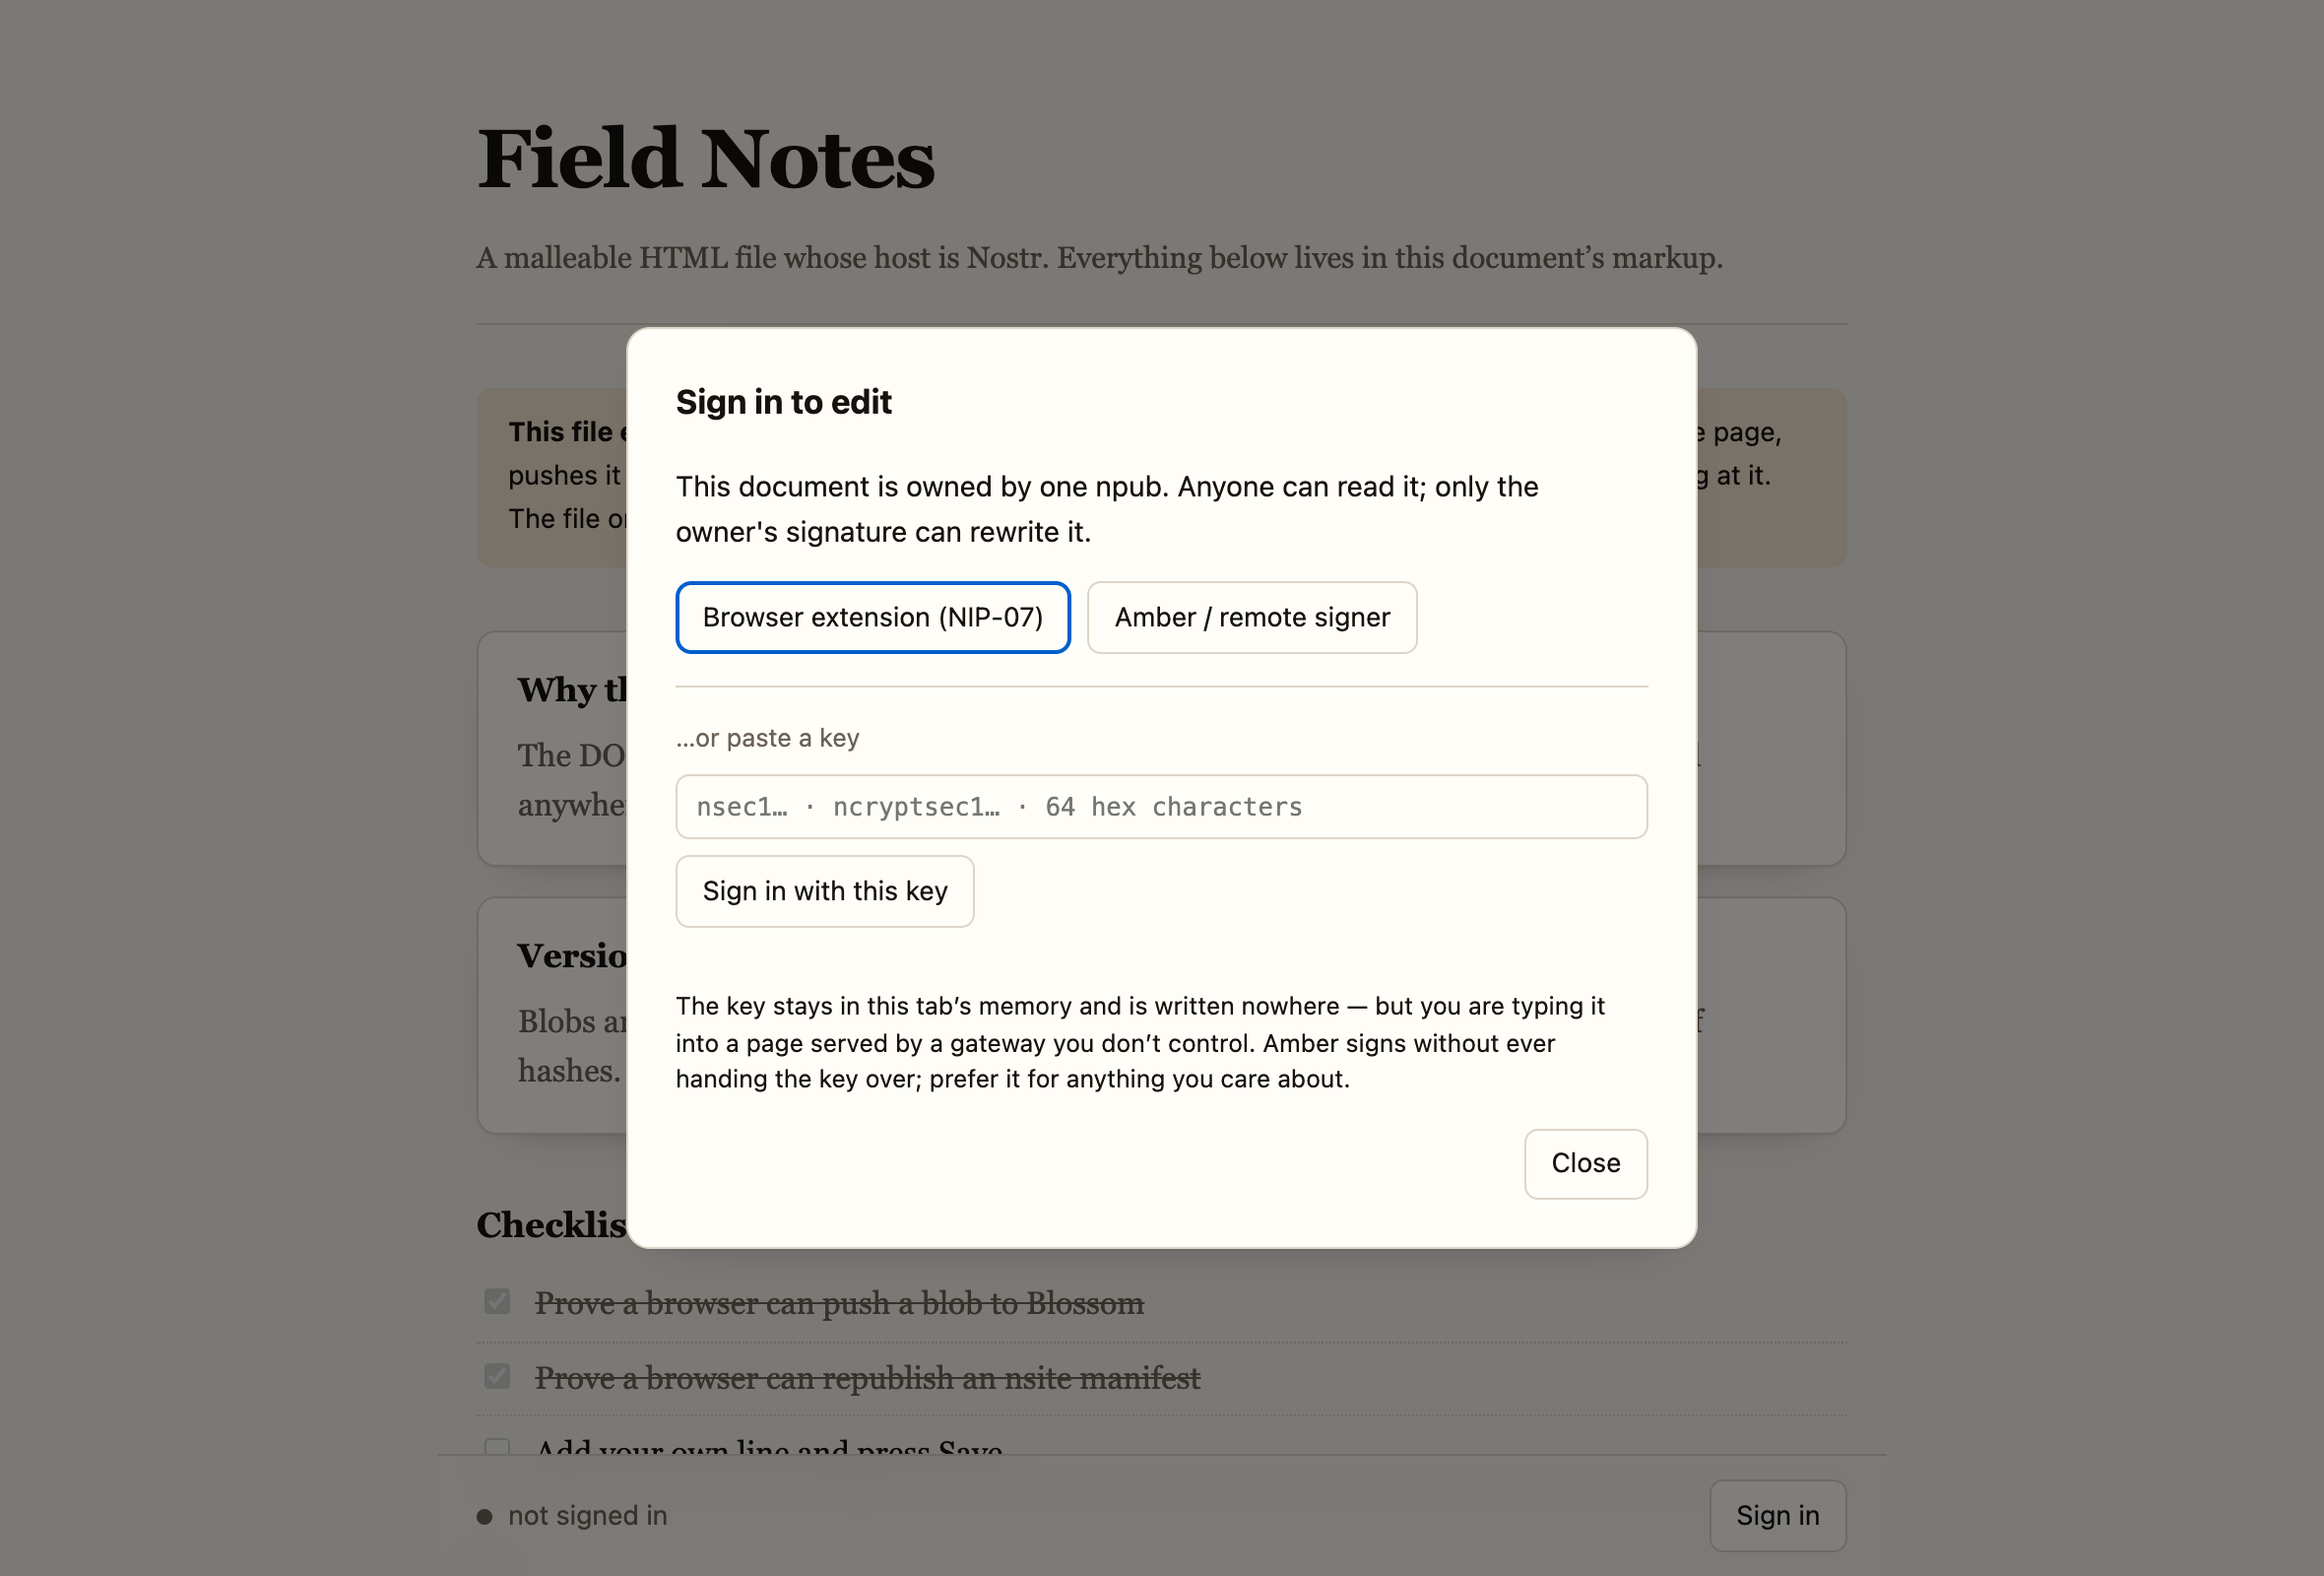
- A browser extension such as Alby or nos2x. One click, nothing to type.
- Amber, or another signer app. Press the button, scan the code with your phone, and approve each change there. Your key never touches the browser, which makes this the safest option.
- Paste your key. Your
nsec, or an encryptedncryptsecwith its password. It stays in the tab until you close it and is never saved anywhere.
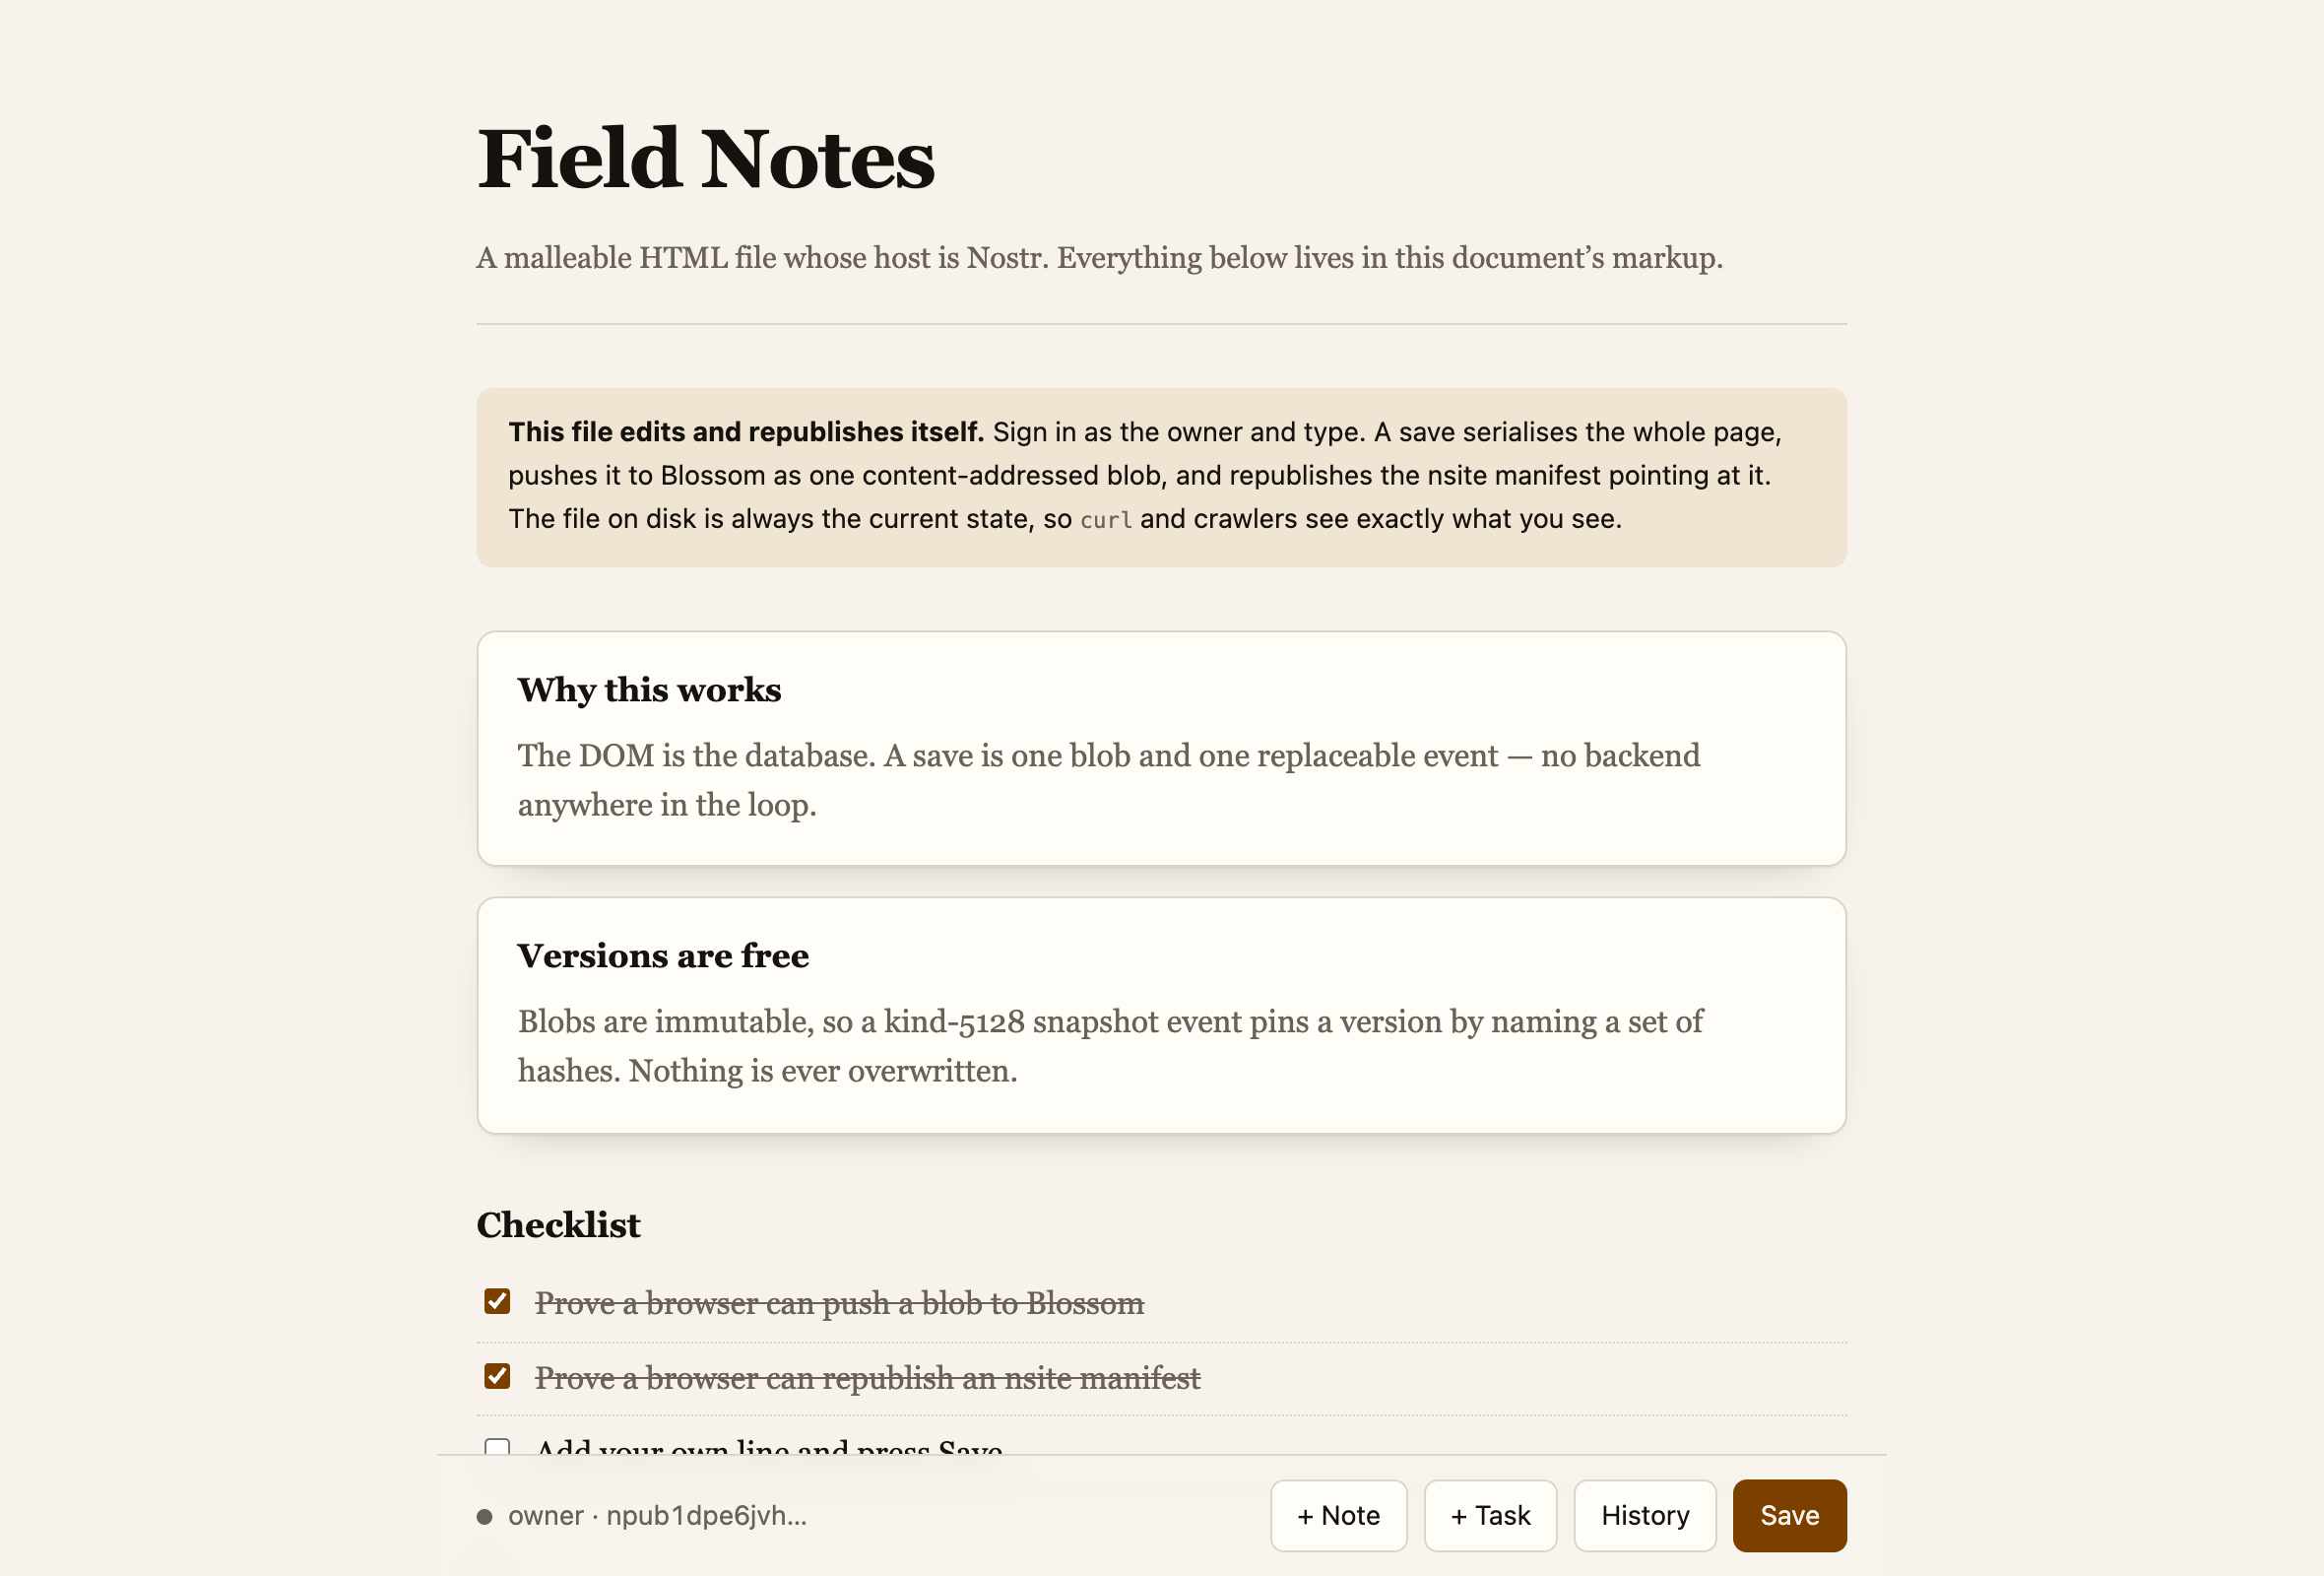
Only your key can change the page. Anyone else who signs in gets the same read-only page a visitor sees.
03
Change the words
Edit content opens a form for the page's fields. A template can give you a date picker, a dropdown or a number field instead of asking you to type everything as text. Rich-text fields keep links, lists and formatting.
Click into any text and type. Press Enter for a new paragraph. Select some text and a small toolbar appears above it.
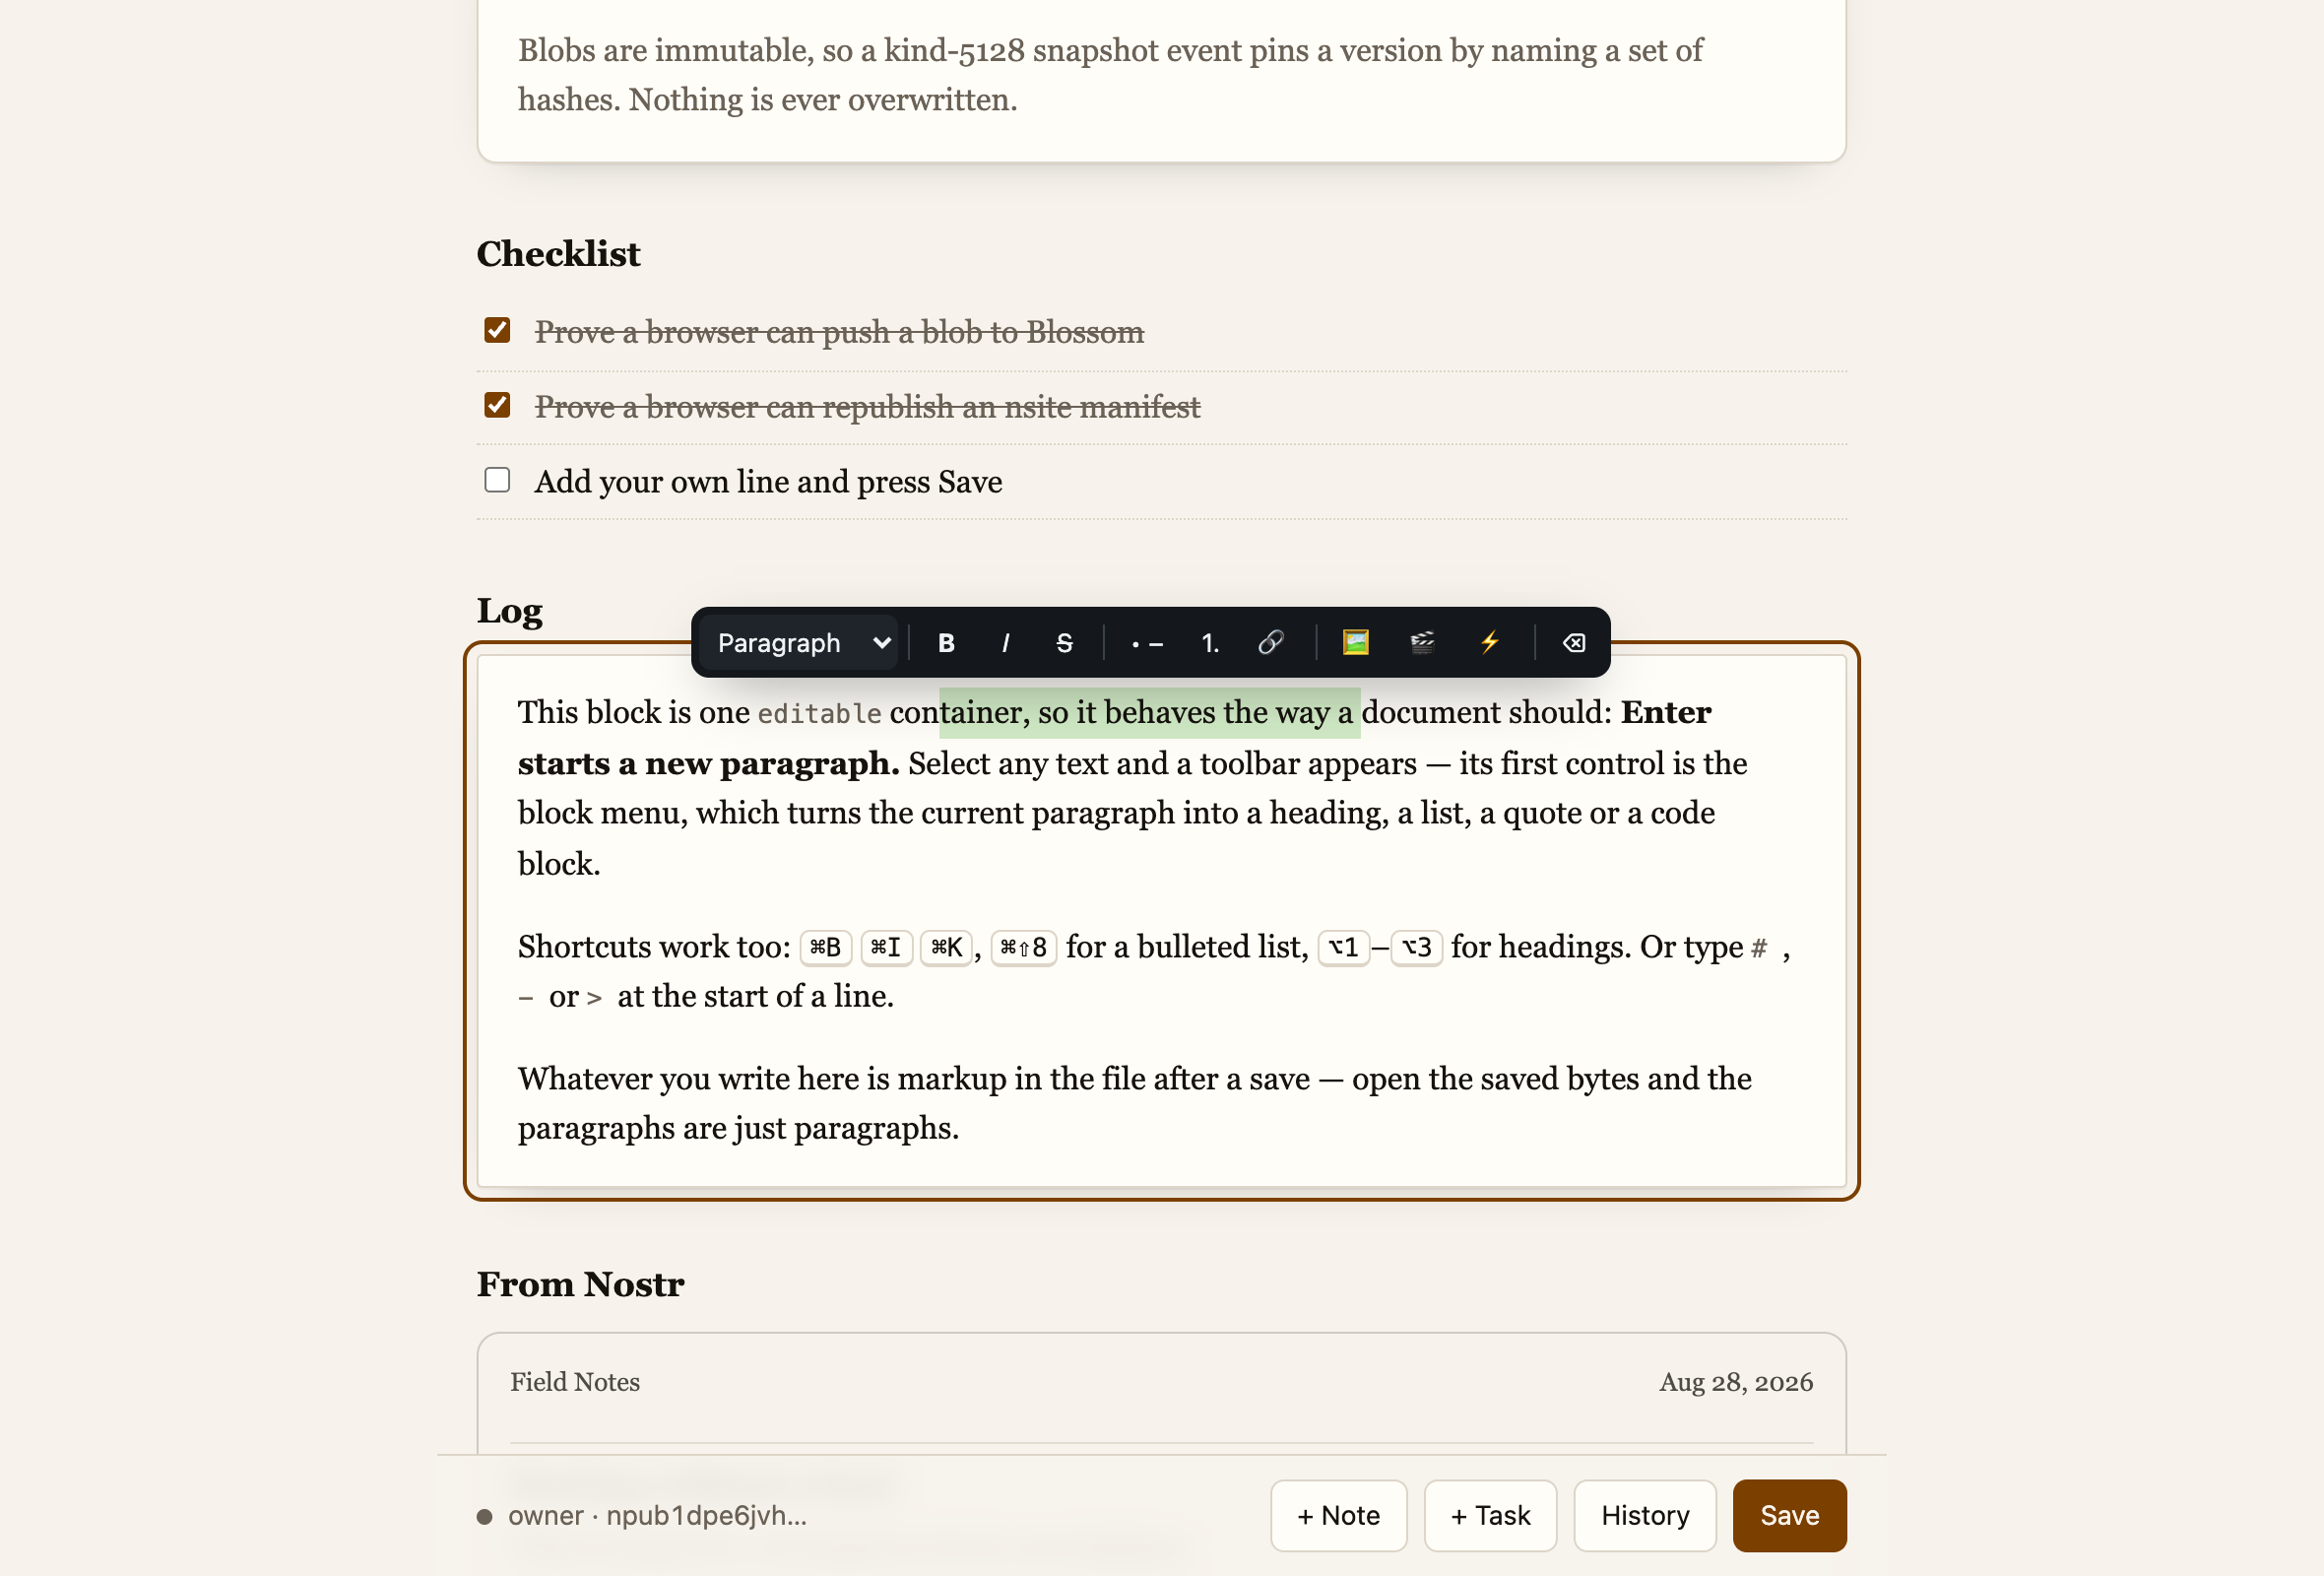
The rest of the toolbar is bold, italic, strikethrough, bulleted and numbered lists, a link button, the three insert buttons covered below, and one to strip formatting back out.
| ⌘B ⌘I ⌘U | bold, italic, underline |
| ⌘K | make a link, or remove one |
| ⌘⇧8 | bulleted list (⌘⇧7 numbered, ⌘⇧9 quote) |
| ⌥1 ⌥2 ⌥3 | the three heading sizes, ⌥0 back to normal |
# - > | type these at the start of a line for the same thing |
Pasting from a word processor is safe. The formatting gets cleaned up on the way in, so you do not end up with someone else's fonts in your page.
04
Add a picture
Put the cursor where you want it and press the picture button on the toolbar.
Deleted a block by mistake? Press Undo on the page toolbar, or use Ctrl+Z (⌘Z on a Mac). Redo puts it back. These steps last until you sign out or leave editing; History holds your published versions.
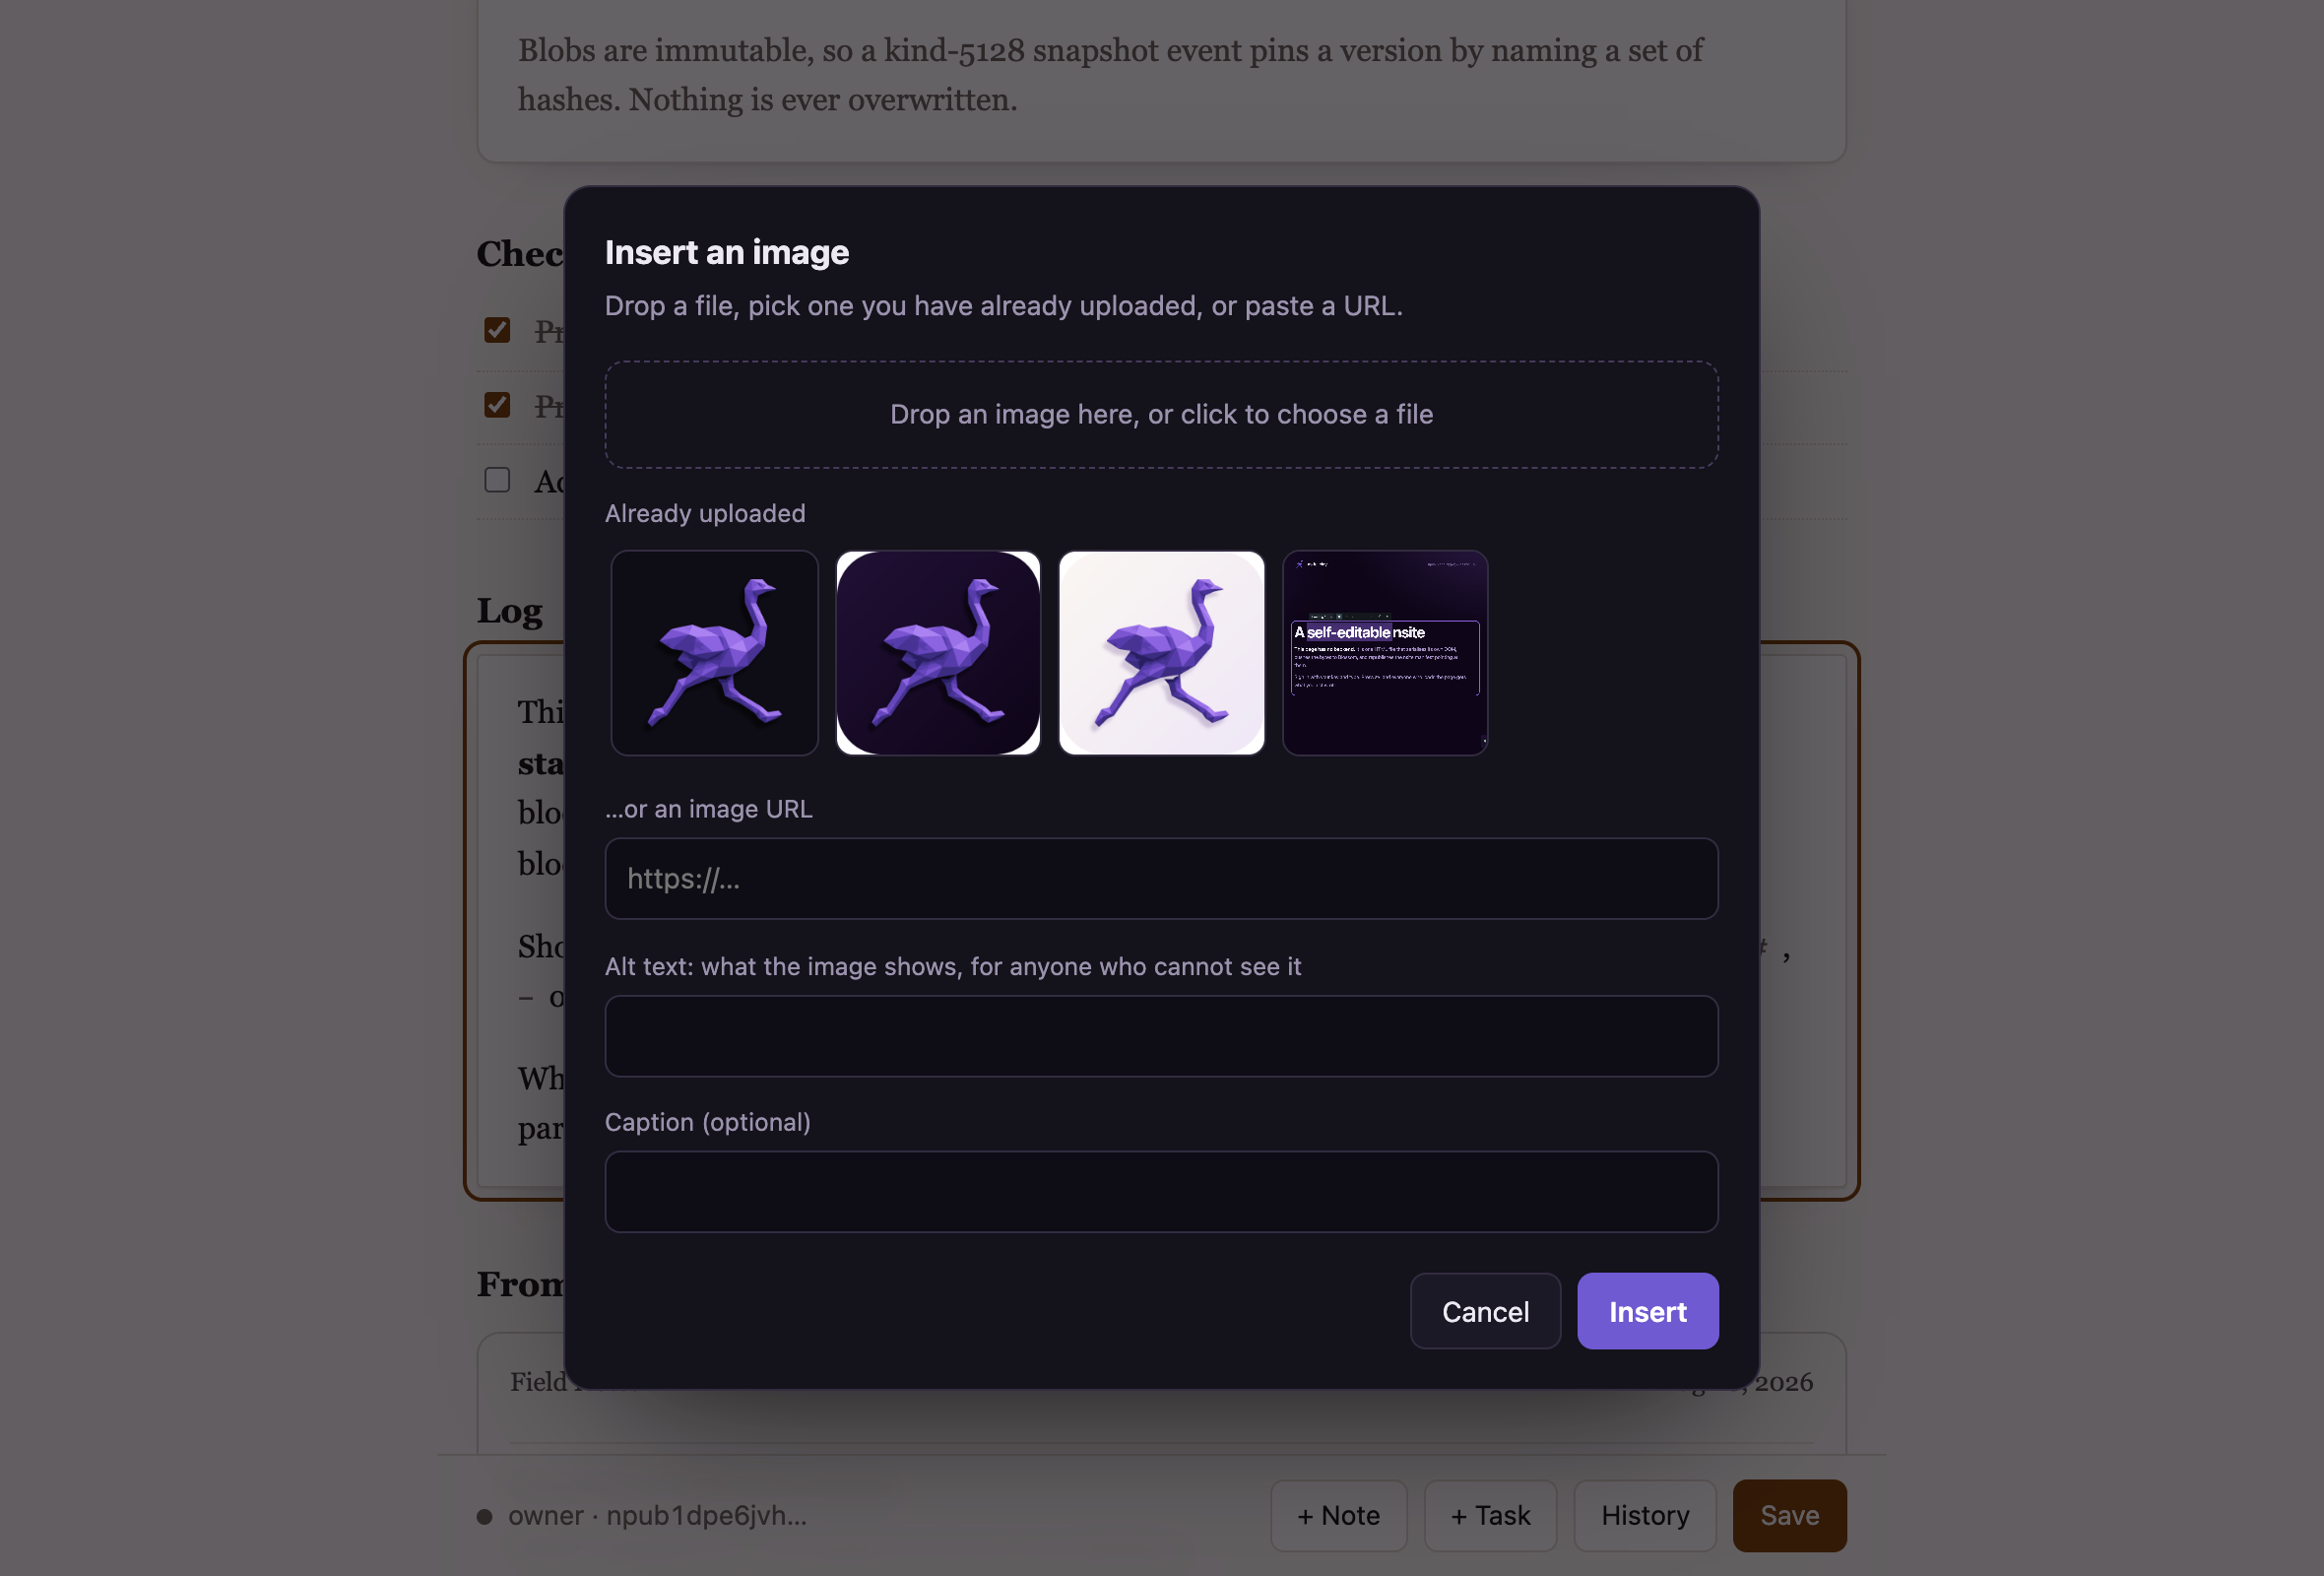
Anything you upload is stored alongside the page itself, and everything you have uploaded before shows up in that grid, so you never have to hunt for the same picture twice.
For a new file, choose a crop before you upload: free, square, wide or 4:3. Your browser uploads the crop you accept. Choose "Keep the original" for an animated picture or an SVG.
Fill in the alt text. It is what people using a screen reader hear, and what shows if the image ever fails to load. A caption is optional and appears under the picture.
05
Add a video
The video button next to it takes a YouTube or Vimeo link, or a video file to upload.
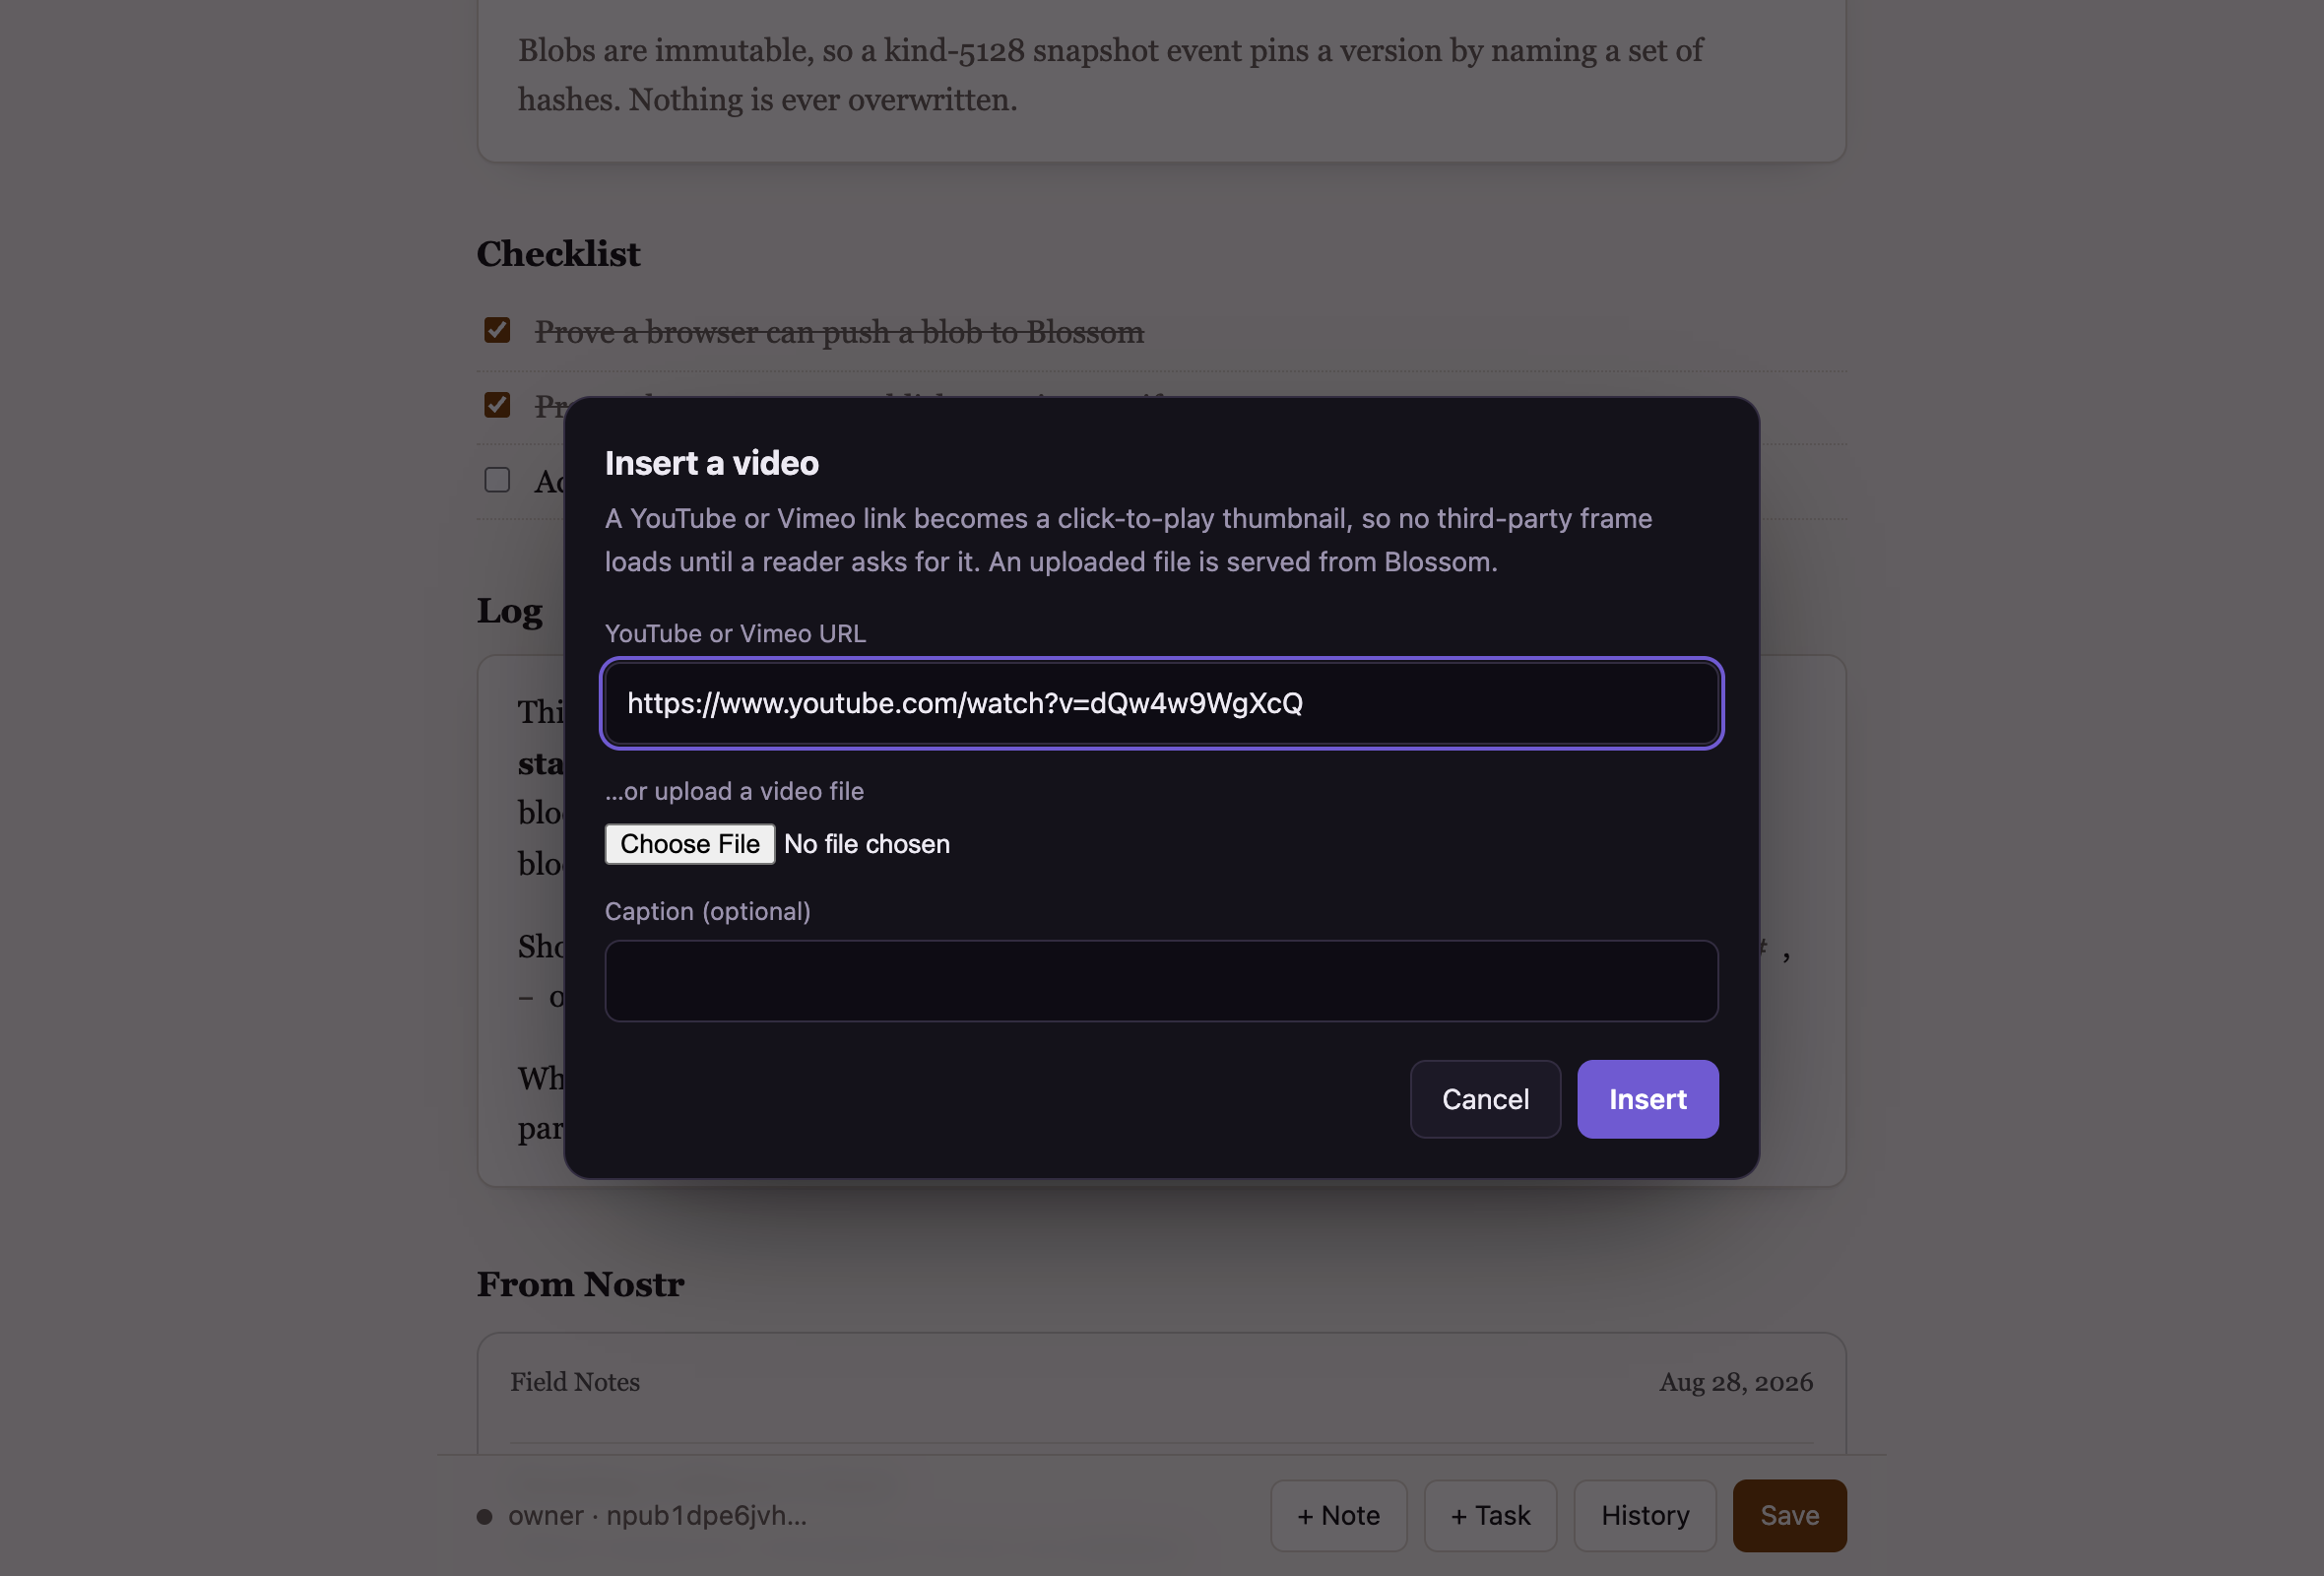
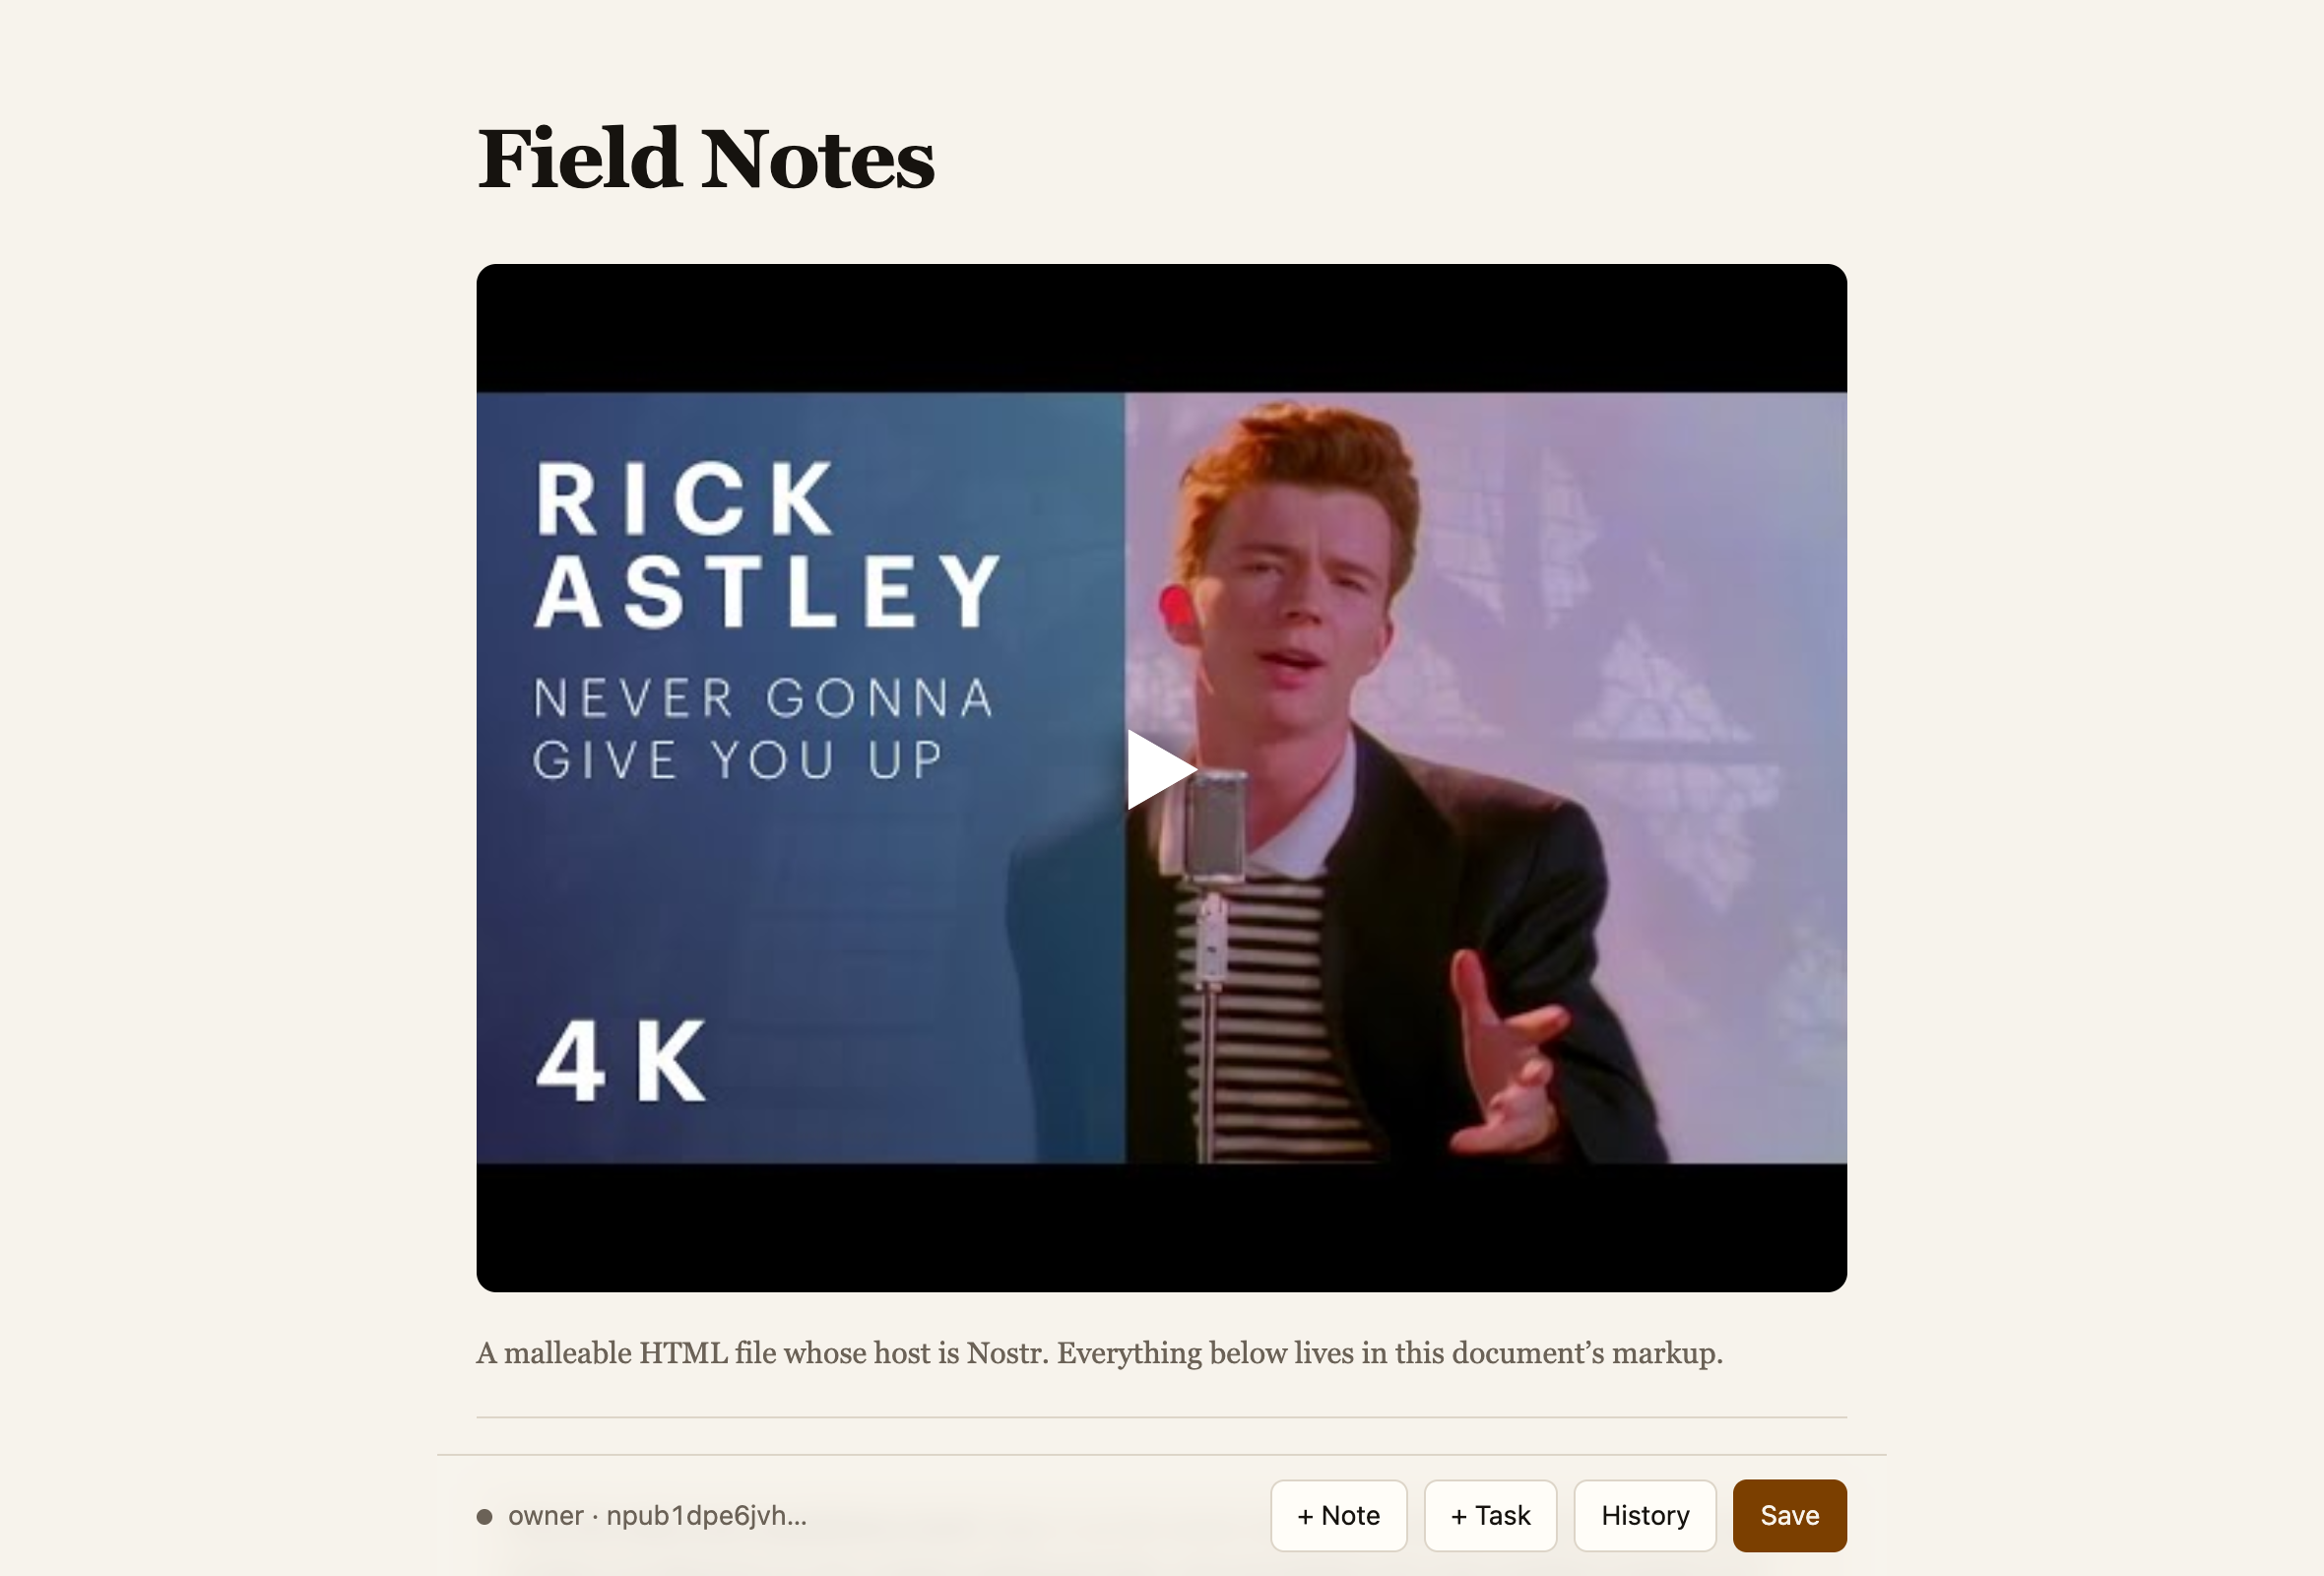
The player only loads if someone presses play. Until then your readers are not being tracked by YouTube, and the thumbnail still works as a link even for people browsing with JavaScript turned off.
06
Show your Nostr posts
The lightning button puts a feed of Nostr posts into the page. Choose whether you want short notes, long-form articles or picture posts, and whose.
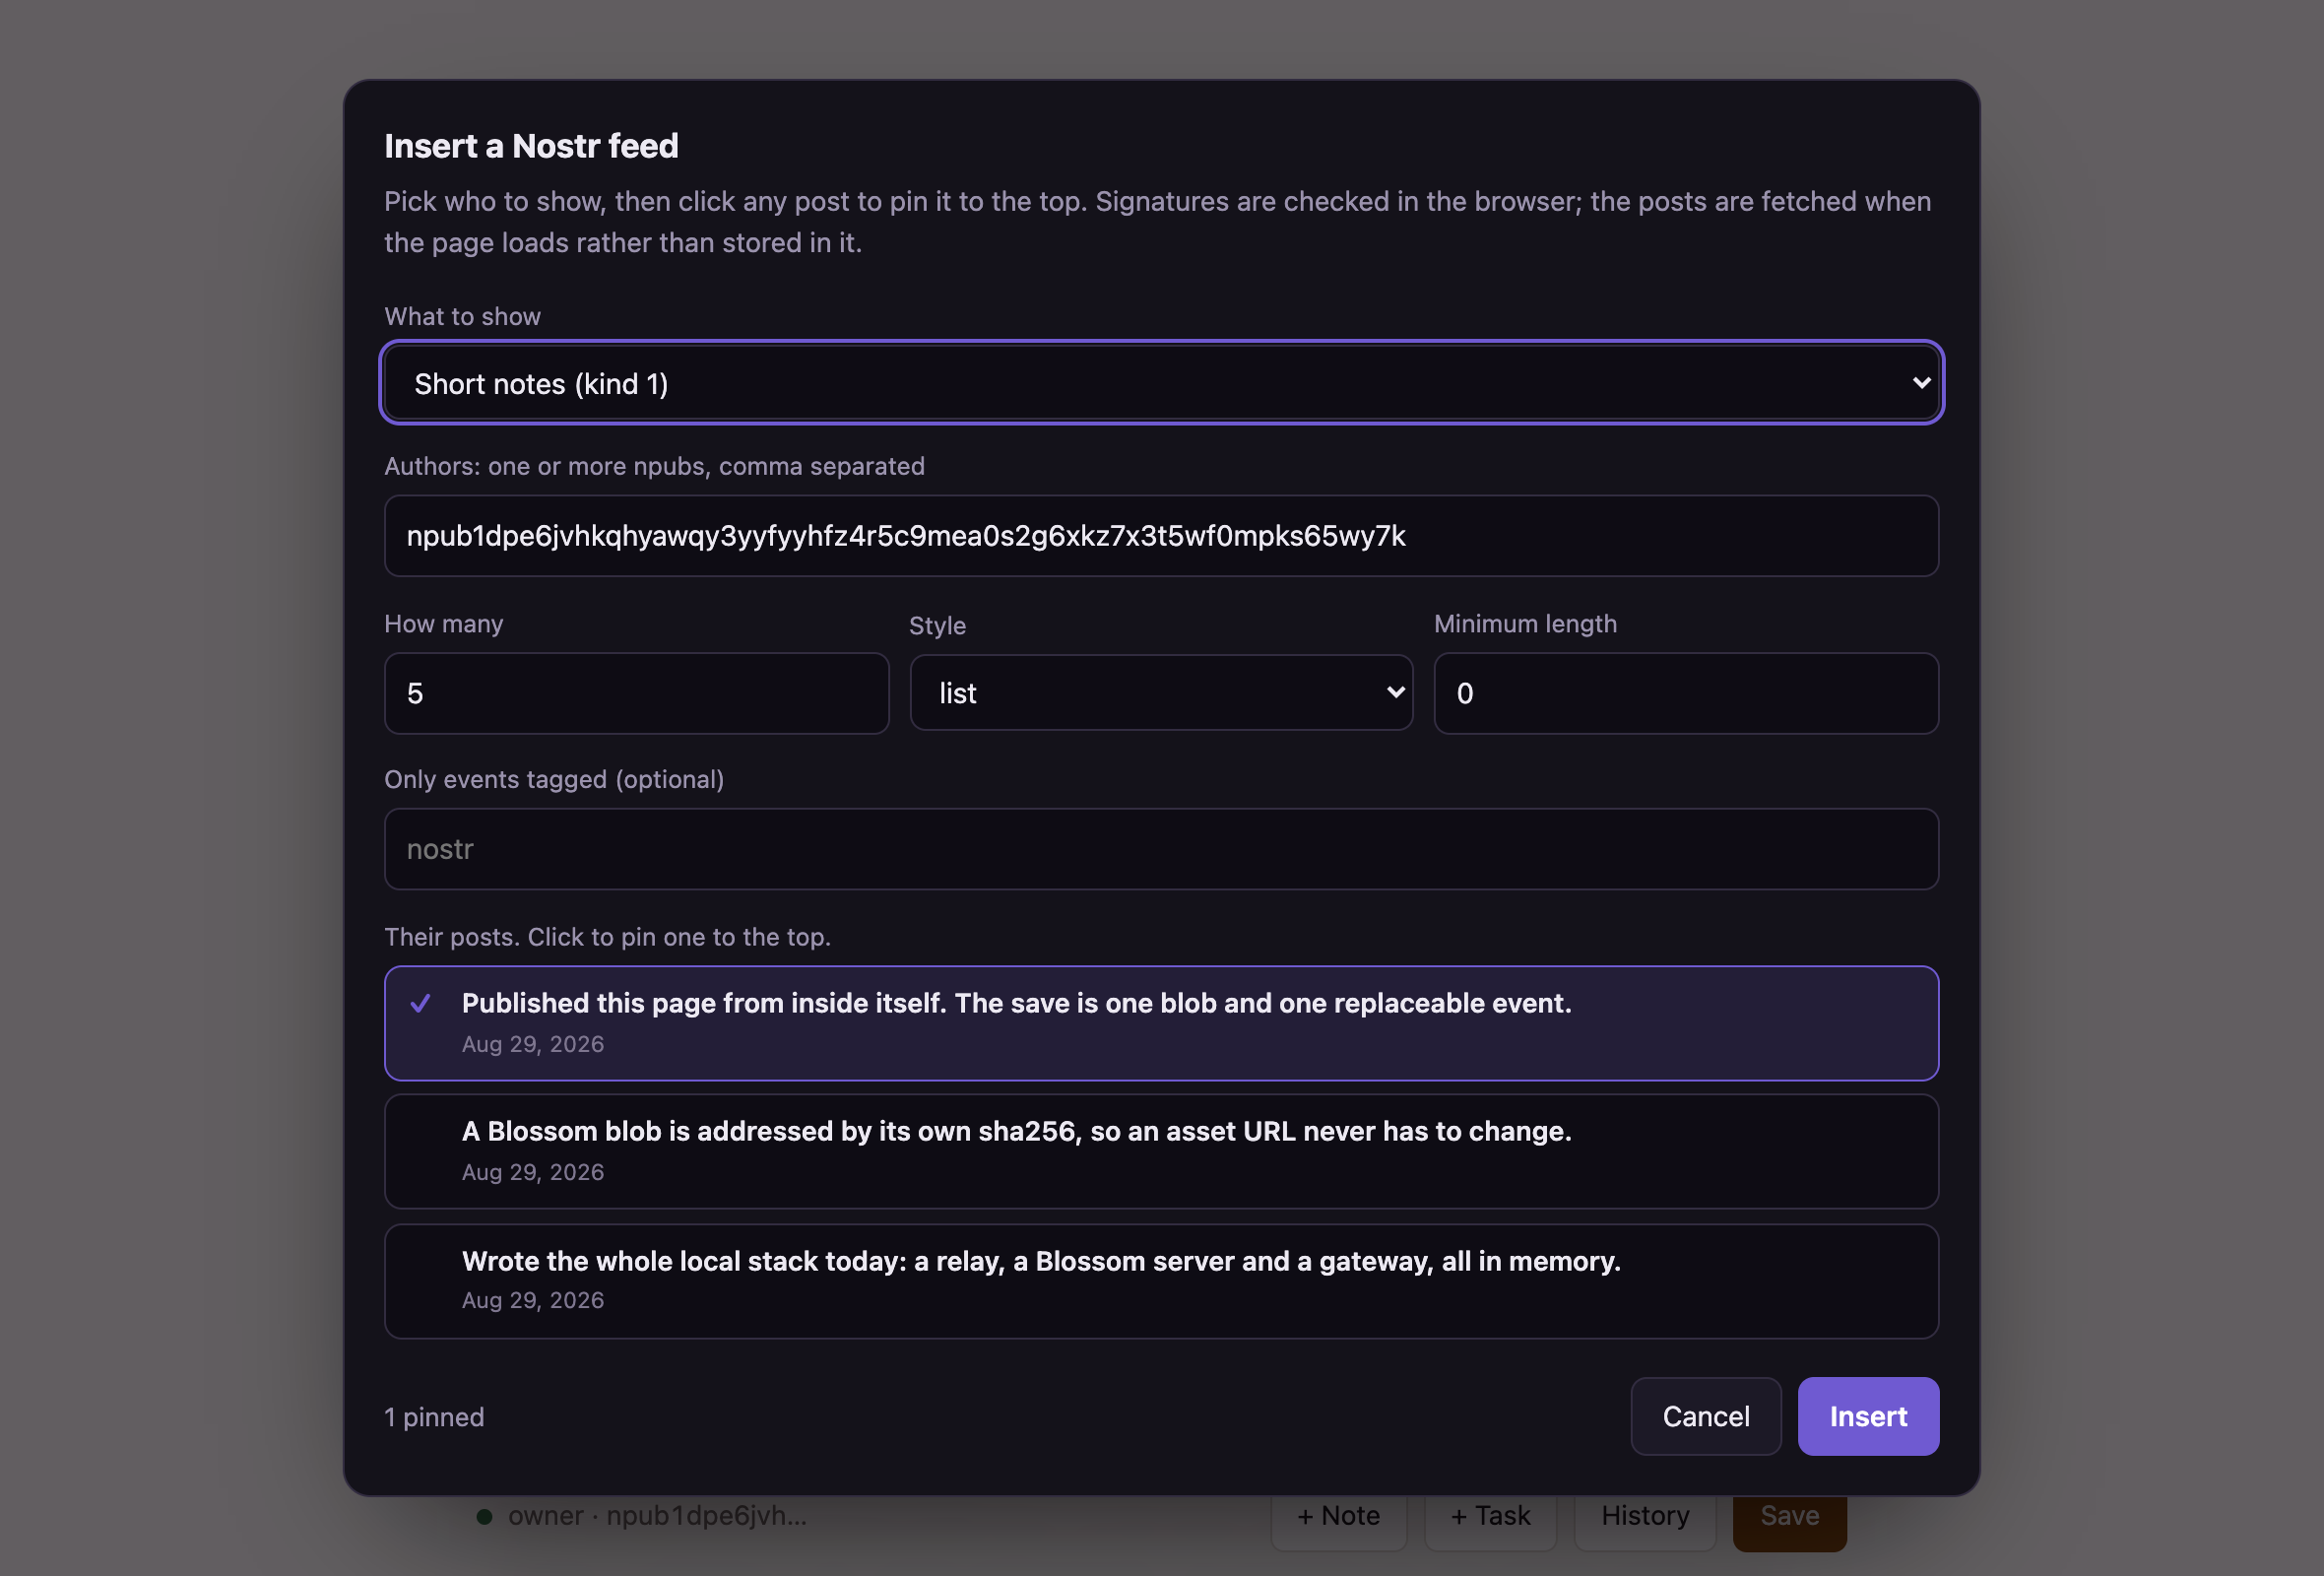
You can name more than one npub, so a page can show a whole group. The rest of the controls are how many posts to show, whether they sit in a list or a grid, a minimum length to filter out one-liners, and a tag to narrow it down to one topic.
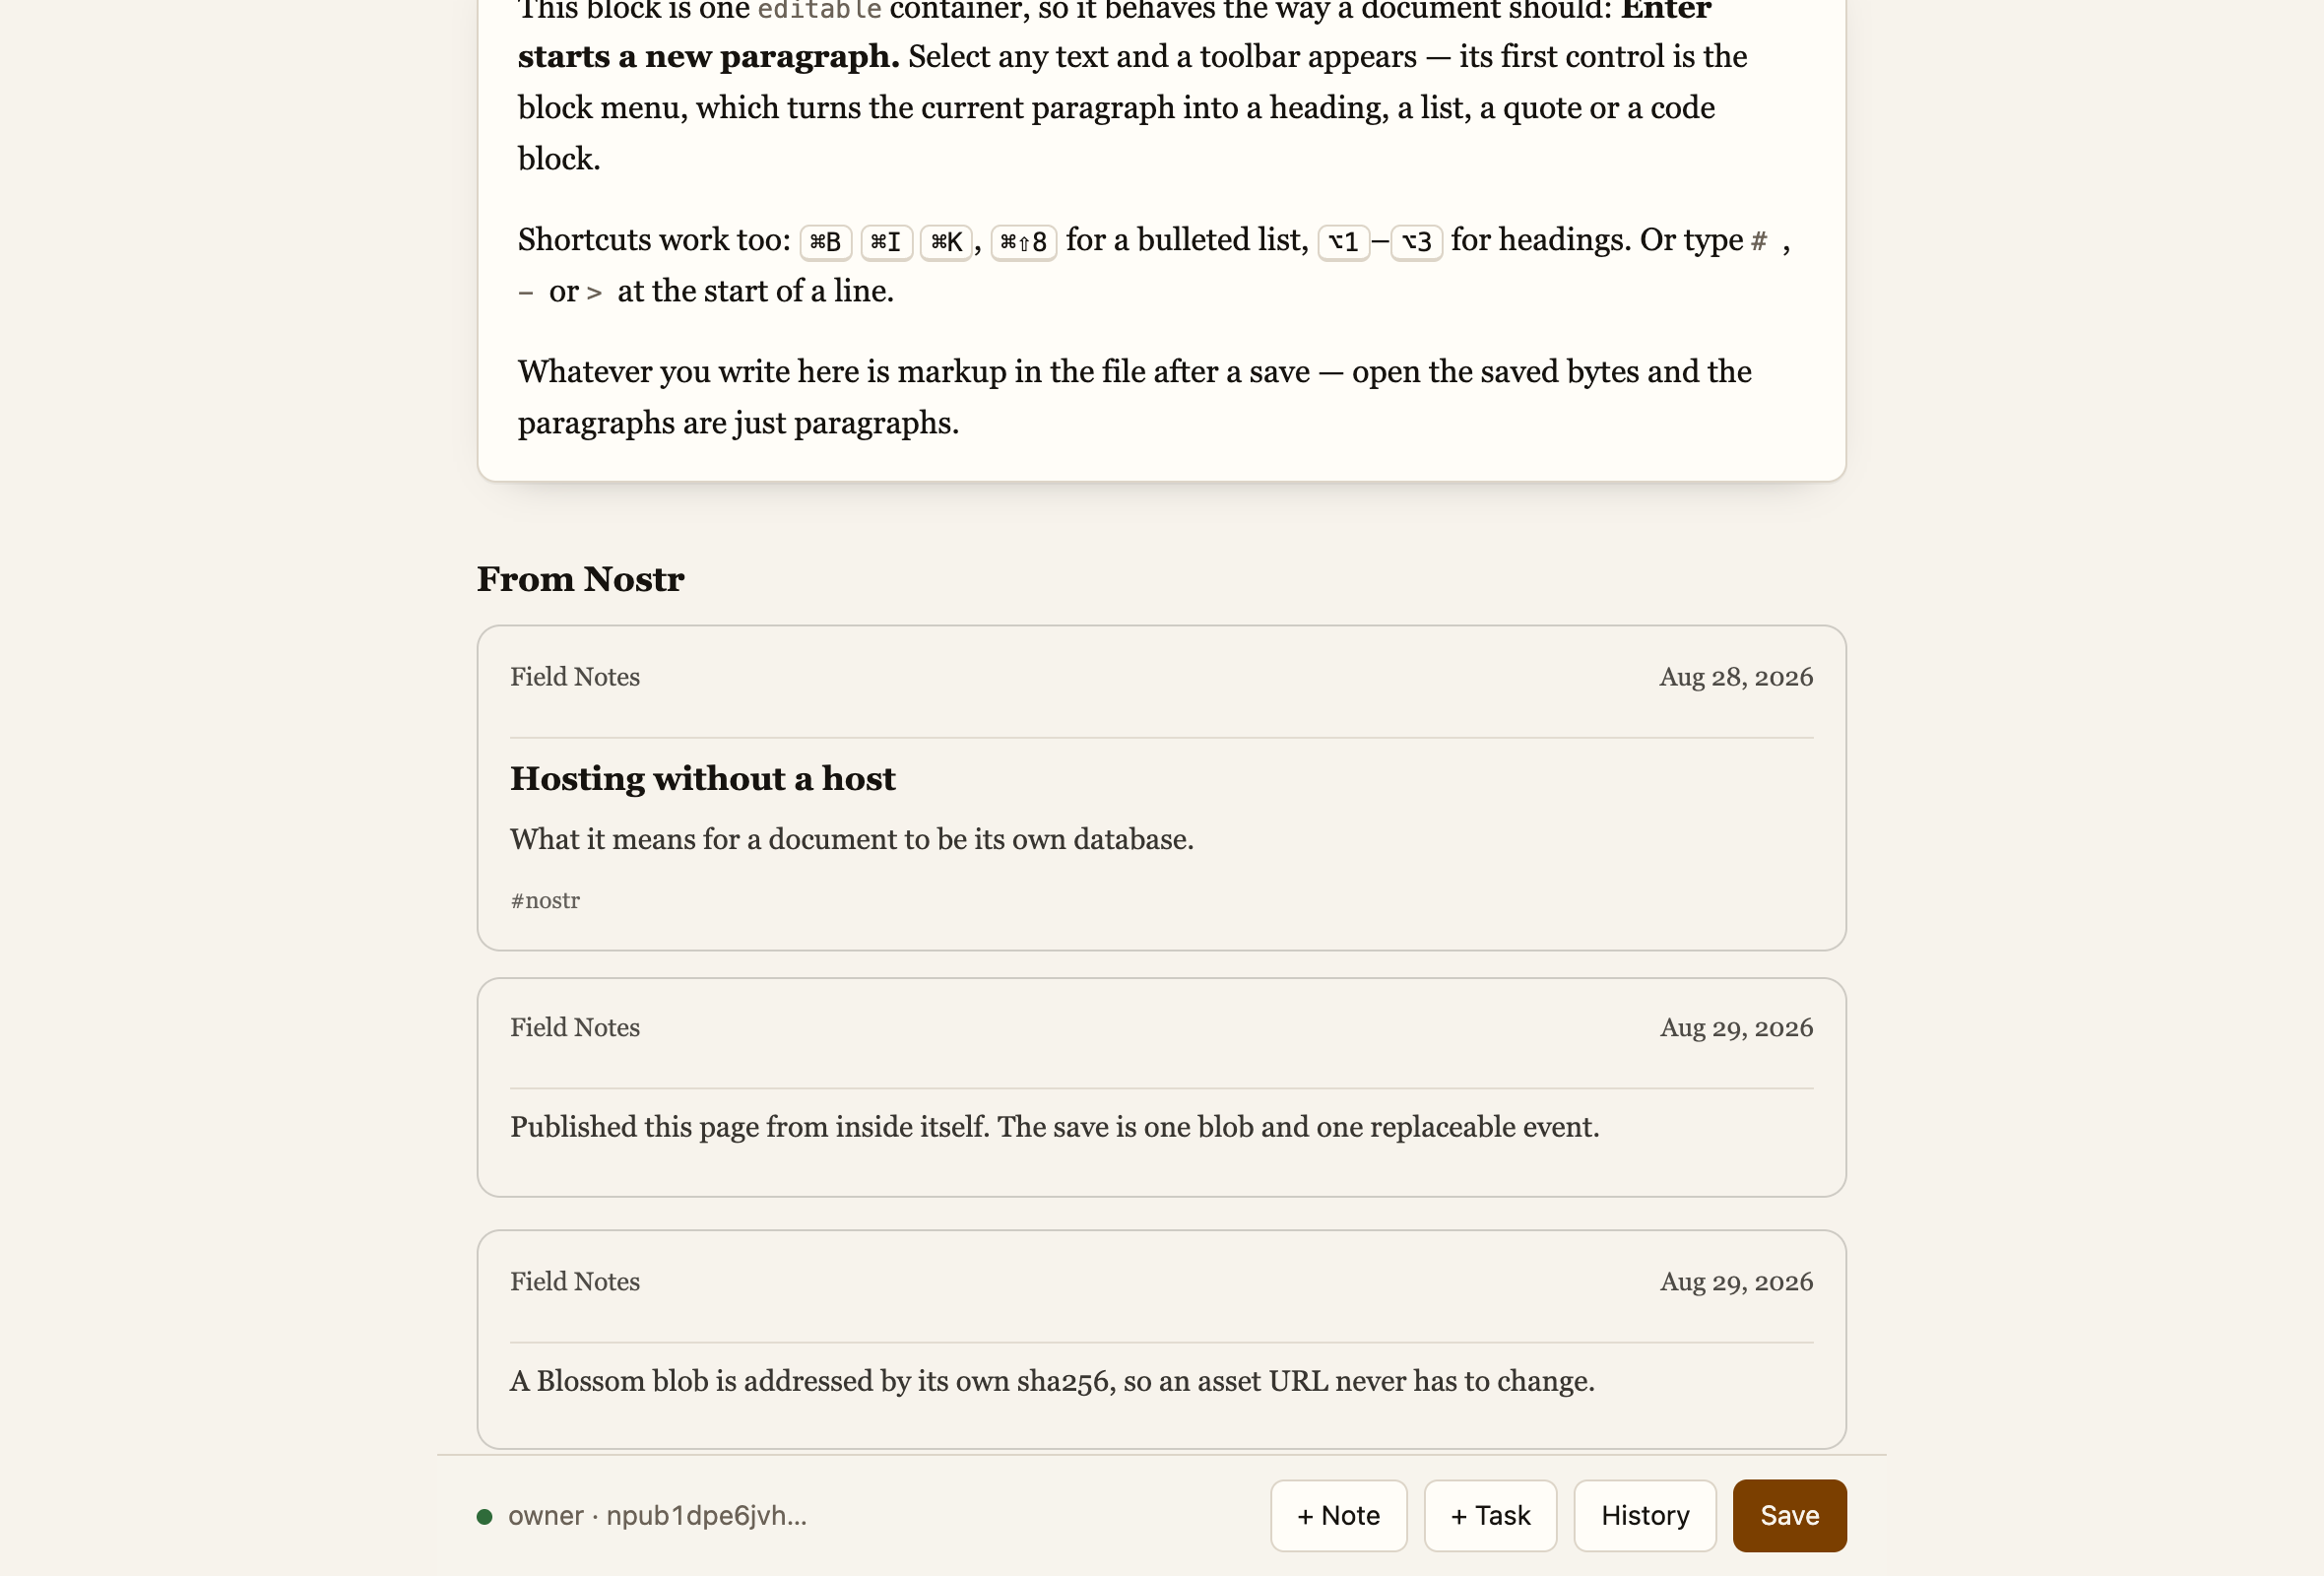
Post something new later and it turns up here on its own. You do not have to touch the page again.
07
Write a post
If the page can show your posts, it can write them too. Everything you have published is listed, and you can edit any article from here.
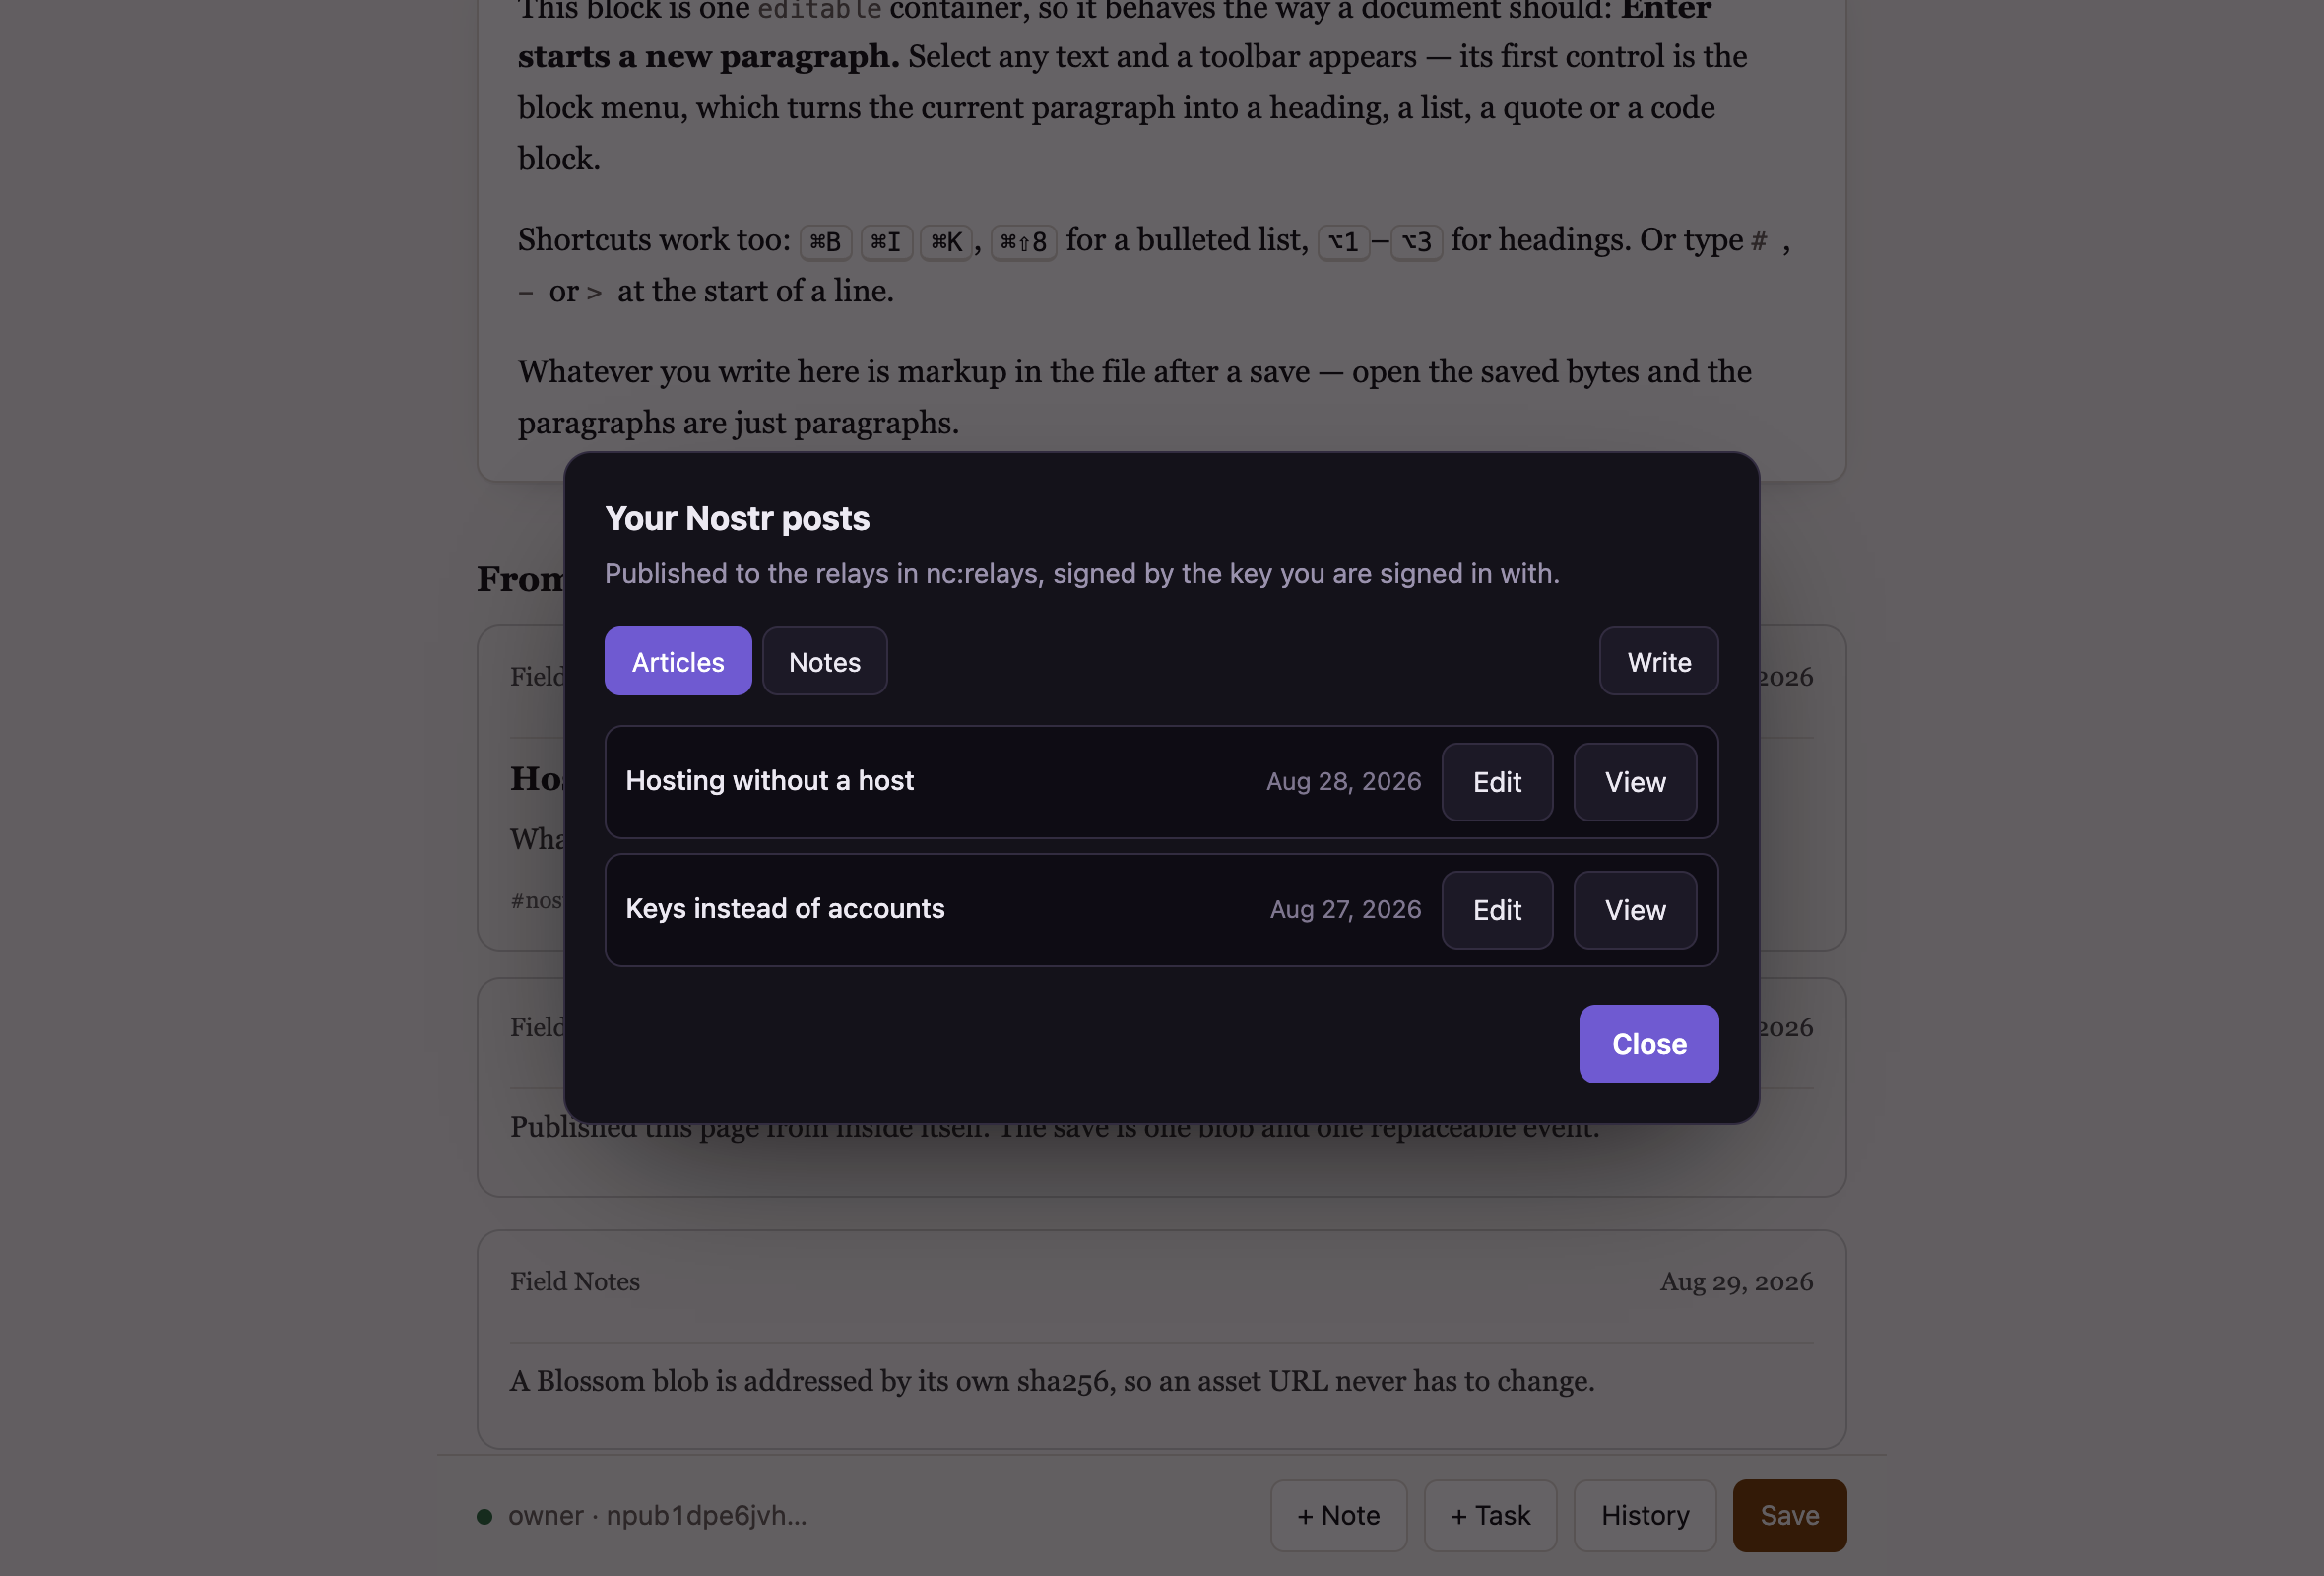
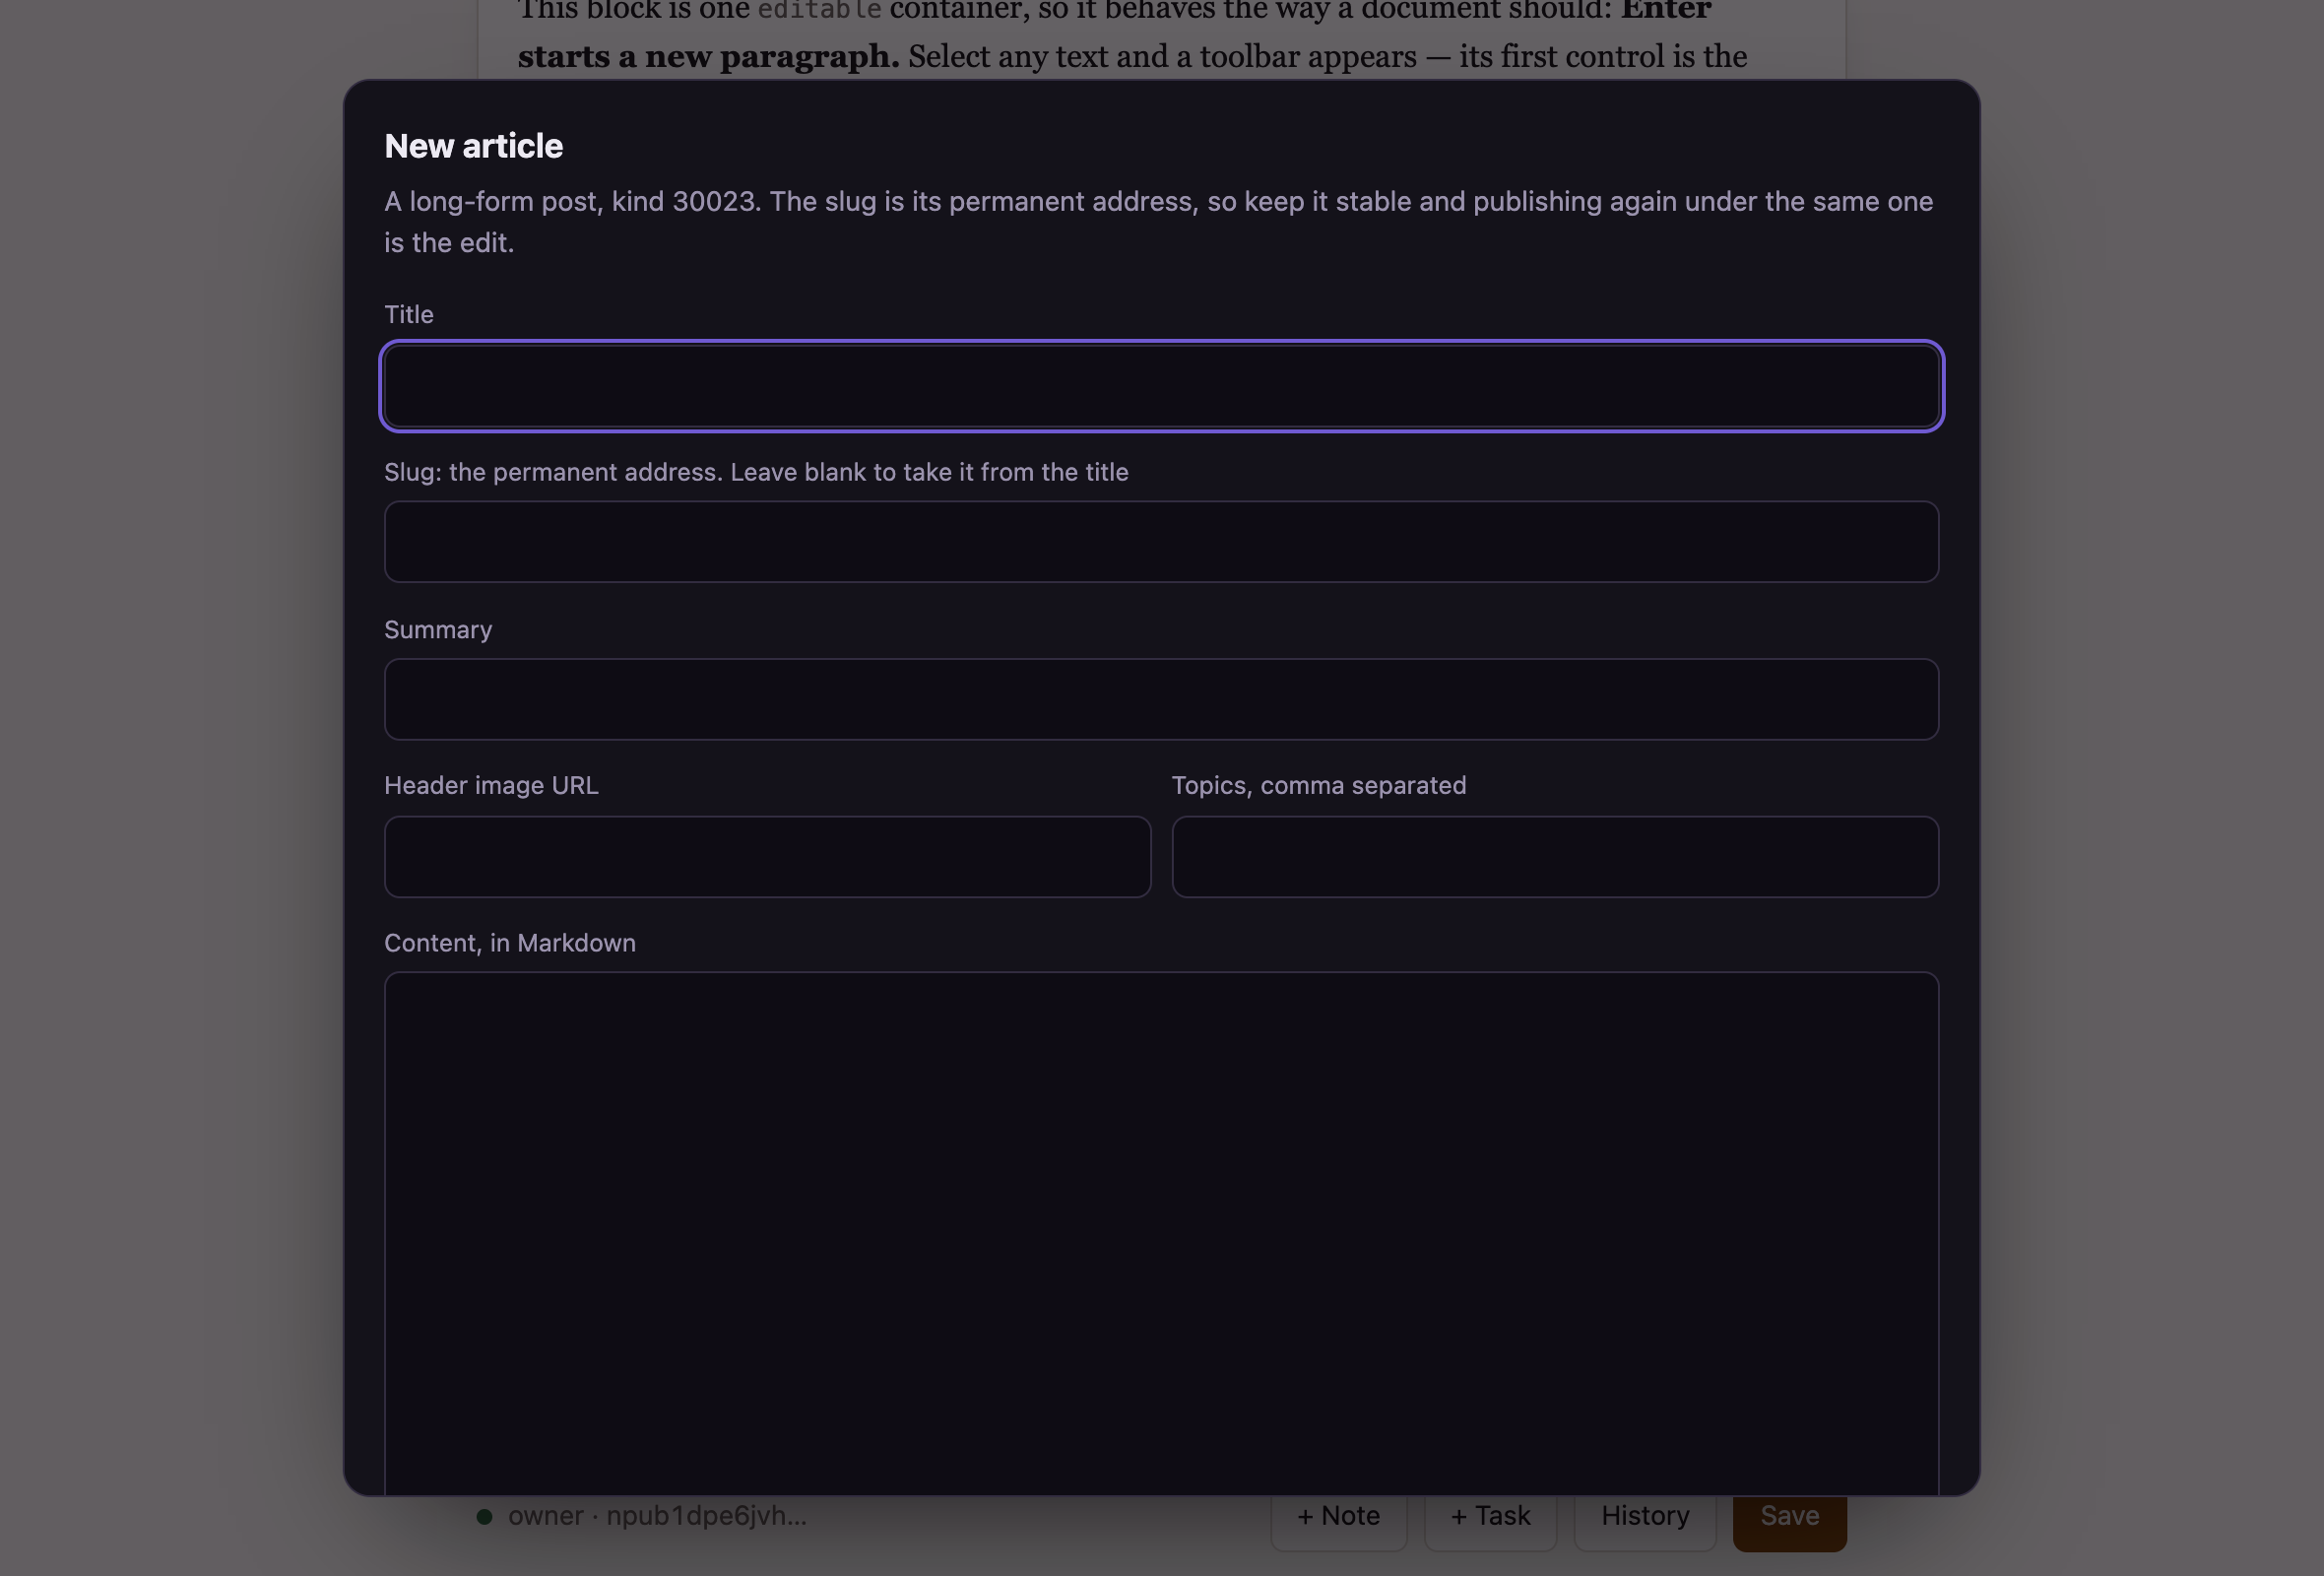
The address is the part worth getting right. It is how your article is linked, and publishing again under the same address is how you edit it. Fix a typo, publish, and every Nostr app shows the corrected version at the same link. The original date stays put.
Short notes work the same way with one difference: they cannot be edited afterwards. The panel says so before you publish one.
Posts and pages are separate. Writing a note does not change your page, and saving your page does not touch your posts.
08
Save your changes
Press Save, or ⌘S. The dot in the corner turns green when it is done, and anyone opening your page from that moment sees the new version.
Saving takes about a second. If nothing has changed since the last save, it says so and does nothing, so pressing it twice is harmless.
Anyone still reading the old version gets told a newer one exists, and their page updates itself. Nobody has to know what a hard refresh is.
If a save fails, it says why rather than failing quietly. The usual cause is a signer app that has gone to sleep: wake it, approve, and press Save again.
09
Go back to an earlier version
Every save is kept. History lists them all.
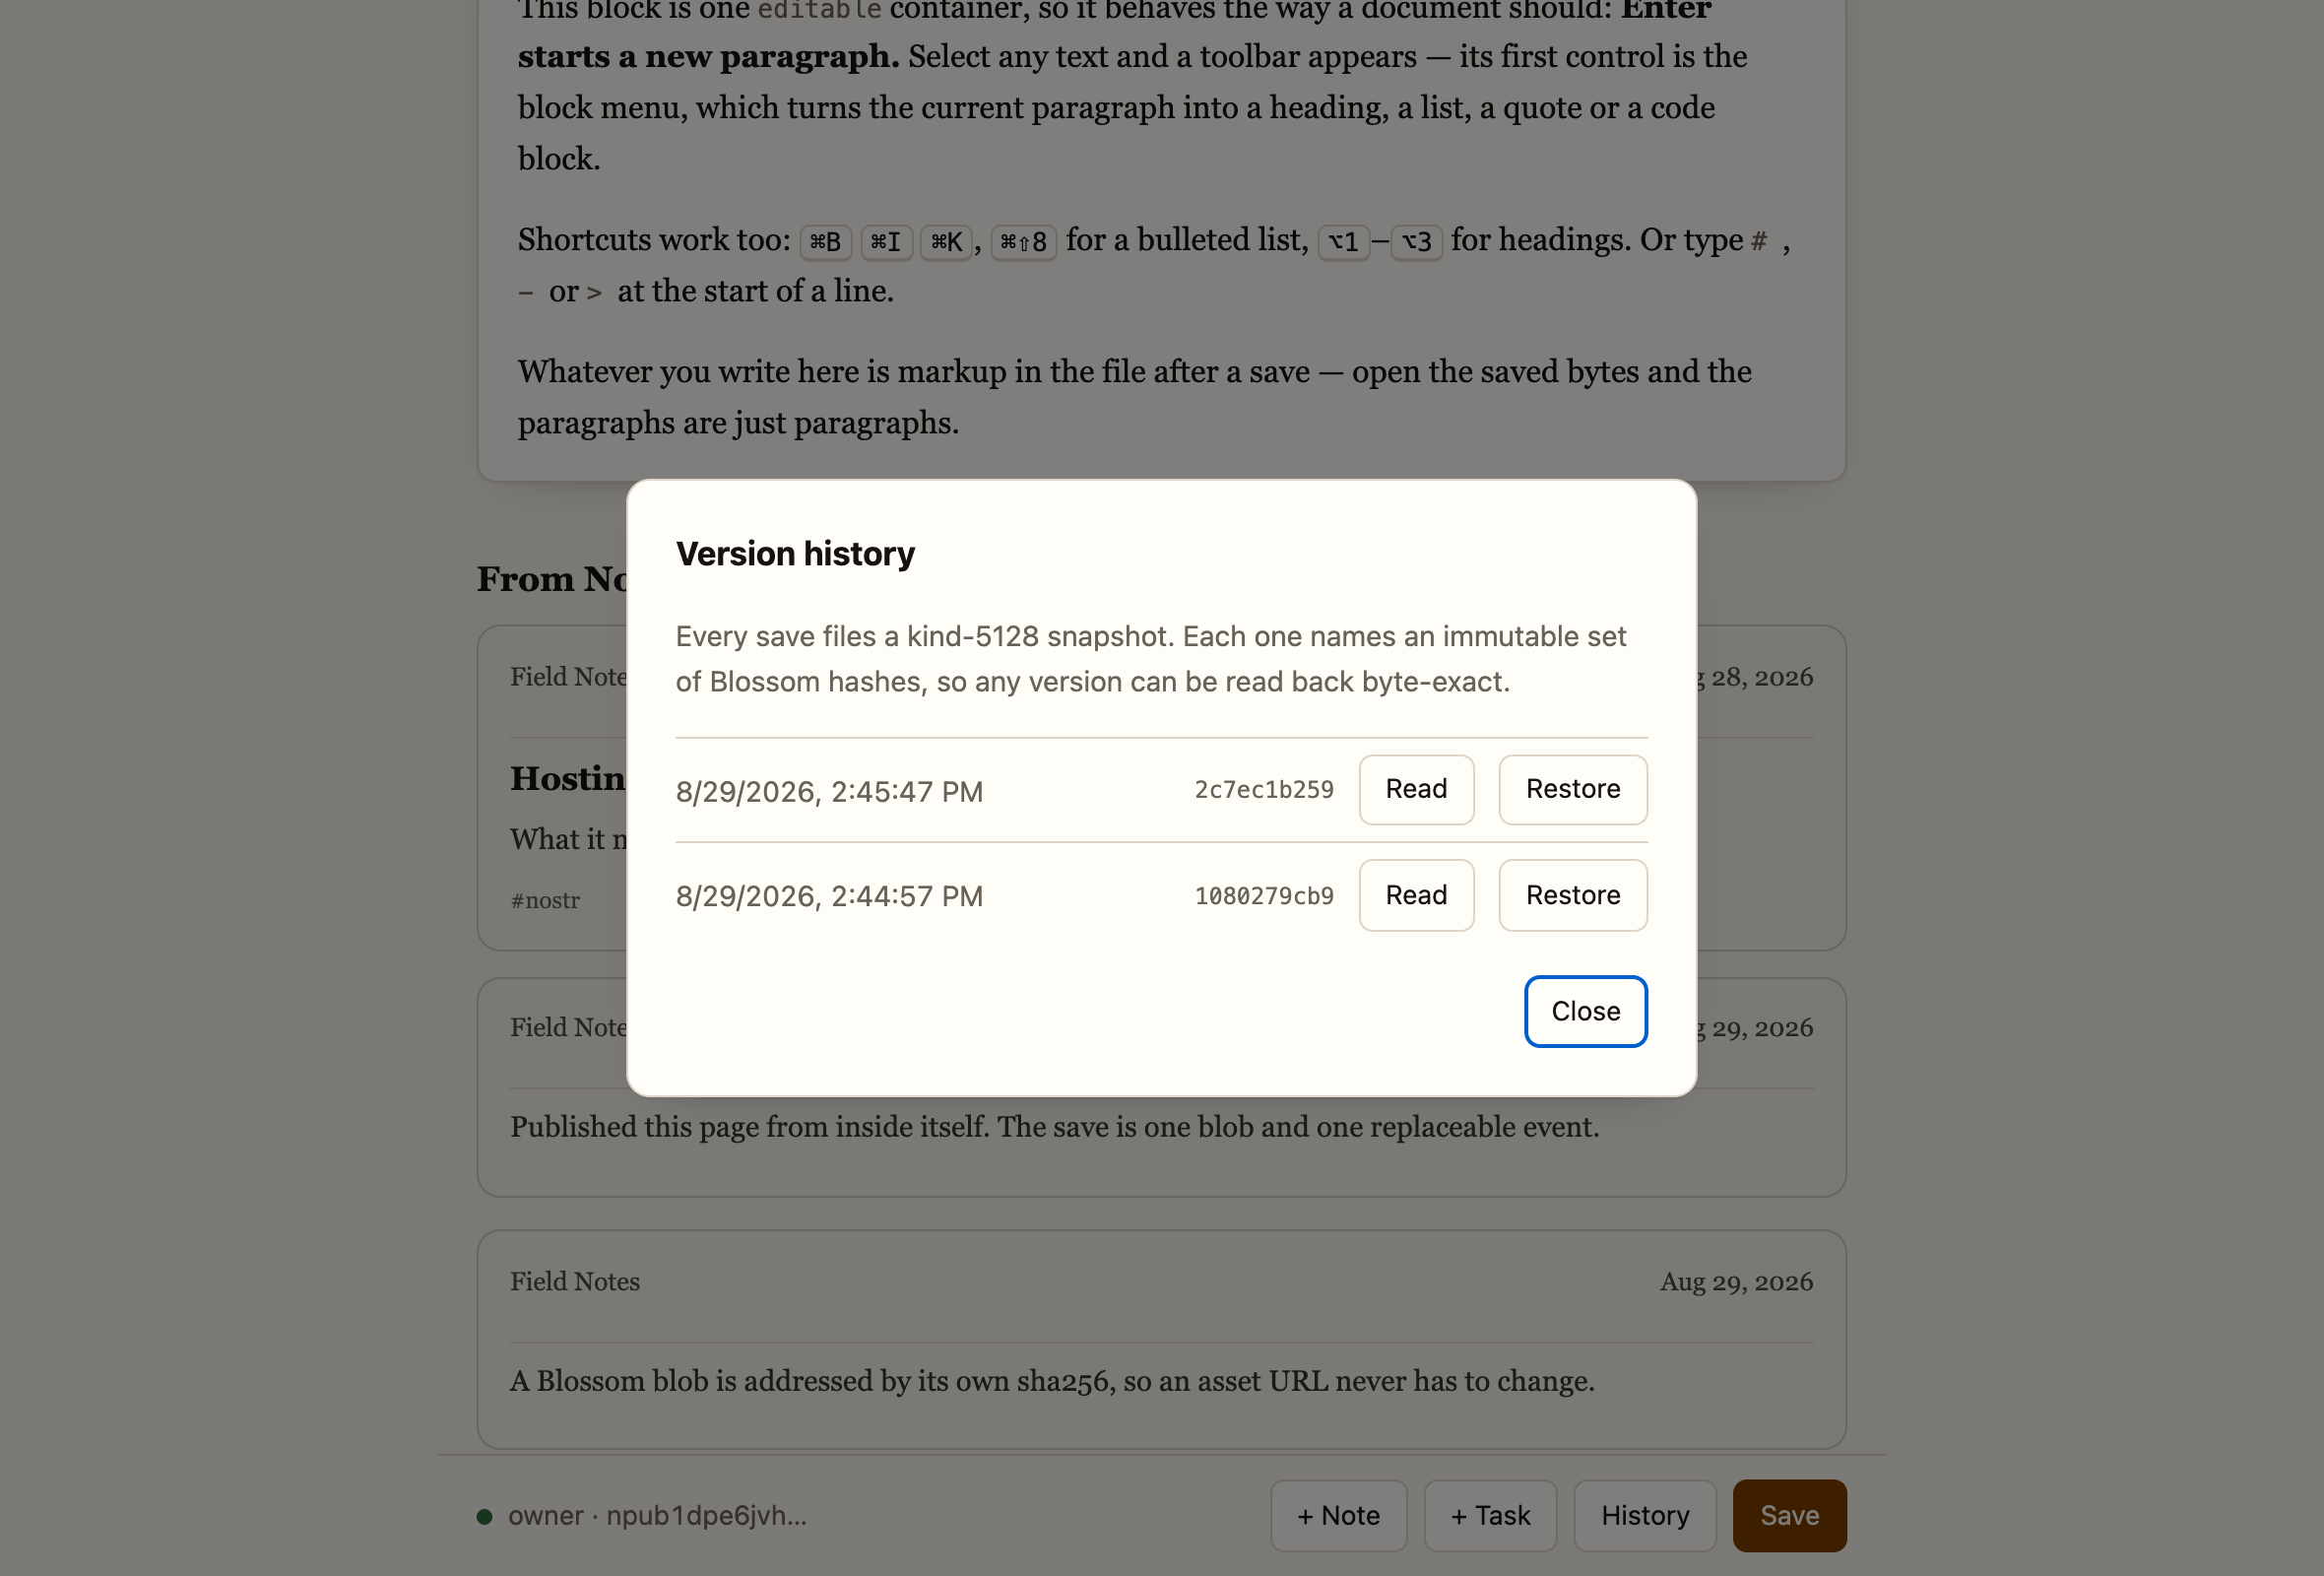
Restoring an old version does not throw the current one away. It becomes just another entry in the list, so you can change your mind again.